

Build it right, fly it well
Your Echo Drone arrives mostly assembled - your job is to fit the propellers and guards correctly, install the battery, and power up. Getting the propellers in the right spots is the single most important step: a mixed-up propeller means a drone that won’t fly.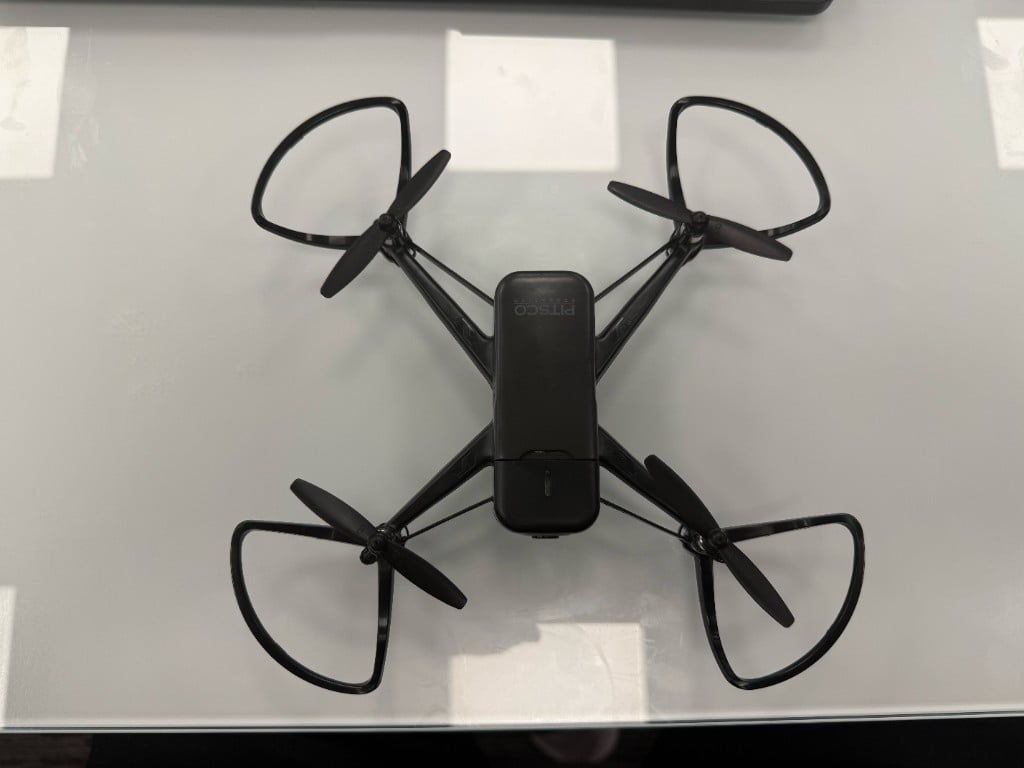
Your Echo Drone (top) and controller
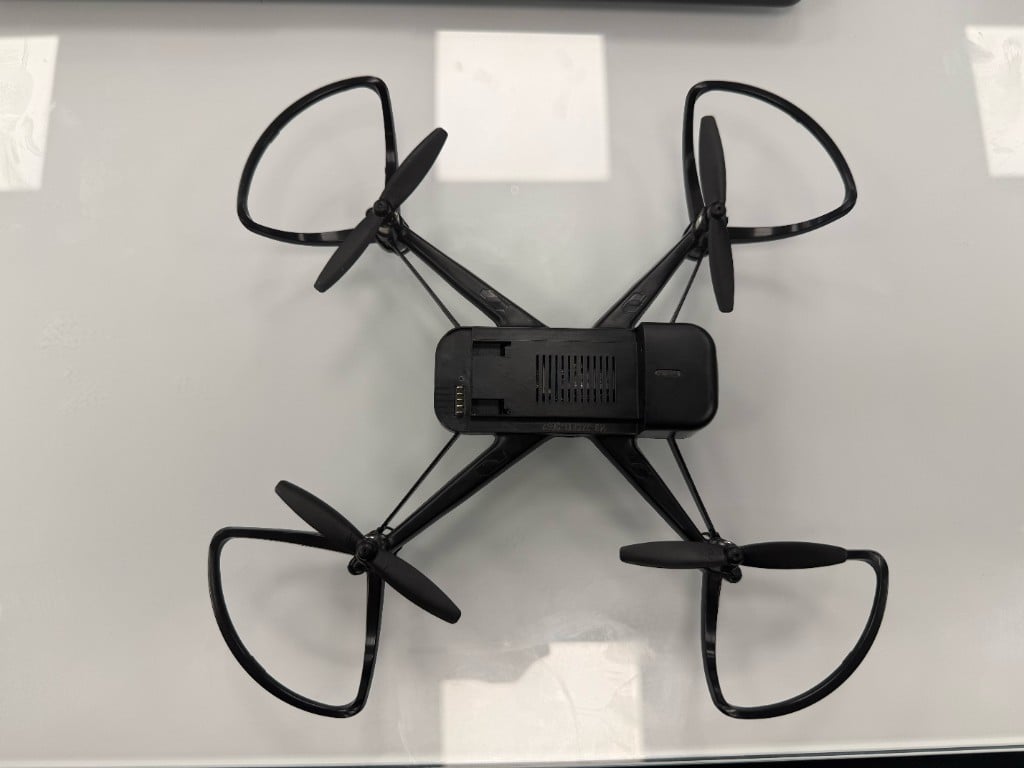
The underside, showing the clip-in battery tray and power switch
Check your kit
Lay everything out first - it’s easier to spot a missing piece now than mid-build.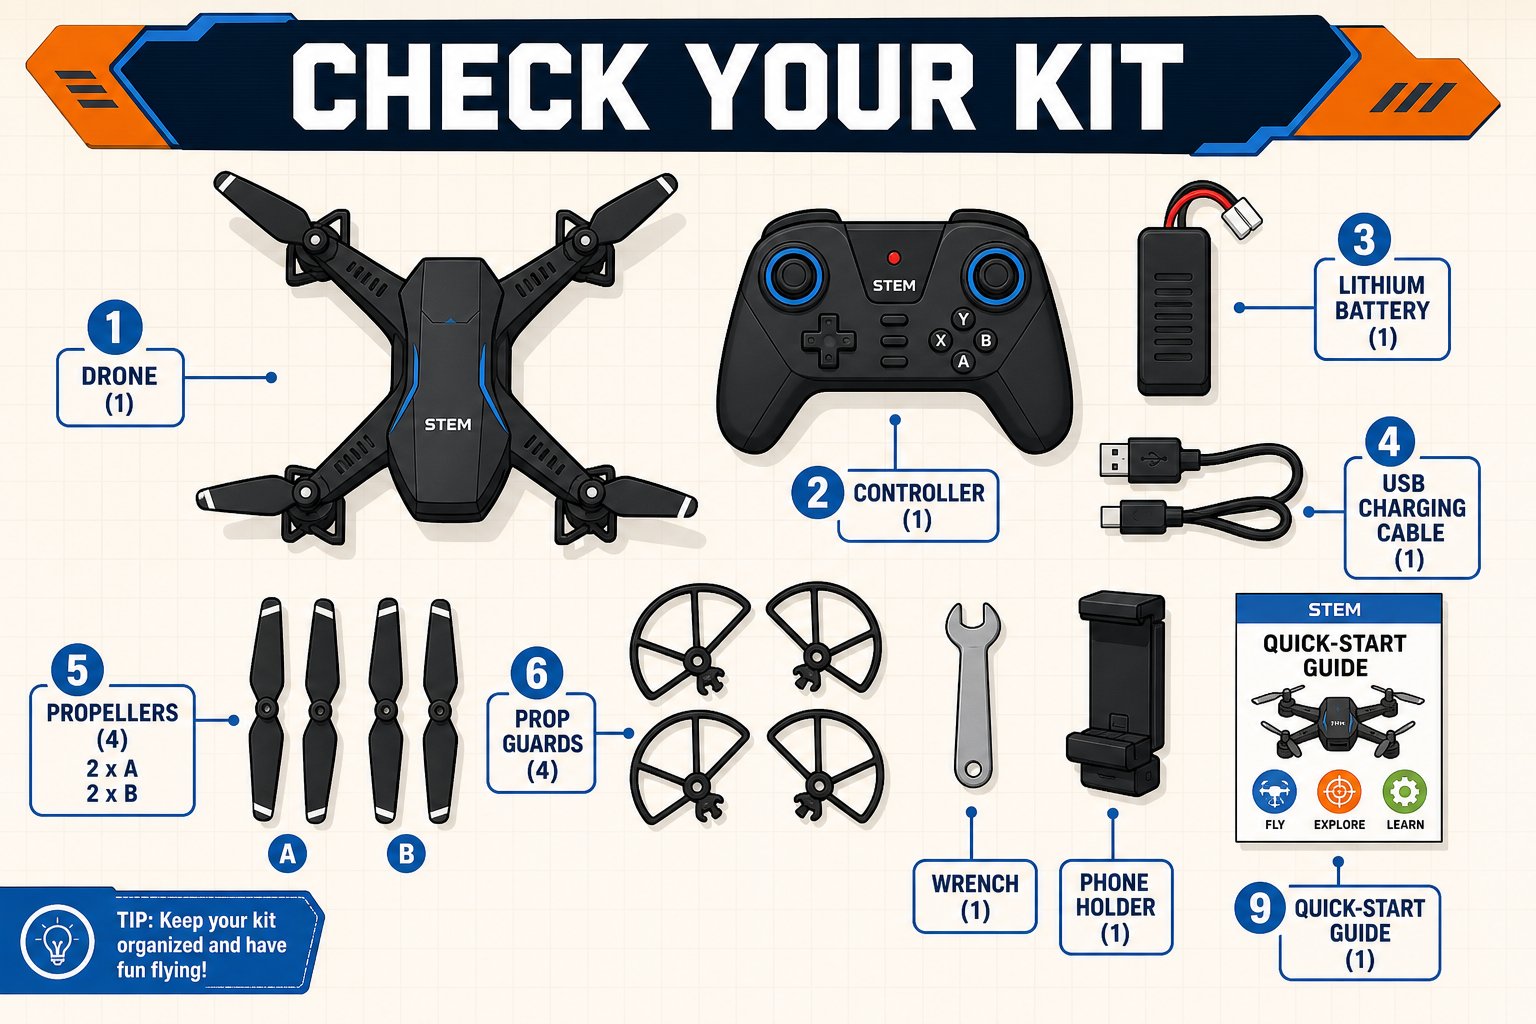
Lay out every part and check it against the list before you start
Open your box and confirm you have every part. Some pieces may be tucked under the drone tray.
Propellers: A and B matter
Each propeller has a small A or B printed on its blade. They spin in opposite directions and are not interchangeable. Putting one in the wrong place makes the drone flip or refuse to take off.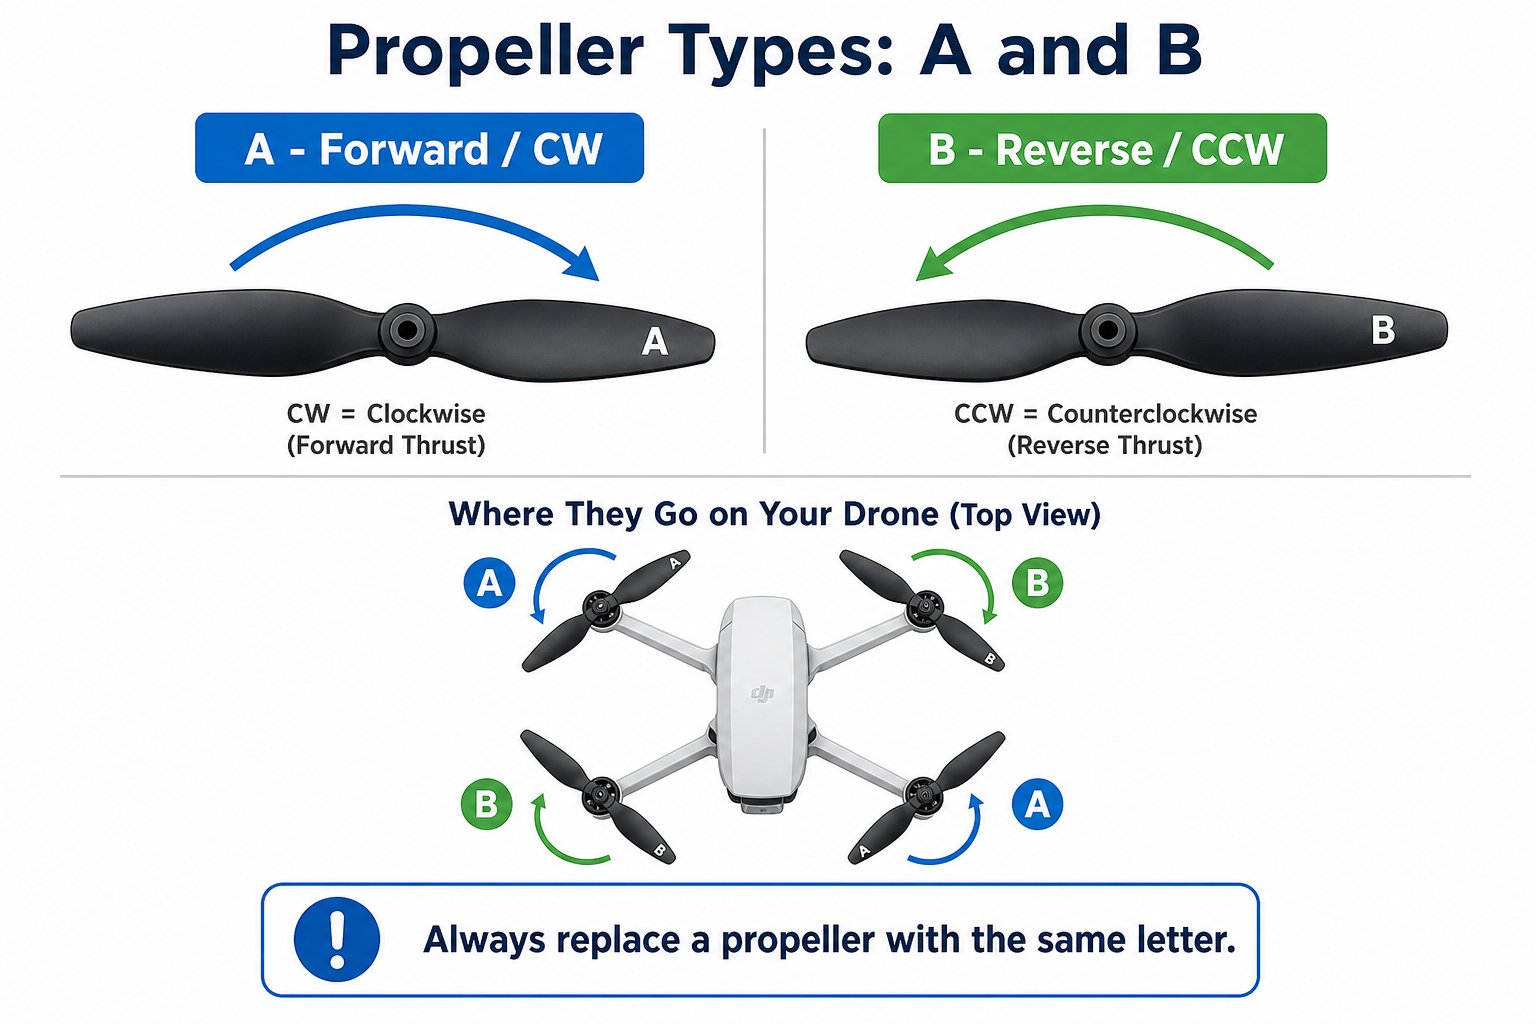
Match each propeller's letter to the correct arm
The placement map
Look down at your drone from above. The A propellers go on one diagonal pair, and the B propellers on the other - always alternating around the drone.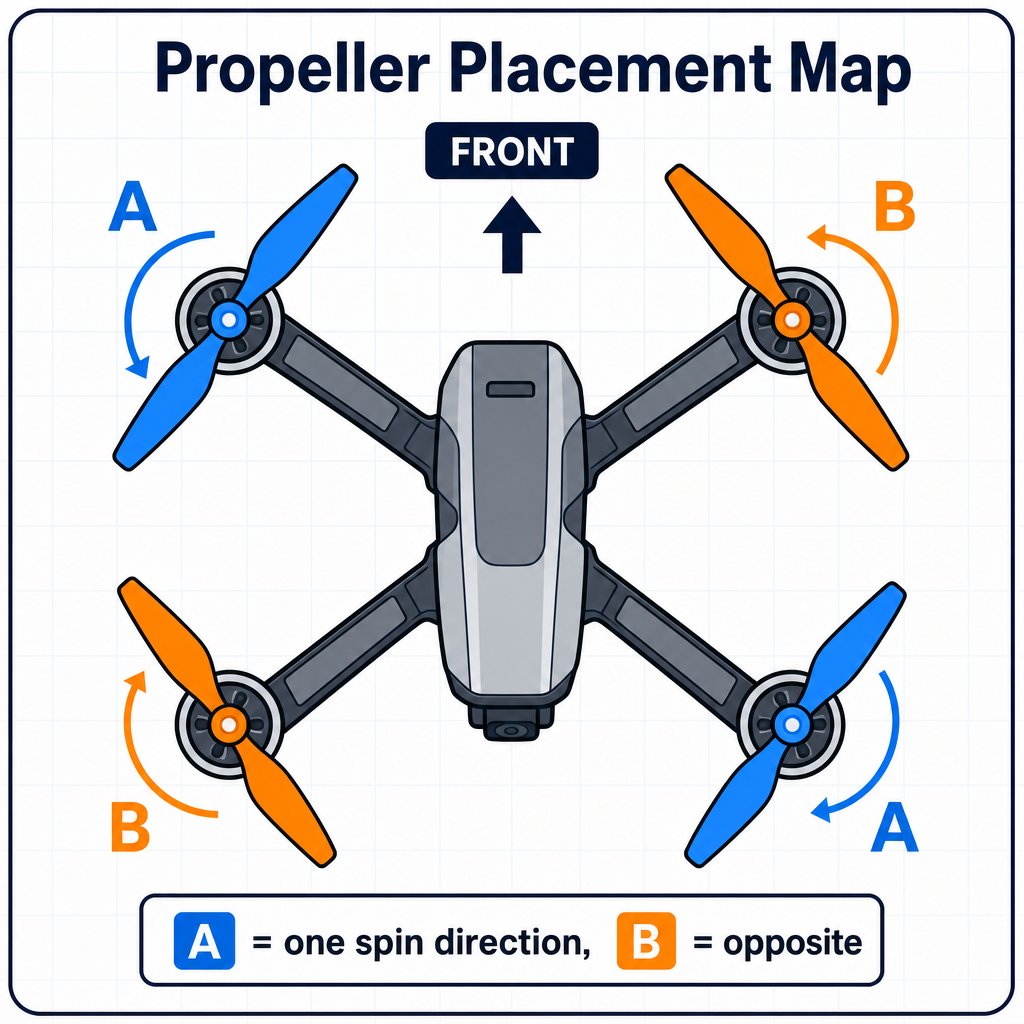
A and B propellers alternate around the drone - never two of the same next to each other
Build steps
Attach the prop guards
Clip each circular prop guard onto its arm around the motor. Press until it clicks into place. These protect the blades, your fingers, and your walls.
Install the propellers
Match each propeller’s A or B to the correct motor position (use the placement map above). Press each one firmly onto its motor shaft. Double-check every letter before flying.
Insert the drone battery
Slide the charged lithium battery into the drone’s body until it clicks. It only fits one way - don’t force it.
Power the controller
Put two fresh AAA batteries in the back of the controller.
Power on to check
Switch the drone’s power on and press and hold the controller’s On/Off button. You’ll pair them on Day 2 - for now just confirm both power up (lights come on).
Removing a propeller
If you ever need to swap a propeller, use the included wrench to grip and pull it straight off the motor shaft. When replacing, always use a new propeller with the same letter (A or B).Common build mistakes
Drone flips over on takeoff
Drone flips over on takeoff
Almost always an A/B propeller in the wrong position. Recheck against the placement map.
Propeller wobbles or flies off
Propeller wobbles or flies off
It wasn’t pressed all the way onto the motor shaft. Power off and press firmly until seated.
Battery won't go in
Battery won't go in
It only fits one way - don’t force it. Flip it and try again gently.
Nothing powers on
Nothing powers on
Check the drone battery is charged and clicked in, and that the controller has fresh AAA batteries.
All four propellers are installed in the correct A/B positions, the prop guards are clipped on, the battery is seated, and both the drone and controller power on.