

From a box of parts to a working machine
Welcome to the Advanced 3D Printing STEM Workshop. Over five days you will take a brand-new Flashforge Adventurer 5M printer out of the box, assemble it piece by piece, calibrate it, and use it to bring your own designs to life. This is a hands-on, build-it-yourself camp - by Friday you will own a machine you understand from the inside out.This is a fully virtual, facilitator-led camp. Each student receives a Flashforge Adventurer 5M 3D printer kit shipped to their home. You will assemble and keep your printer.
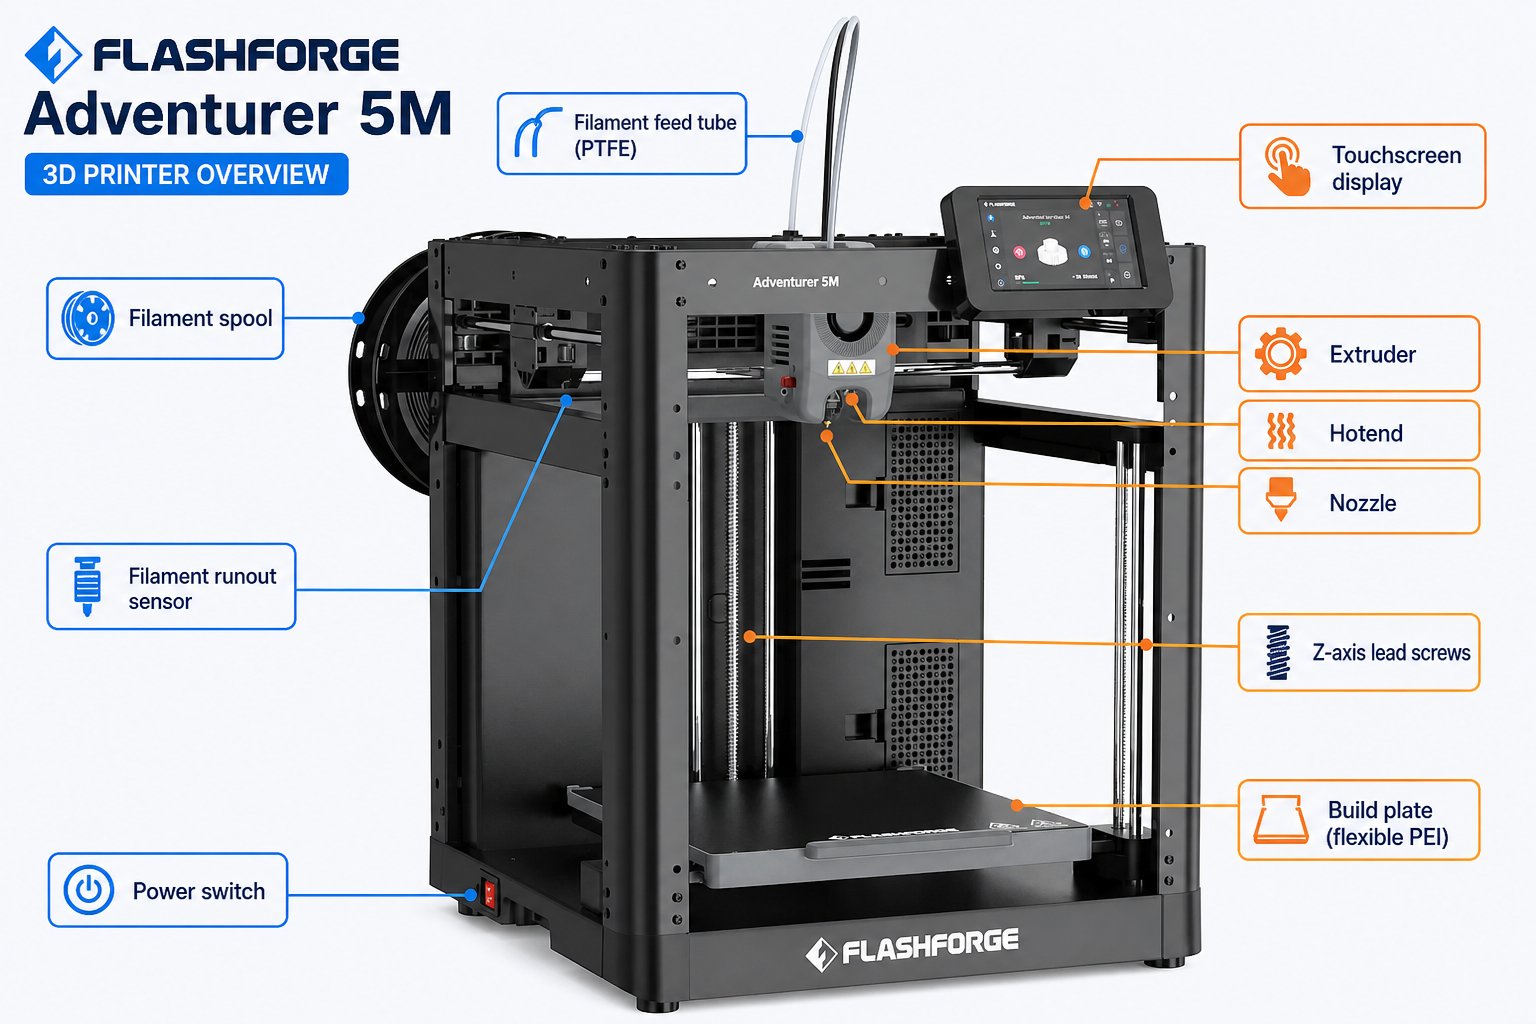
The FDM 3D printer you will build and master this week
What you will learn
By the end of this week you will be able to:- Explain how FDM 3D printing works, from filament to finished part
- Assemble a 3D printer from the box, including the LCD, filament path, base plate, spool holder, and power
- Calibrate and level the printer and run your first successful print
- Slice a 3D model into G-code using Orca-Flashforge and send it over Wi-Fi
- Choose the right filament (PLA, PETG, ABS, TPU, Nylon, PC) for any job
- Select nozzles and build surfaces based on material and goal
- Diagnose and fix the most common print failures
- Maintain and upgrade your printer for the long haul
- Design, print, and present a capstone project in the camp contest
Your week at a glance
1
Day 1: Foundations
The history of 3D printing, how FDM works, the anatomy of your printer, and the kickoff of your capstone contest project.
2
Day 2: Unboxing and assembly
Unbox your Adventurer 5M and build it step by step - accessories, LCD, filament tube, base plate, spool holder, and power supply.
3
Day 3: First print, calibration, and software
Load filament, run calibration, install the slicer, learn nozzles, and send your first print.
4
Day 4: Filaments and materials science
Compare filament types, learn drying and storage, choose build surfaces, and explore colors and additives.
5
Day 5: Troubleshooting, maintenance, and capstone
Fix common print problems, maintain and upgrade your machine, then present your capstone project for judging.
The capstone contest
Throughout the week you will plan, print, and present a project of your own in the 3D Printing Capstone Contest. You pick your project on Day 1, print it across Days 2-4, and present it on Day 5. Winners choose a spool of premium tri-color silk filament.Choose and plan
Pick a model to design or download, get it approved, and present your plan to the class on Day 1.
Design and print
Slice, print, and (optionally) post-process your project across the middle of the week.
Present and win
Show your work on Day 5. You are judged on effort and problem-solving, not just perfection.
Camp format
- Schedule: Monday through Friday, 9:30 AM to 12:30 PM daily
- Delivery: Fully virtual with live facilitator-led instruction
- Duration: 3 hours per day, 5 days
- Hardware: Flashforge Adventurer 5M printer kit (shipped to each student)
Your printer at a glance
The Flashforge Adventurer 5M is a fast, beginner-friendly FDM printer with automatic calibration and Wi-Fi printing.Before you start
Confirm your Flashforge Adventurer 5M kit has arrived and you have a clear, flat workspace and a pair of scissors ready for Day 2.