

Where your designs begin
To print something you first have to design it. Tinkercad is a free, browser-based CAD (computer-aided design) tool made by Autodesk. It is powerful enough to build real models but simple enough to learn in a day - perfect for your first designs and your capstone project.
The Tinkercad 3D design workspace
Create your account
Visit Tinkercad
Go to tinkercad.com and click Sign Up at the top right.
Create a personal account
Choose Create a personal account, then Sign up with email.
Enter your details
Enter your birthday, your email, and a password, then click Done. Confirm your email if asked.
Open a new design
From your dashboard, click Create → 3D Design. You now have a blank workplane.
Students under 13 may need a parent or teacher to set up access. Your instructor can provide a class code if your camp uses one.
The Tinkercad workspace
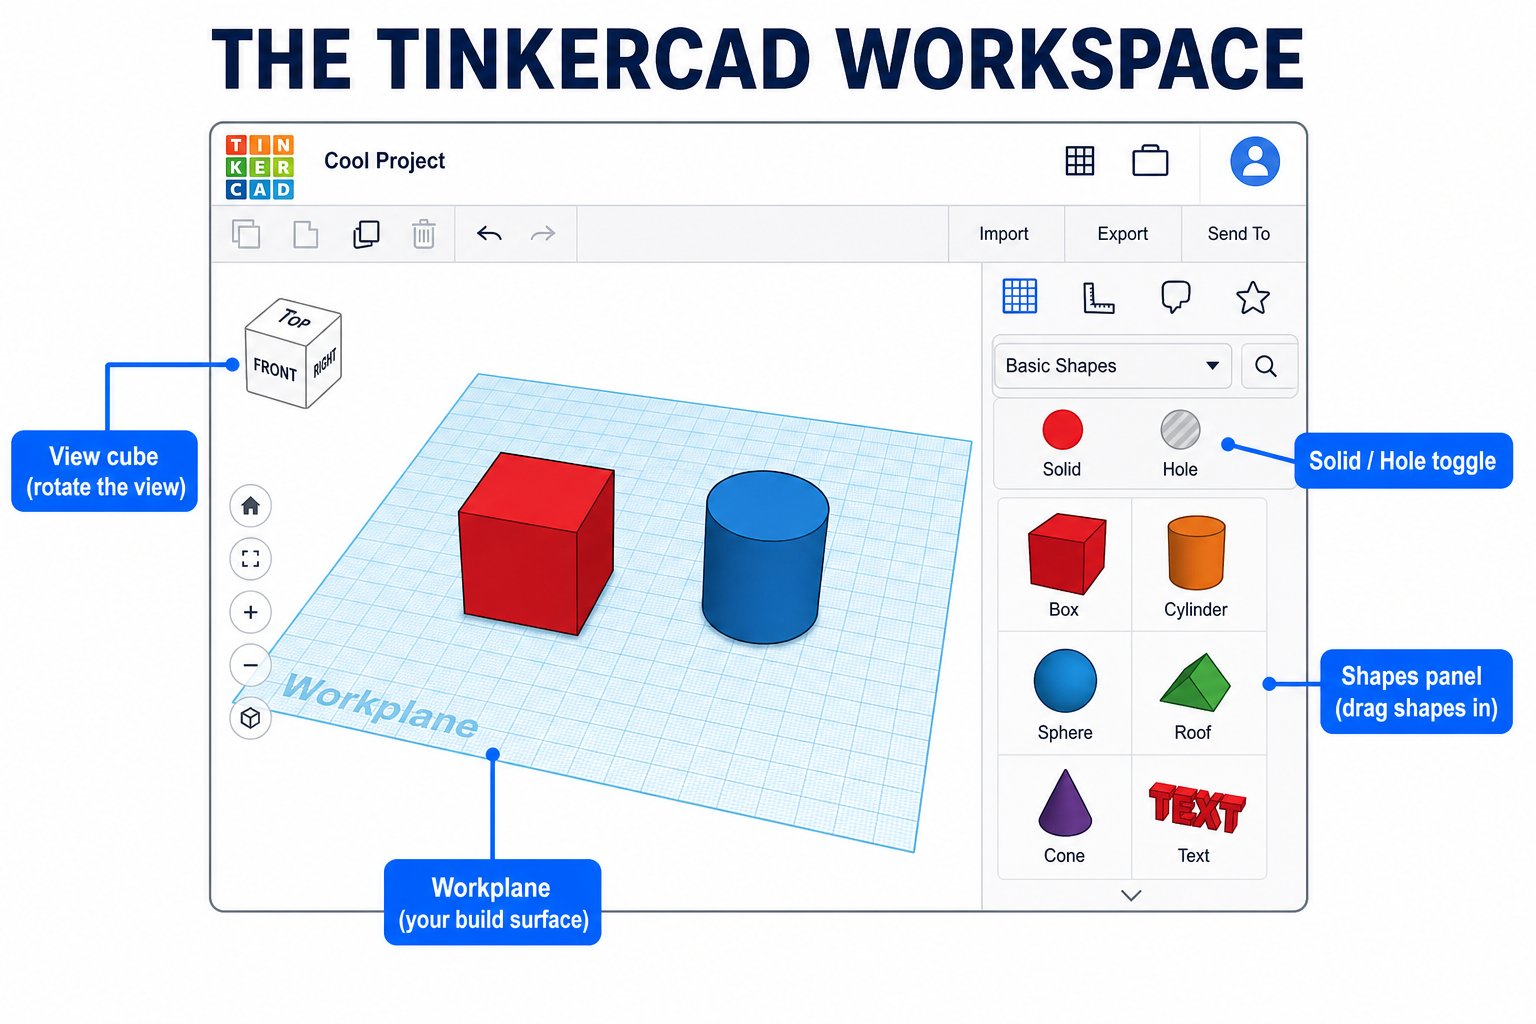
The key parts of the Tinkercad editor: workplane, shapes panel, and view controls
The workplane
The blue grid is your build surface. Anything you place here is what gets printed.
Shapes panel
On the right are ready-made shapes - boxes, cylinders, spheres, text, and more. Drag them onto the workplane.
Solid vs Hole
Every shape is either a solid (adds material) or a hole (carves material away). This is how you cut and combine shapes.
Group and align
Group merges shapes into one; Align snaps them to a shared edge or center.
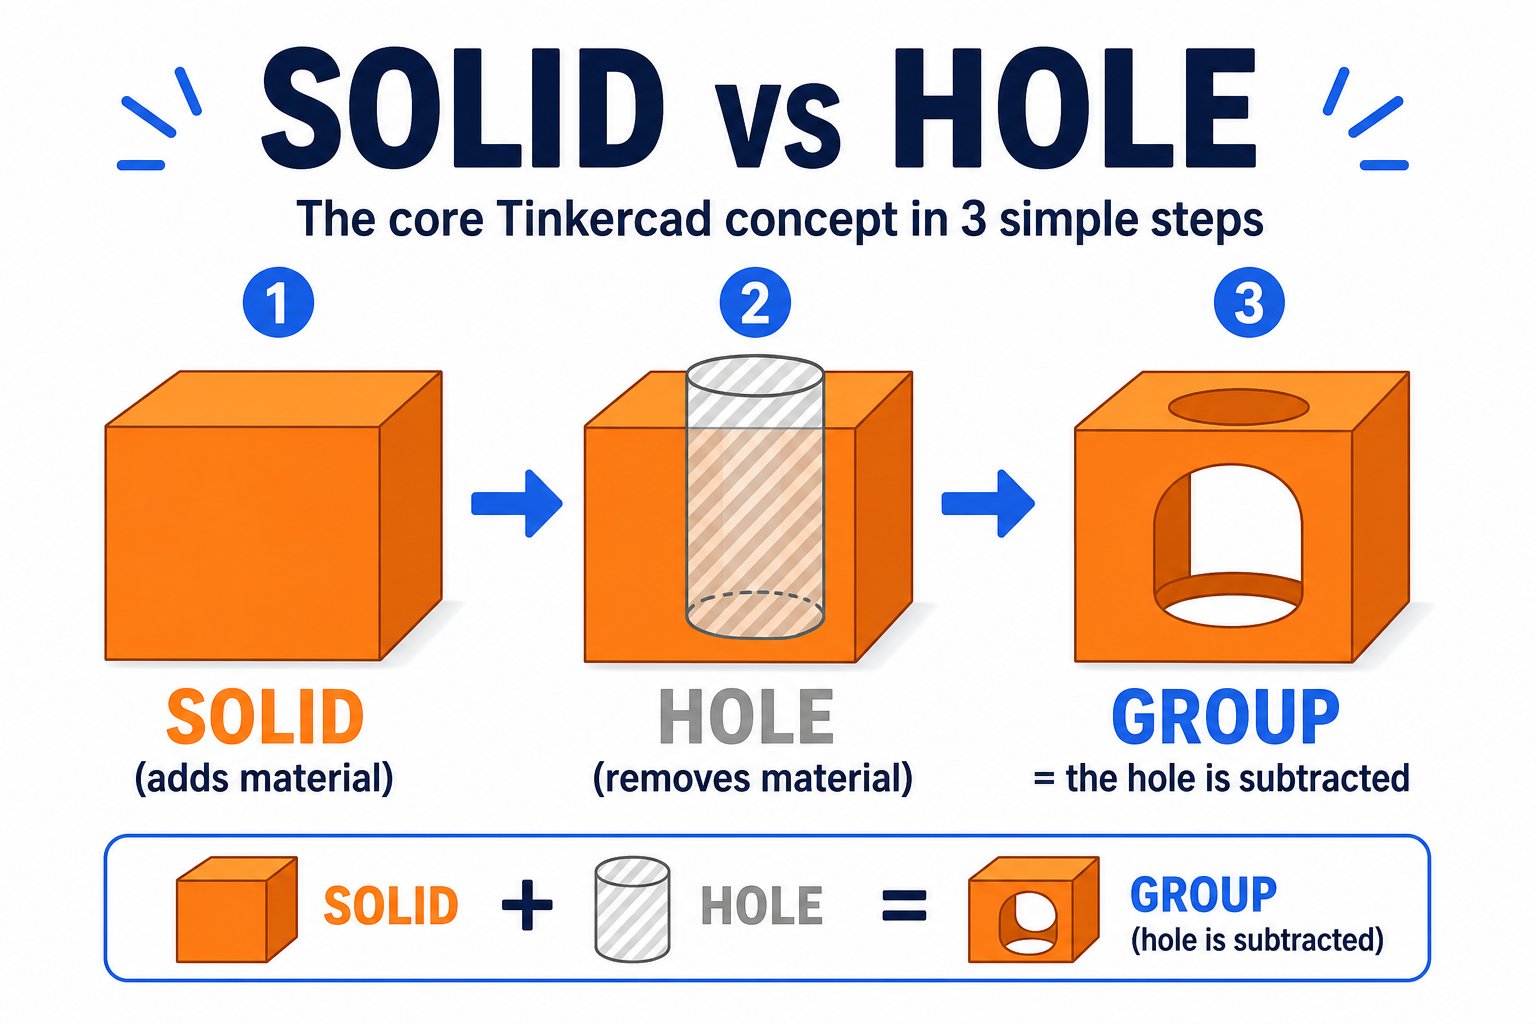
Solids add material, holes subtract it - grouping a solid with a hole carves the shape out
Moving around the view
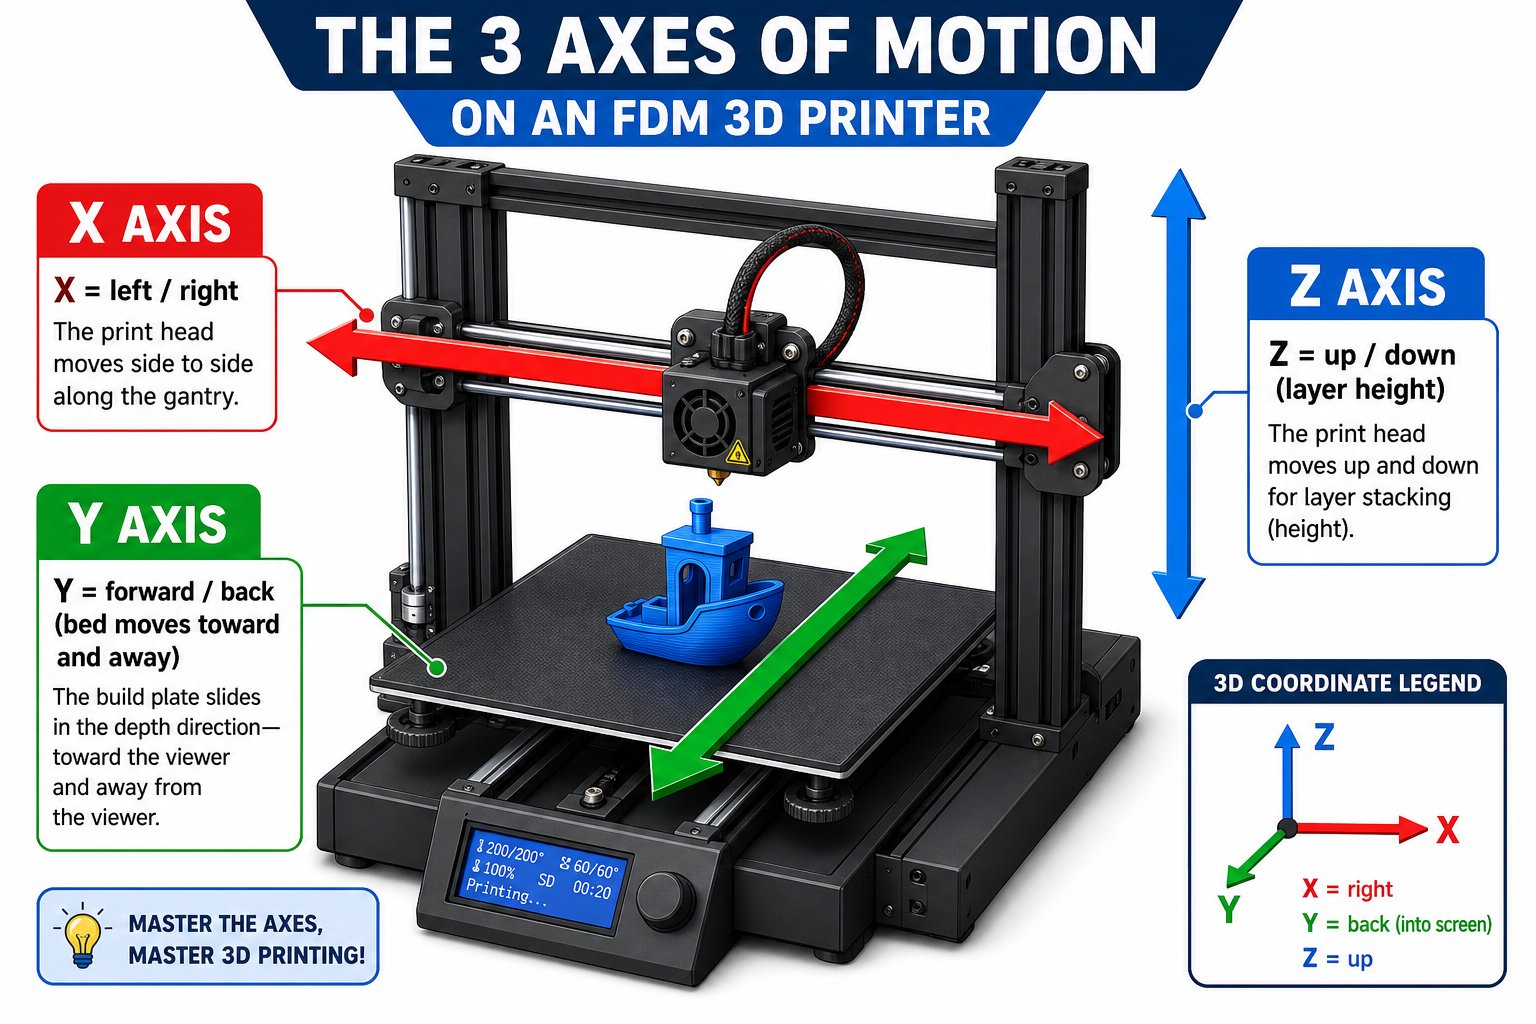
X, Y, and Z axes define width, depth, and height in every 3D design
Rotate the view
Right-click and drag (or use the orientation cube in the corner) to orbit around your model.
Pan and zoom
Scroll to zoom; hold shift and drag to pan. Get comfortable looking at your design from every angle.
Resize precisely
Click a shape and drag the white handles to resize, or type exact dimensions in millimeters.

Rotate to inspect your design from every angle before printing
The five core moves
Almost every Tinkercad design uses just these actions:- Drag a shape onto the workplane
- Resize it to the dimensions you want
- Position it (move and raise/lower on the workplane)
- Combine solids and holes to add and subtract material
- Group everything into a single model, then Export
Your Tinkercad account works, you have opened a new 3D design, and you can drag, resize, and rotate a shape. You are ready to design your first model.