

Your first real print
Now you run the bed-level test print - a set of squares across the bed. Reading how they turn out tells you whether your leveling is right and teaches you to spot problems that will help you all week.Download the test print
STEM_bed_level_print.gcode - copy it to your microSD card if it is not already there.Run the test
1
Start the print
On the LCD, go to Print from TF card → STEM_bed_level_print → Print.
2
Let it heat up
The screen shows “bed heating” and the nozzle warming. When it reaches temperature, it starts printing automatically. Hands off.
3
Watch the squares lay down
The printer draws a small priming line, then a series of squares across the bed. Watch the first layer closely.
Read the results
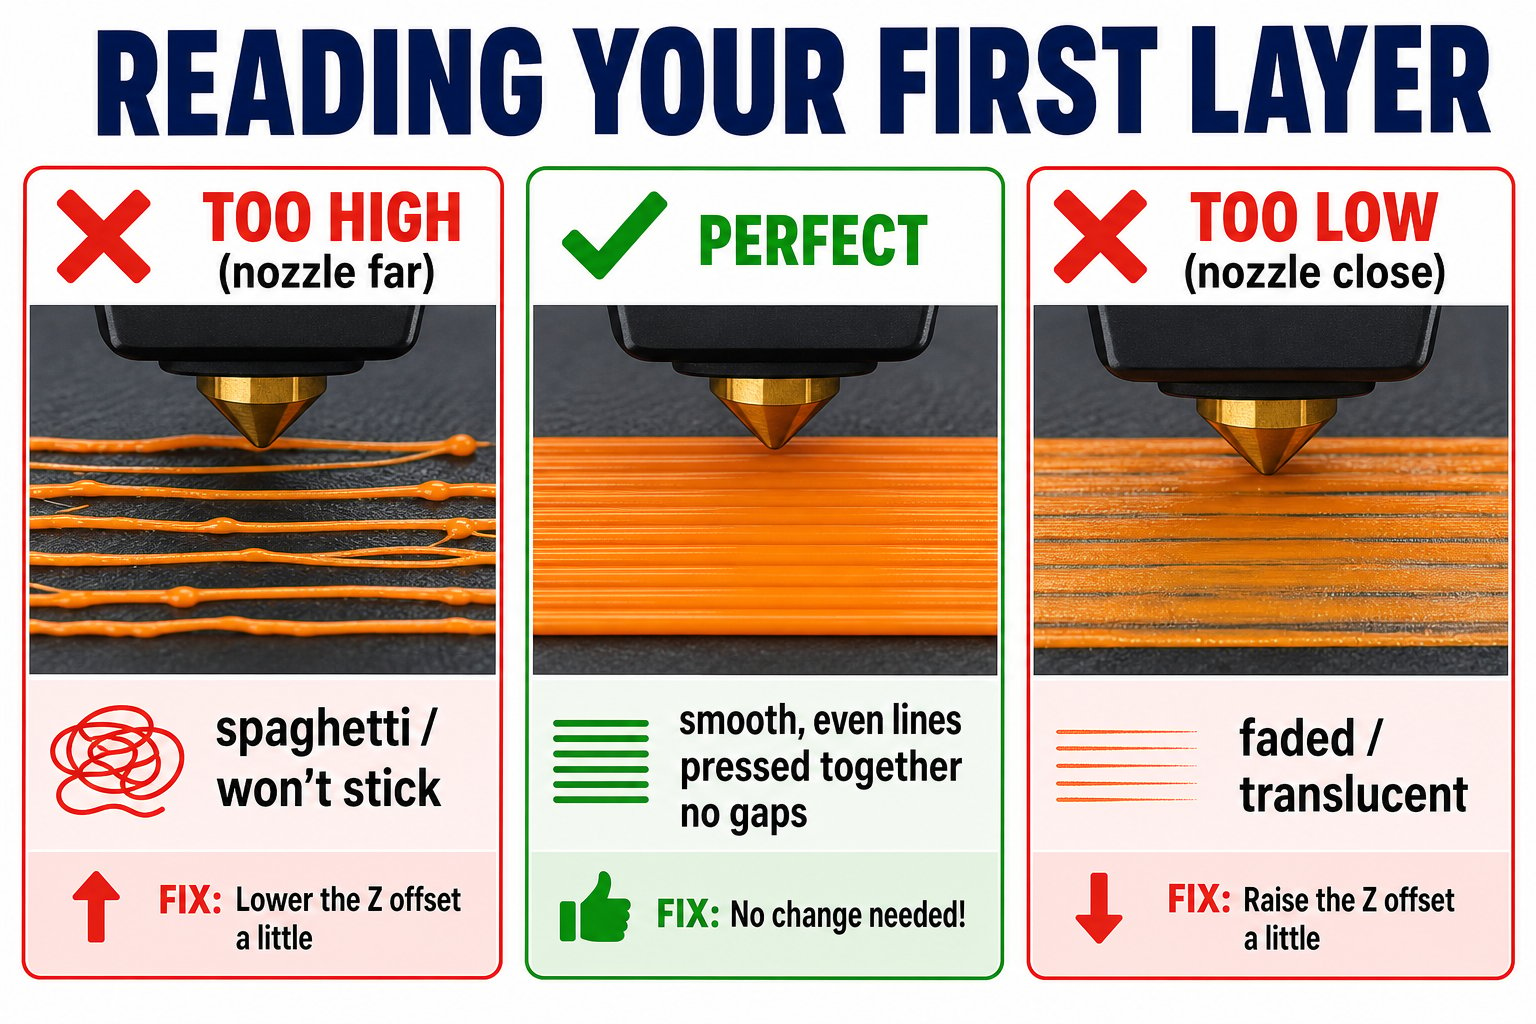
A good first layer is smooth and even; too close or too far each look distinct
Good square
Smooth, uniform lines that stick well and press together with no gaps. This corner is level.
Spaghetti / strings
Loose strands that do not stick - the nozzle is too far (bed too low) there. Loosen that corner’s knob to raise it.
Faded / scraped lines
Thin, see-through, or scraped plastic - the nozzle is too close (bed too high) there. Tighten that corner’s knob to lower it.
Nothing prints
Filament may not be fully loaded to the extruder - reload it and re-cut a sharp tip.
If it is not perfect
That is normal - leveling takes practice. Note which corner had the problem, adjust just that knob a little, and run the test again.Adjust the problem corner
Loosen (raise) for spaghetti, tighten (lower) for faded lines - a small turn at a time.
Re-run the test
Print the squares again and compare. Repeat until all corners look uniform.
Remove the print
Once cool, pop off the flexible plate and flex it, or use the scraper at the corners to lift the squares off.
Your test print shows clean, uniform squares that stick to the bed. Your Ender 3 is calibrated and ready to print real projects. Congratulations on your first print!
Bonus: print a 3DBenchy
Once your squares look good, print a 3DBenchy - the little tugboat that is the world’s most famous 3D-printing test. It packs overhangs, curves, text, and fine detail into one model, so it is the perfect way to show off your freshly leveled bed and spot any quality issues.Download 3DBenchy (ready-to-print G-code)
CE3_3DBenchy.gcode - pre-sliced for the Ender 3 with PLA. Copy it to your microSD card and print. Takes roughly 2 hours.