

Installing the spool holder
The spool holder carries your filament spool above the printer and lets it unwind smoothly into the feeder. You assemble the tube onto its bracket, then mount it to the top rail facing the back.For this step you need the last two M5x8 screws, two M5 T-nuts, and the number 4 Allen wrench.
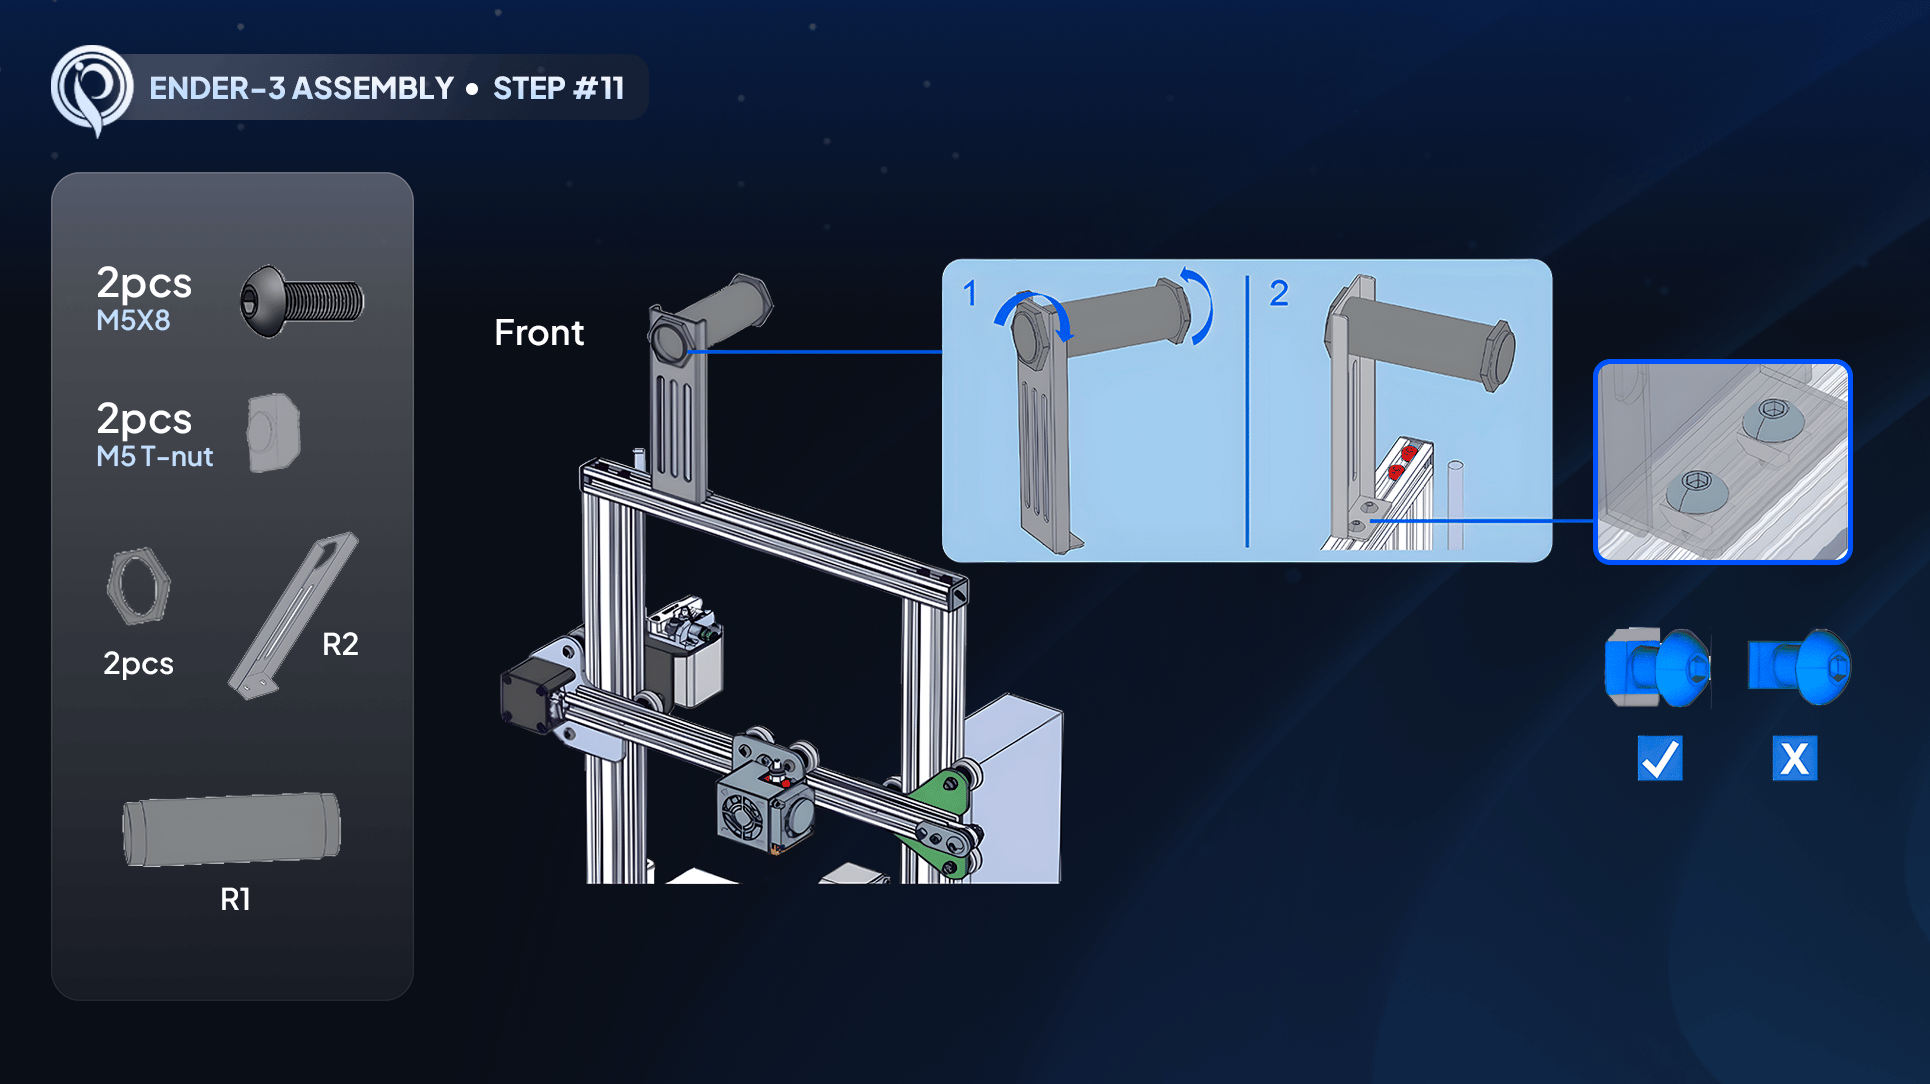
Step 11: assembling and mounting the spool holder
Step-by-step
1
Assemble the tube and bracket
Twist the removable cap off the tube (lefty-loosey), pass the tube through the large hole in the metal bracket, and twist the cap back on to lock it in place - it should click.
2
Prepare the screws and T-nuts
Thread an M5x8 screw into each of the two holes on the bottom of the bracket, then start an M5 T-nut onto each screw. Leave them barely snug so the T-nuts can still move. Orient the T-nuts horizontal.
3
Mount to the top rail
Set the bracket on the top rail and flip the T-nuts into the rail slot. The bracket should sit flush, facing toward the back of the printer.
4
Tighten firmly
Tighten both screws with the number 4 Allen wrench until the T-nuts grip the rail hard. Wiggle it - it should be rock solid.
The tube is locked in the bracket, the holder is mounted solidly to the top rail facing the back, and it does not wiggle.