

Why you need a slicer
Your printer cannot read a 3D model directly. It needs step-by-step instructions called G-code - move here, extrude this much, heat to this temperature. A slicer is the software that takes your 3D model, cuts it into hundreds of thin horizontal layers, and writes the G-code your Ender 3 follows. The gold-standard free slicer is UltiMaker Cura, trusted by millions of makers worldwide.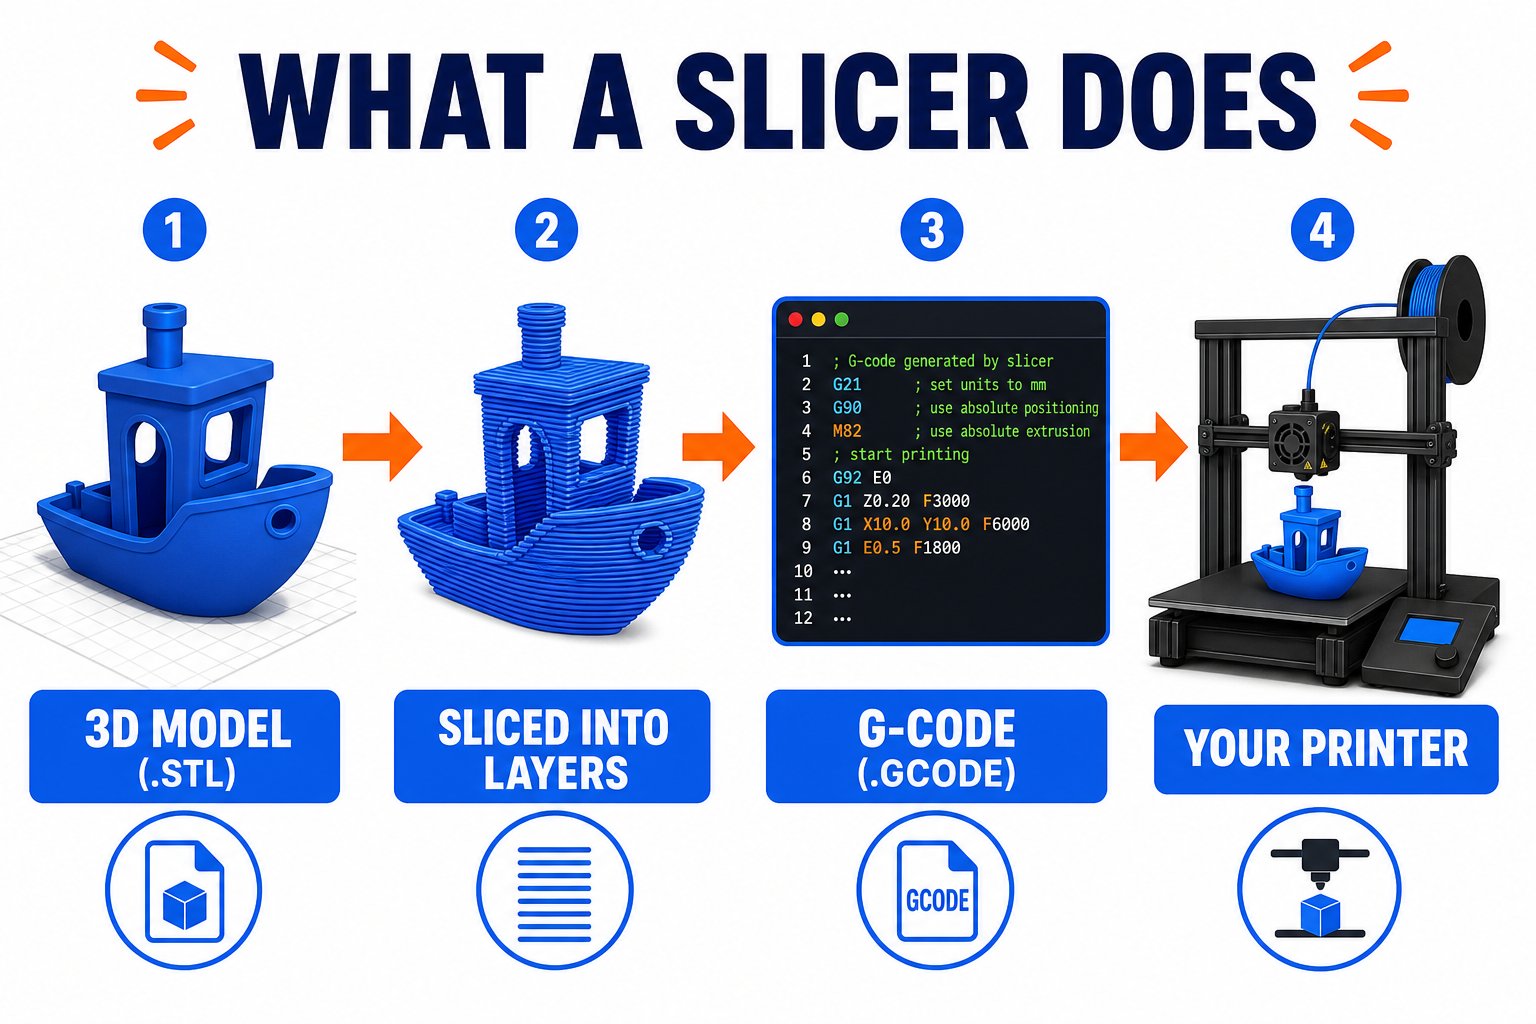
A slicer cuts your solid 3D model into hundreds of thin printable layers of G-code
Model file (
.stl / .obj) → Cura slices it → printer file (.gcode) → your Ender 3 prints it.Install Cura
Go to the official site
Visit ultimaker.com/software/ultimaker-cura and click Download for Free. Choose the installer for your operating system (Windows or Mac).
Run the installer
Open the downloaded file (
.exe on Windows, .dmg on Mac). Agree to the terms, then on Windows click Install, or on Mac drag Cura into your Applications folder.Open Cura
Launch Cura. The first time it opens, it walks you through adding a printer.
Add your Ender 3
Cura needs to know which printer you have so it uses the right settings and build area.Add a non-networked printer
Click Add Printer → Non-UltiMaker Printer → Add a non-networked printer.
Choose Creality Ender 3
Open the Creality manufacturer group, select Creality Ender 3, and click Add.
Confirm the machine settings
Cura fills in the Ender 3’s build volume (220 x 220 x 250 mm) and defaults automatically. Accept them.
A quick tour of Cura
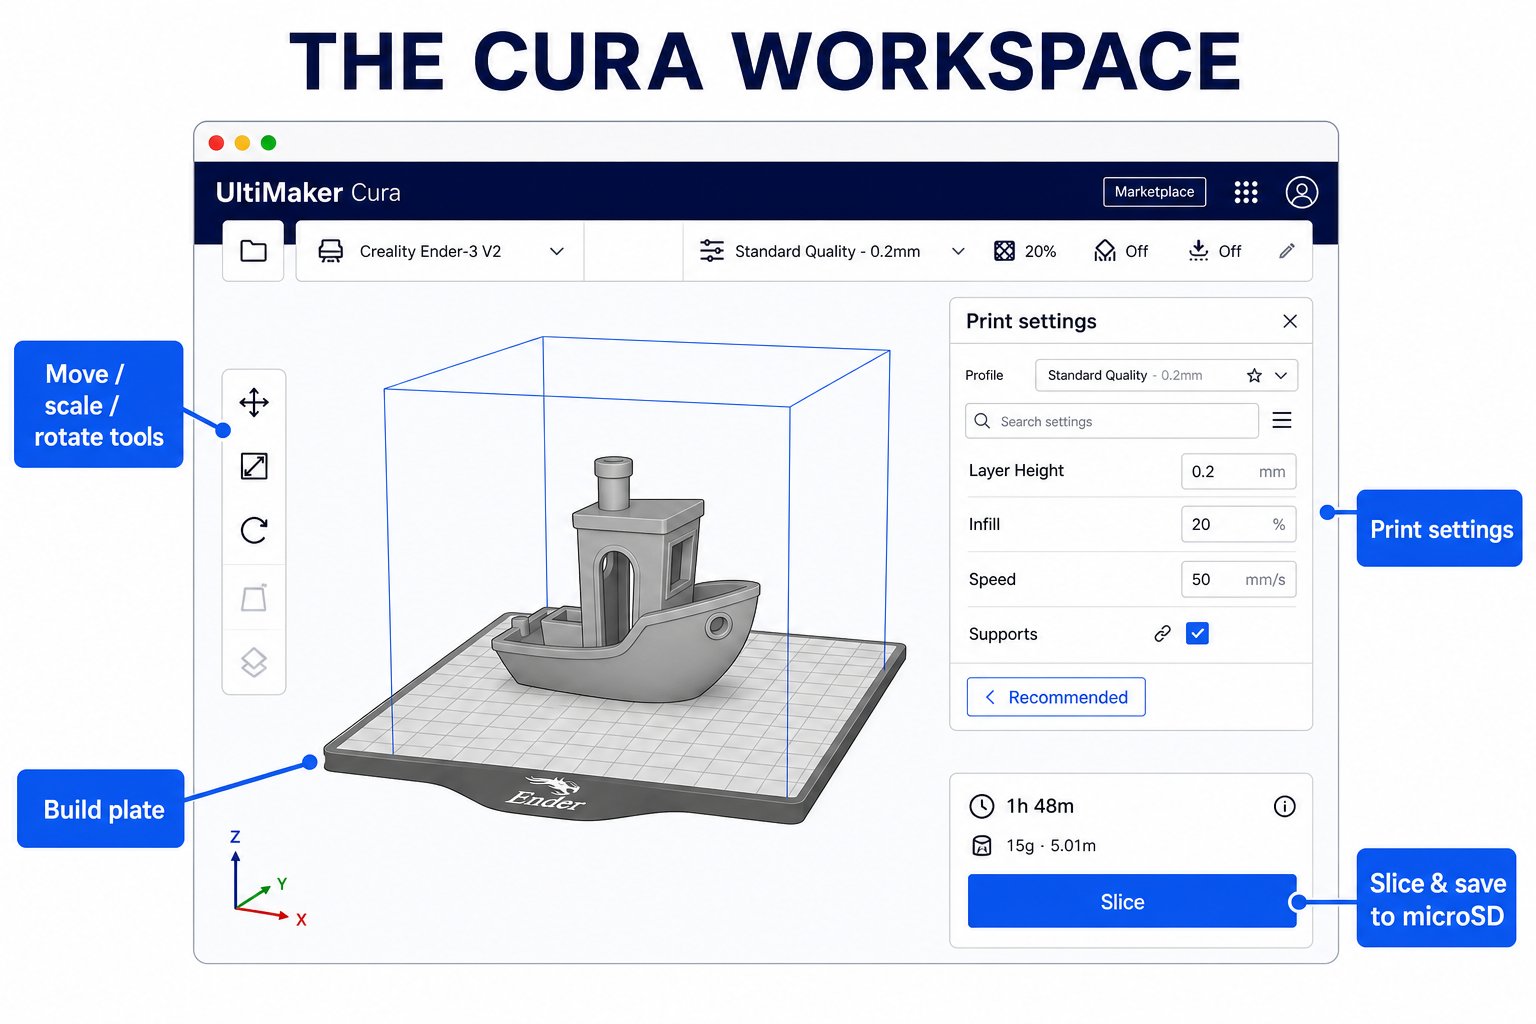
The Cura workspace: model on the bed, tools on the left, print settings on the right
Load a model
Drag an
.stl file into Cura, or use File → Open. Your model appears on the virtual bed.Move, scale, rotate
Use the tools on the left to position and size your model on the bed.
Print settings
On the right, set layer height, infill, speed, and supports. Start with the Standard Quality preset.
Slice and save
Click Slice, review the time and material estimate, then Save to Disk or to your microSD card.
Beginner settings that just work
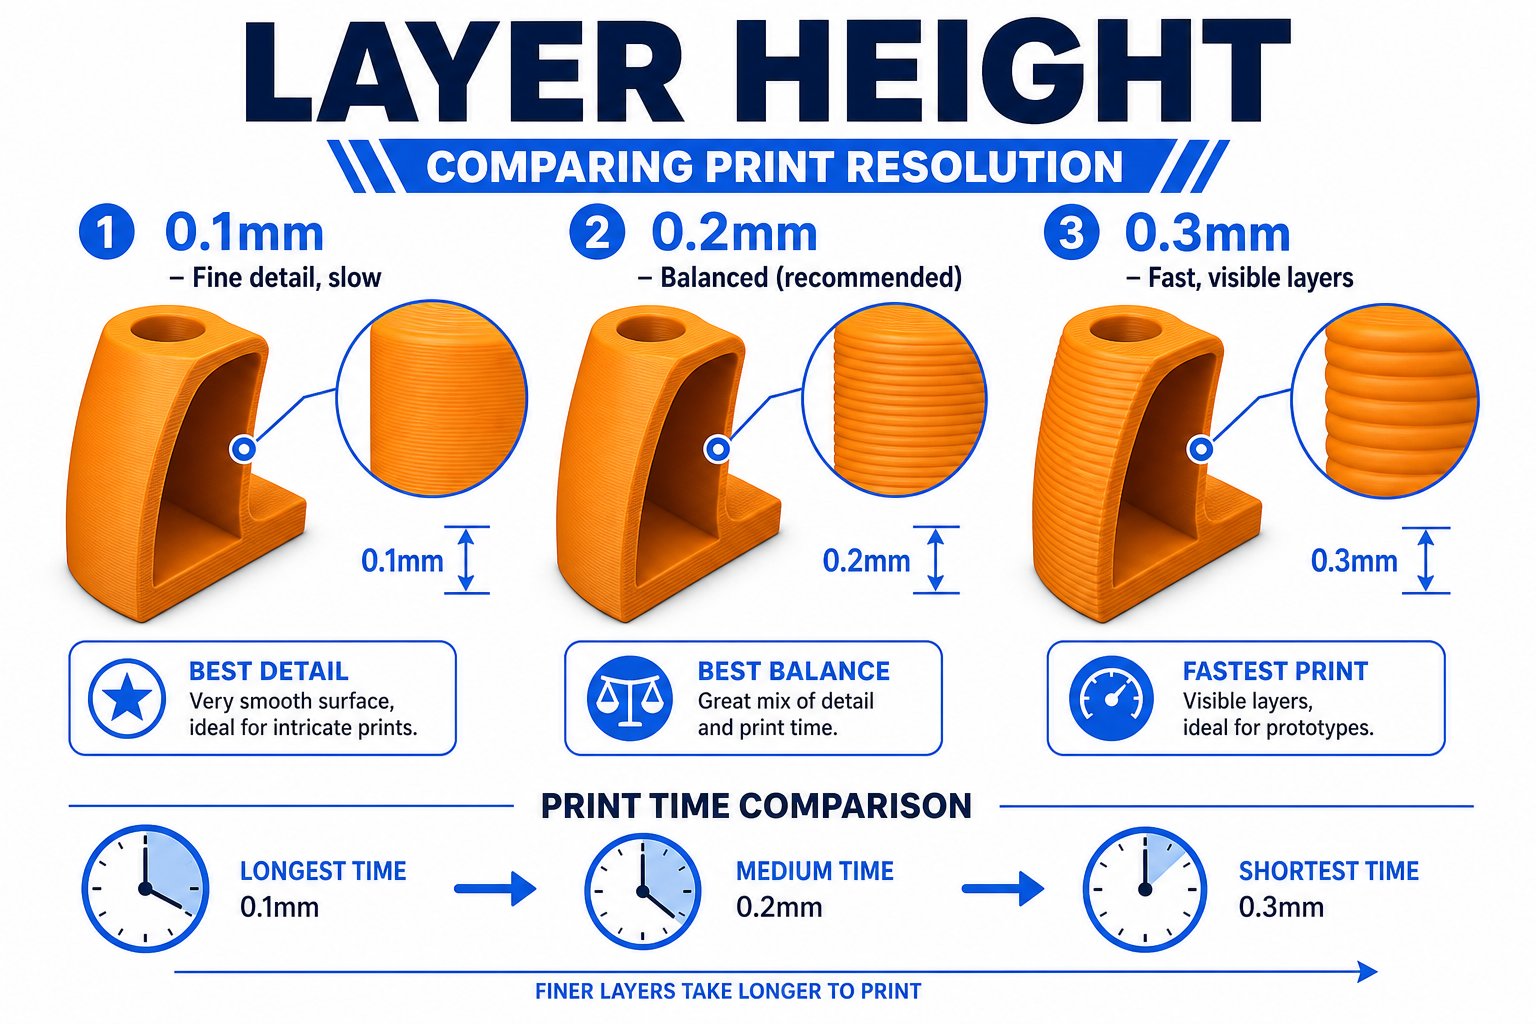
Layer height sets how fine your print looks - thinner layers, smoother surface, longer print
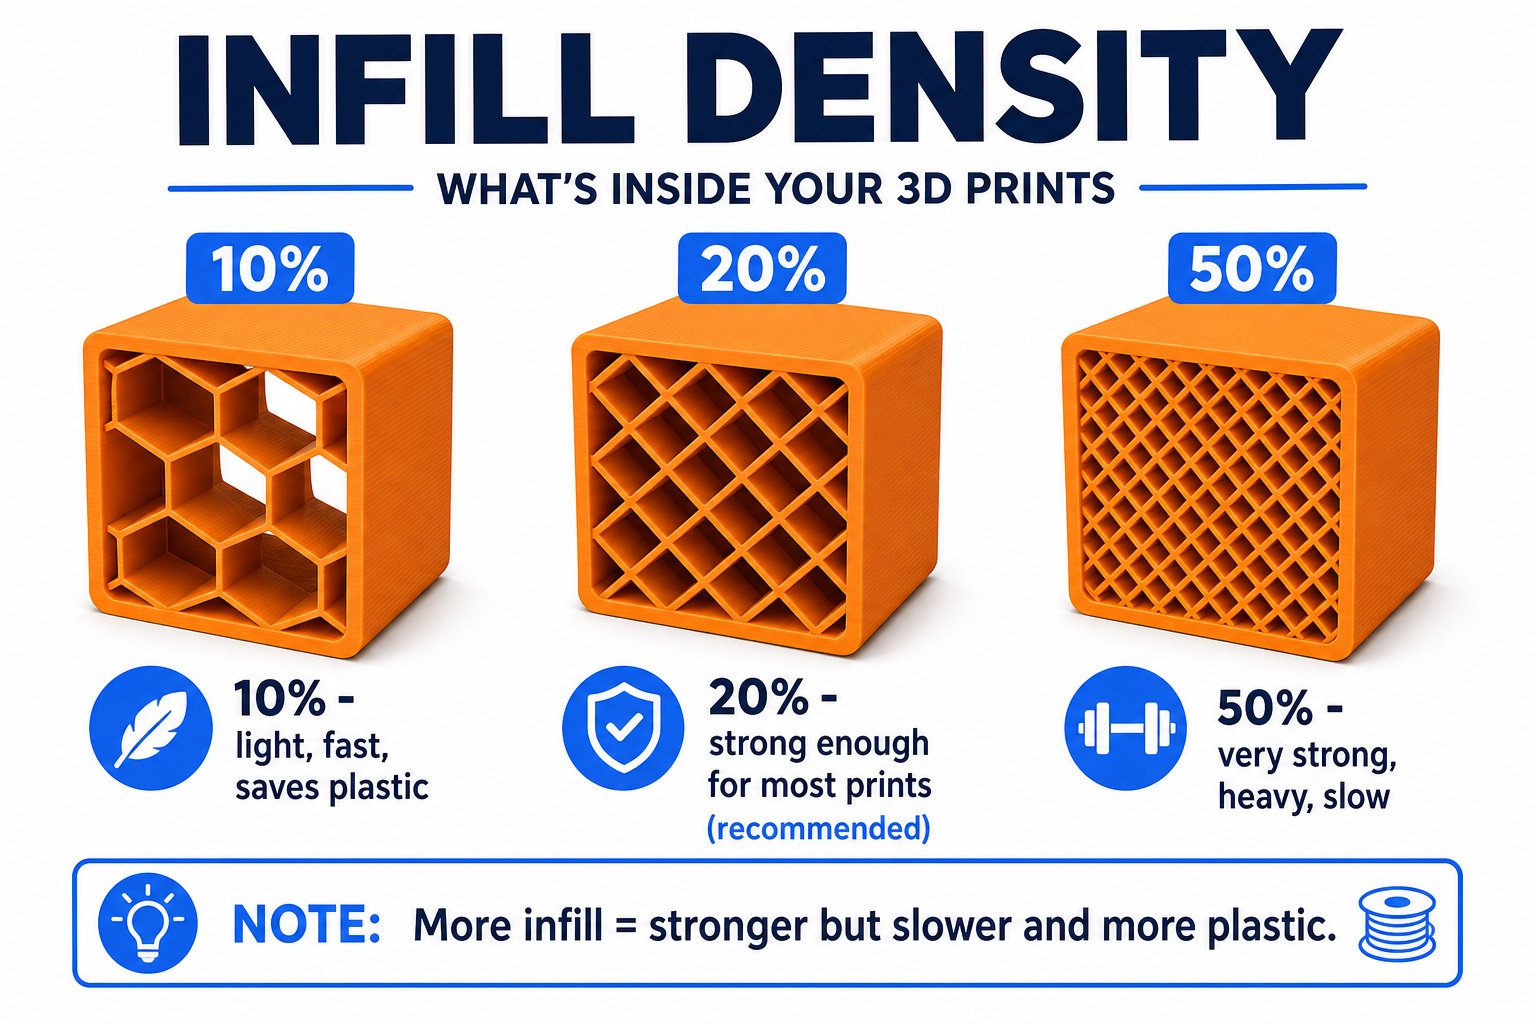
Infill fills the inside of a print - more infill means a stronger, heavier, slower part
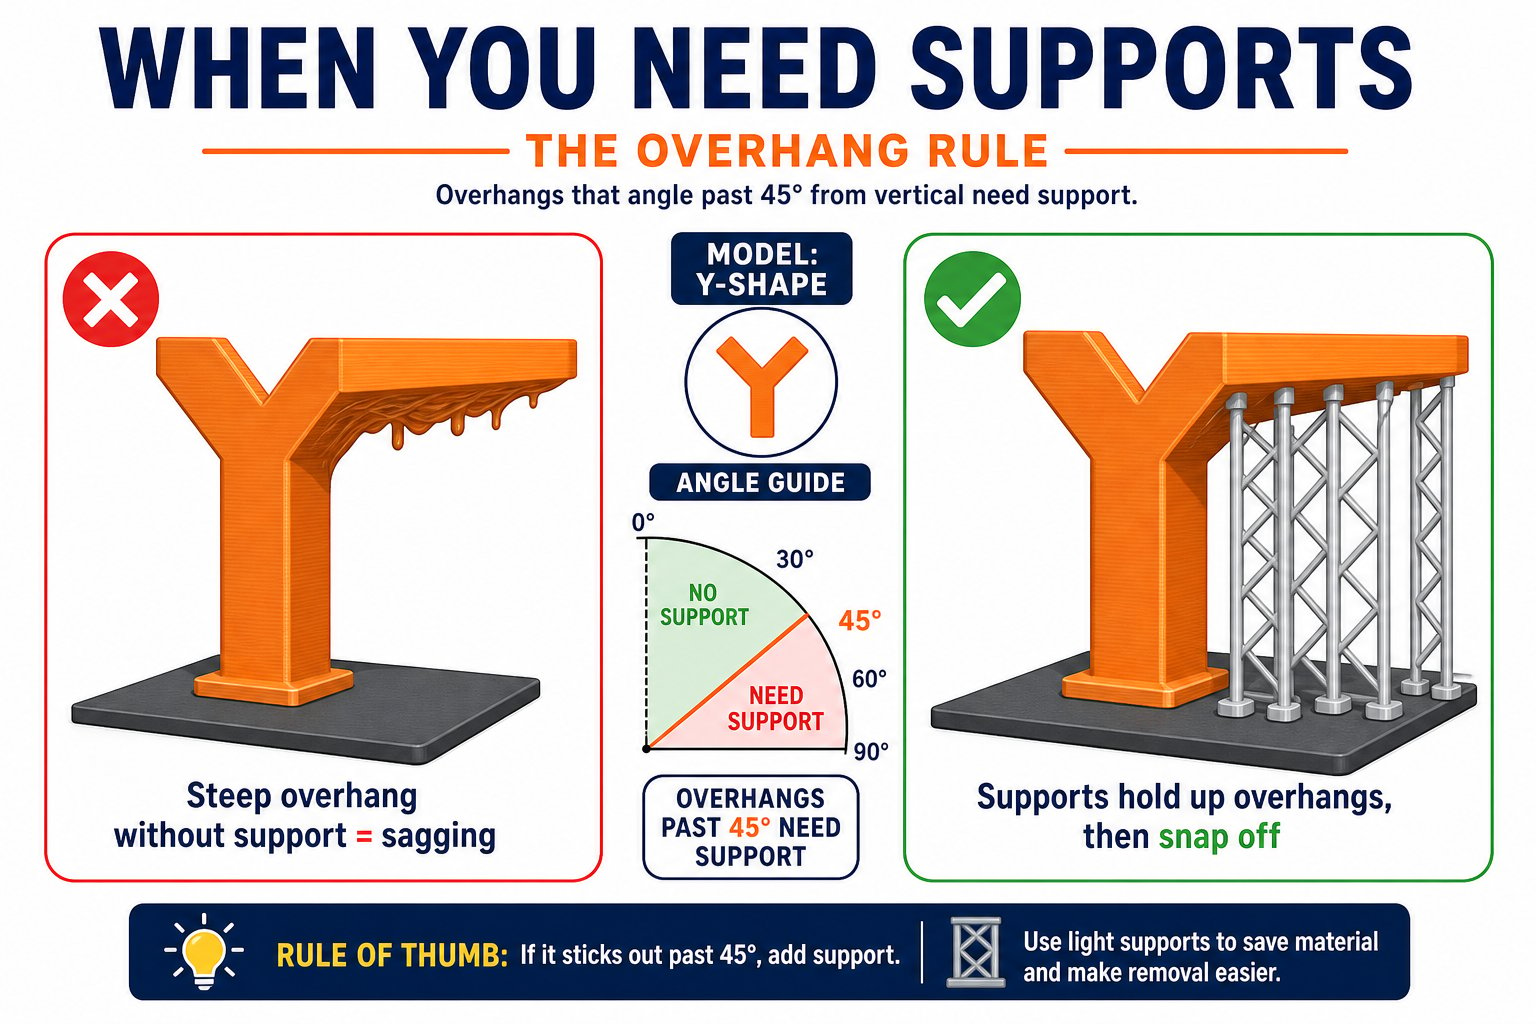
Steep overhangs need supports - temporary scaffolding you remove after printing
Cura is installed, the Creality Ender 3 is added, and you can load a model, slice it, and save a
.gcode file. Next we set up the design software.