

Installing the power supply
Next you mount the power supply unit (PSU) - the large silver box that converts wall power into the 24 V your printer runs on. It bolts to the back of the right-side rail.For this step you need the two M4x20 screws (silver, blocky heads) and the number 4 Allen wrench (second largest).
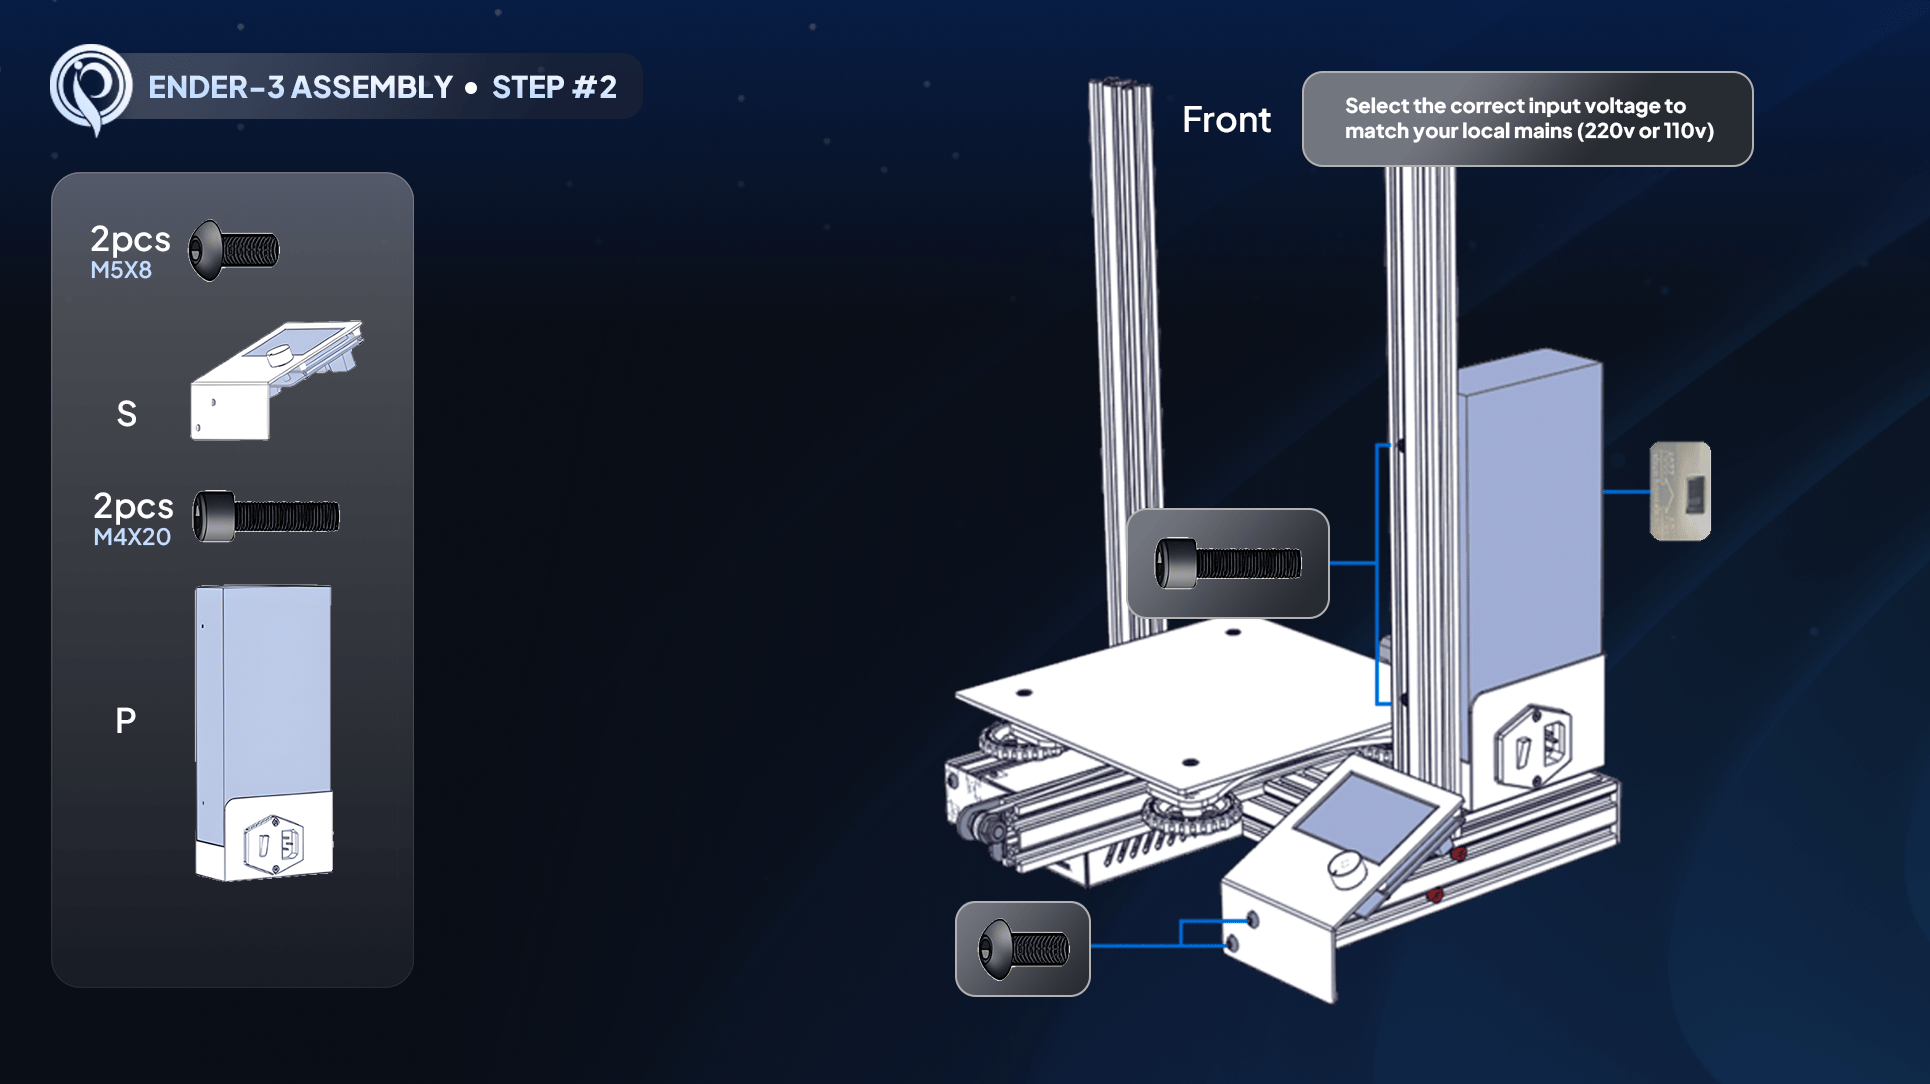
Step 2: mounting the power supply to the right rail
Step-by-step
1
Find the two screw holes
On the back of the PSU (the side with the “power supply” sticker) there are two screw holes about six to eight inches apart. These line up with the two holes on the same track of the right rail.
2
Orient the PSU
Set the PSU on the right side of the printer with the power switch and cable facing outward (to the right) and the sticker facing the rail. Slide it toward the back.
3
Insert the screws through the rail
Push both M4x20 screws through the rail holes so they poke out the back. Raise the PSU about an inch to line up its holes with the screws.
4
Thread and tighten
Hand-thread each screw into the back of the PSU, then tighten fully with the number 4 Allen wrench until the heads sit flush in the rail and the PSU does not move.
The power supply is bolted to the right rail with no wiggle, the power switch and cable face outward on the right, and both M4x20 screw heads sit flush in the rail.