

Your first real model
Time to design something and print it. In this project you will build a personalized name-tag keychain in Tinkercad - a flat plate with your name raised on top and a hole for a keyring. It teaches the core moves you will use for every model this week: shapes, text, alignment, holes, and grouping.
From a digital design to a printed object
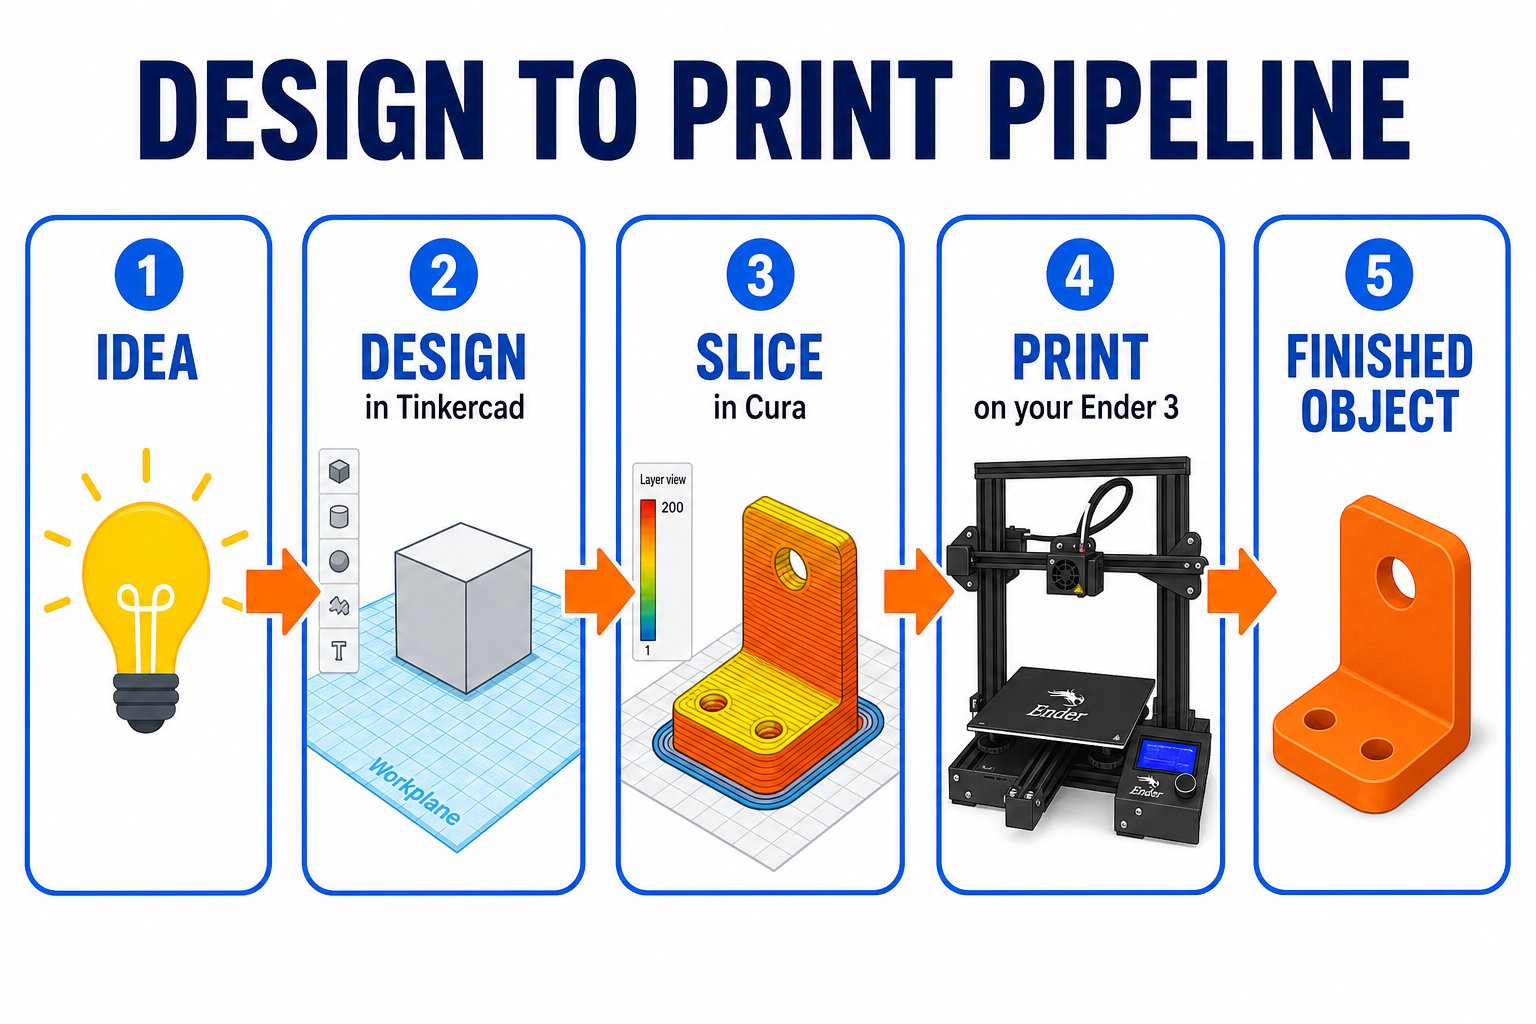
The full pipeline you will use all week: design → export → slice → print
Step by step
Make the base plate
Drag a Box onto the workplane. Resize it to about 50 mm long, 20 mm wide, and 3 mm tall. This is your tag body. Round the corners for a nicer look by dragging the corner radius handle, or use a Rounded Box shape instead.
Add your name
From the shapes panel, drag the Text shape onto the plate. Click it and type your name in the settings box. Set its height to about 4 mm so the letters stand up off the plate.
Size and center the text
Resize the text so it fits nicely on the plate with a small margin. Select both the plate and the text, then use Align to center them horizontally and vertically.
Raise the text onto the plate
Make sure the bottom of the letters sits on the top face of the plate (raise it so it overlaps slightly). The letters should look like they are growing out of the tag.
Add the keyring hole
Drag a Cylinder and switch it to a Hole (in the shape settings). Shrink it to about 5 mm wide, place it near one end of the plate, and make sure it passes all the way through. This becomes the hole for your keyring.
Group it into one model
Select everything (plate, text, and hole cylinder) and click Group. The hole is subtracted, the text merges with the plate, and you have a single solid model.
Export your model
Click Export → STL to download your keychain as an
.stl file.Slice and print
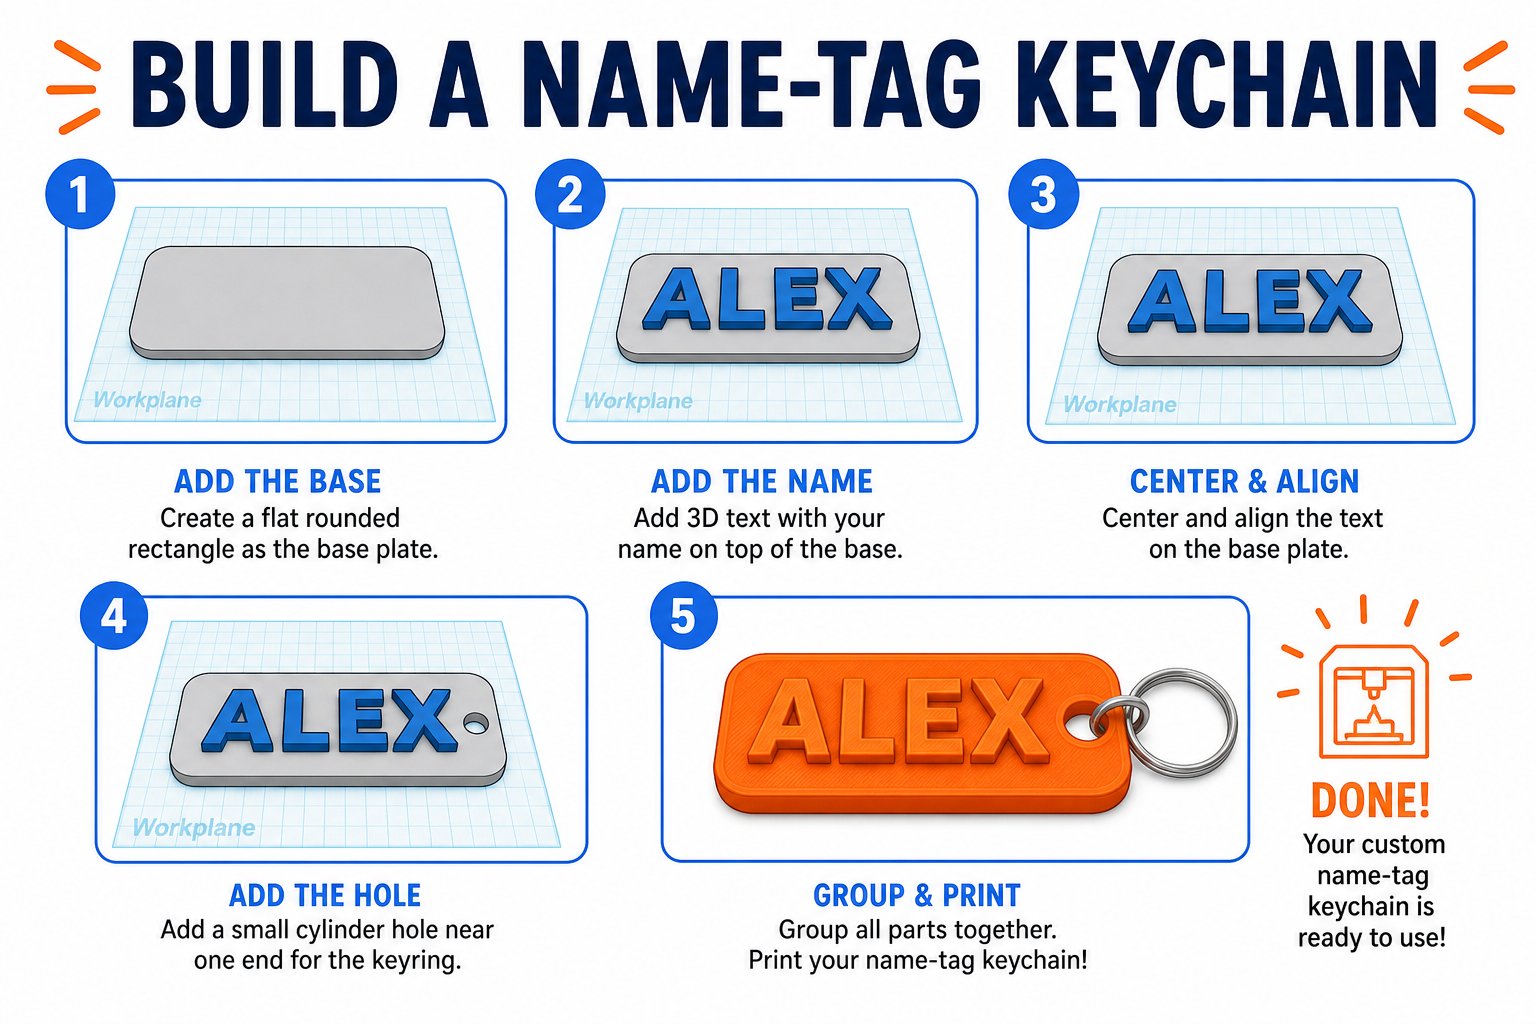
Building the name-tag keychain step by step in Tinkercad
Open it in Cura
Drag your
.stl into Cura. Lay it flat on the bed (it should already be flat).Use beginner settings
0.2 mm layer height, 15-20% infill, 40-50 mm/s. No supports needed for a flat tag.
Slice and save to microSD
Click Slice, check the preview, then save the
.gcode to your microSD card.Print it
Insert the card into your Ender 3, select the file, and print. Watch that first layer!
Design tips
Keep text bold
Thin, fancy fonts can break or fail to print. Chunky letters print cleanly.
Mind the overhang
Raised letters print fine, but avoid floating parts with nothing underneath.
Check the scale
Confirm your dimensions in millimeters before exporting - it is easy to make something tiny or huge by accident.
Save your work
Tinkercad autosaves to your account, but export a copy of anything you want to keep.
You designed a name-tag keychain in Tinkercad, exported it as an STL, sliced it in Cura, and sent it to your printer. You just completed the full design-to-print pipeline!