

Every printer has bad prints
Failed prints are part of 3D printing - even for experts. The skill is not avoiding every failure; it is diagnosing what went wrong and fixing it. Because you understand the full print journey, you can trace almost any problem back to one of a few causes: adhesion, temperature, calibration, filament, or mechanics.Remember the “fail forward” mindset from the contest. A failed print you understand is worth more than a lucky success you cannot explain.
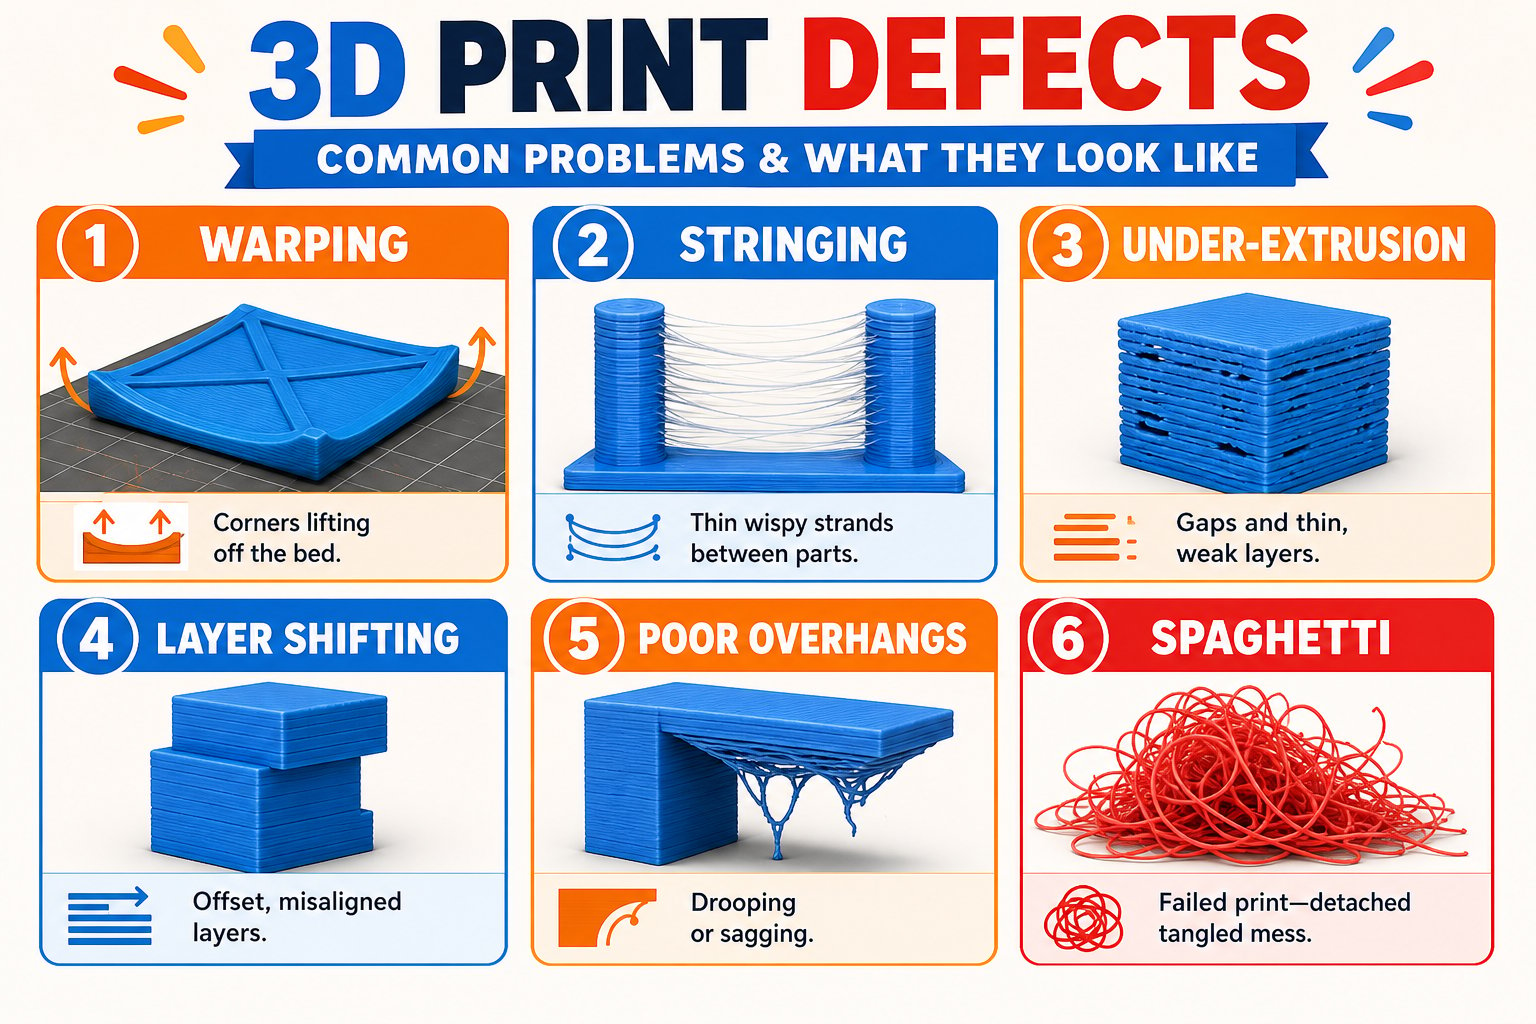
The most common print defects and what they look like
First-layer and adhesion problems
The first layer causes the most failures. Fix these first.Print will not stick to the bed
Print will not stick to the bed
Causes: nozzle too far from the bed, bed too cold, dirty surface, or no adhesive.Fixes:
- Re-run auto calibration so the first-layer gap is correct
- Raise the bed temperature (about 60 C for PLA)
- Clean the plate with isopropyl alcohol to remove finger oils
- Apply a thin layer of the included glue stick
- Add a brim in the slicer for more grip
Warping (corners lifting up)
Warping (corners lifting up)
Causes: the print cools unevenly and contracts, pulling corners off the bed. Worst with ABS, better with PLA.Fixes:
- Increase bed temperature and use glue
- Add a brim or raft
- Keep the printer away from cold drafts and open windows
- For warp-prone materials, use an enclosure
Elephant's foot (bulging first layers)
Elephant's foot (bulging first layers)
Causes: first layers squished too much by heat and weight.Fixes:
- Lower the bed temperature slightly
- Reduce first-layer squish (raise the nozzle a hair via Z-offset)
Extrusion problems
Stringing and oozing
Stringing and oozing
Thin wisps of plastic strung between parts of the print.Fixes:
- Dry your filament - moisture is the top cause
- Increase retraction in the slicer
- Lower the nozzle temperature slightly
Under-extrusion (gaps and thin layers)
Under-extrusion (gaps and thin layers)
Not enough plastic coming out - weak, gappy prints.Fixes:
- Check for a partial clog and clean the nozzle
- Raise the nozzle temperature a little
- Make sure filament feeds freely and the spool is not tangled
Over-extrusion (blobs and rough walls)
Over-extrusion (blobs and rough walls)
Too much plastic, leaving blobs and messy surfaces.Fixes:
- Lower the extrusion multiplier / flow rate in the slicer
- Lower the nozzle temperature slightly
Clogged nozzle
Clogged nozzle
Nothing (or very little) extrudes, sometimes with clicking from the extruder.Fixes:
- Heat the nozzle and gently push filament through by hand
- Use the unclogging pin from your kit to clear the tip
- Try a “cold pull” to remove debris
- Replace the nozzle if it stays blocked
Layer and quality problems
Layer shifting
Layer shifting
Layers suddenly offset sideways, ruining alignment.Fixes:
- Slow the print speed down
- Make sure nothing is obstructing the print head or bed
- Check that belts are tensioned and pulleys are tight
Spaghetti / detached print
Spaghetti / detached print
The print pops loose and the printer keeps extruding into the air.Fixes:
- Fix first-layer adhesion (see above)
- Add supports for tall or top-heavy models
- Use the app or camera to catch failures early and stop the print
Poor overhangs and drooping
Poor overhangs and drooping
Steep overhangs sag or curl.Fixes:
- Enable and increase part cooling fan speed
- Add supports in the slicer for overhangs beyond ~45 degrees
- Slow down on overhang layers
Gaps in top layers
Gaps in top layers
The top surface has holes or looks incomplete.Fixes:
- Increase top layer count in the slicer
- Increase infill density so top layers have more to rest on
A simple troubleshooting method
1
Observe
Look closely. When did it fail - first layer, mid-print, or overhang? What does the defect look like?
2
Isolate the stage
Match the symptom to a stage of the print journey: adhesion, temperature, extrusion, or mechanics.
3
Change one thing
Adjust a single setting at a time so you know what actually fixed it.
4
Test and record
Re-print and note the result. Keep a short log of what worked - future you will thank you.
Quick reference
You can trace a failed print to its cause and apply a targeted fix. You know where the unclogging pin, glue stick, and slicer settings come in.