

Know your machine
Before you build your printer on Day 2, it helps to know what each part does. An FDM printer is really five systems working together: structure, motion, extrusion, heating and cooling, and electronics, plus optional sensors. Learn these and assembly will make far more sense.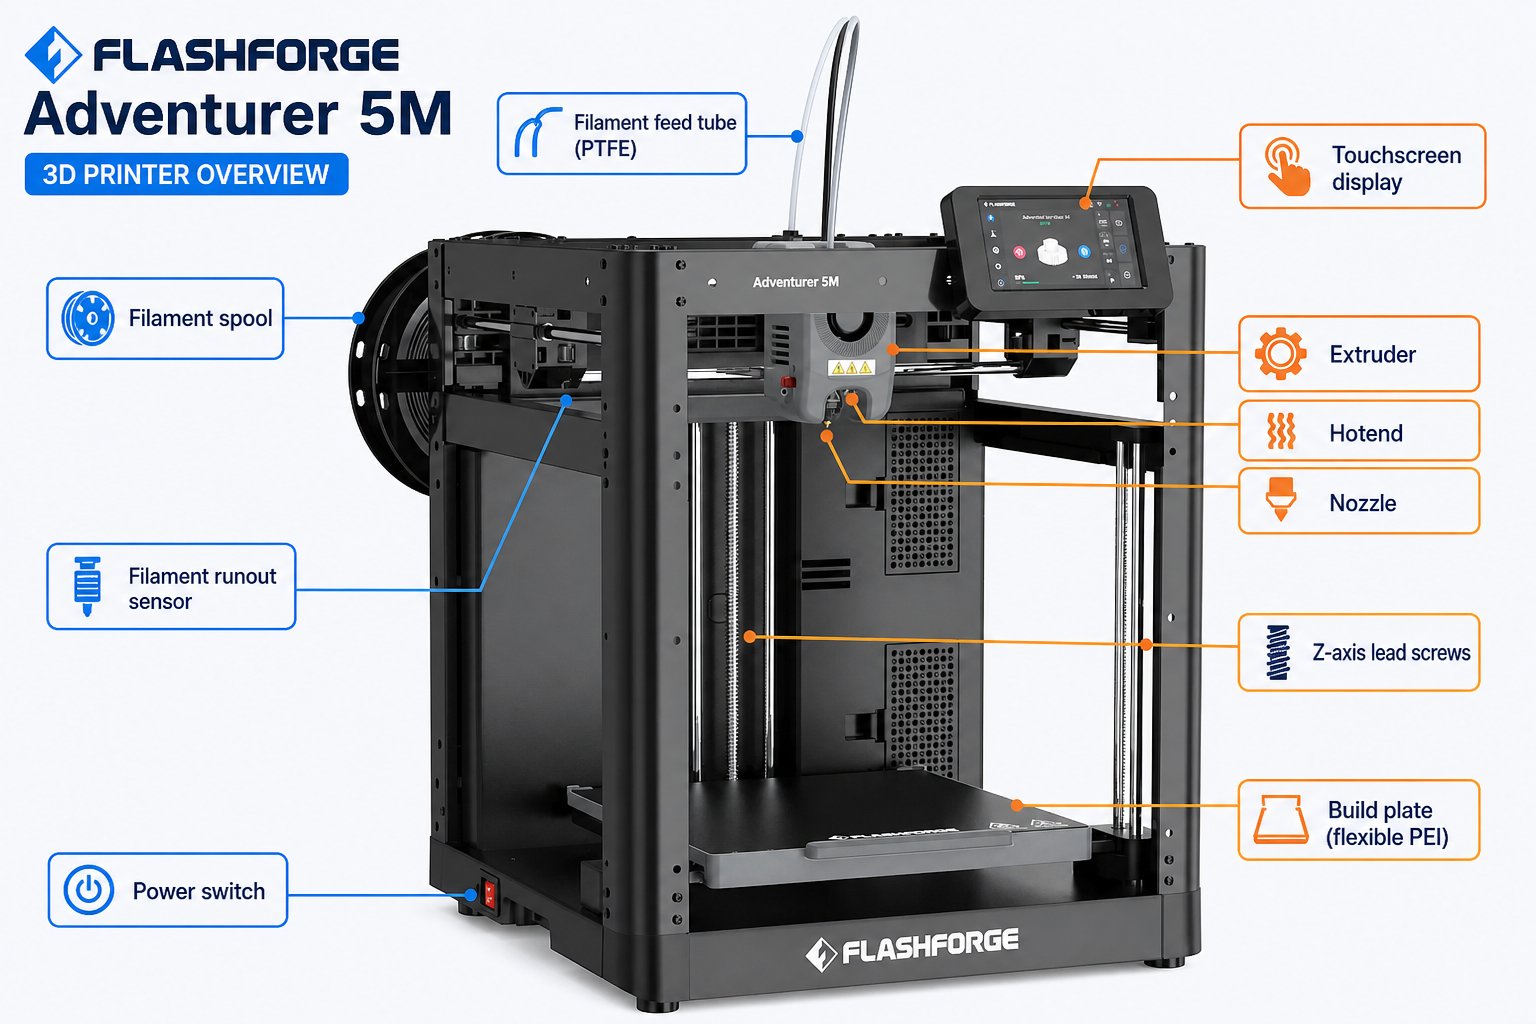
The major components of an FDM 3D printer
Component categories at a glance
Structure and motion
The frame holds everything rigid while motors move the print head and bed with sub-millimeter precision.Frame
Frame
The structural body of the printer, made from aluminum, steel, or plastic. A rigid frame keeps everything aligned so prints stay accurate.
Build plate / print bed
Build plate / print bed
The surface where your print is created. It is often heated to improve adhesion and reduce warping. Your Adventurer 5M uses a flexible, magnetic, removable plate.
Print surface
Print surface
The top layer of the bed (glass, PEI, or a magnetic sheet) that the plastic actually sticks to. You will learn about surfaces in depth on Day 4.
Linear rails, rods, and bearings
Linear rails, rods, and bearings
Guide the smooth motion of each axis. Better guidance means smoother, more accurate prints.
Lead screws and belts
Lead screws and belts
The Z axis typically uses lead screws for precise vertical steps. The X and Y axes use belts for fast horizontal motion.
Limit switches / endstops
Limit switches / endstops
Detect the home position of each axis so the printer knows exactly where “zero” is before a print.
Stepper motors
Stepper motors
Drive the axes and the extruder in precise steps. Most printers use NEMA 17 stepper motors.
Extrusion system
This is the heart of the printer - the parts that melt filament and deposit it exactly where the G-code says.Extruder
Extruder
Feeds filament into the hotend. A direct drive extruder sits right on the hotend (great for flexible filament); a Bowden extruder is mounted on the frame and pushes filament through a tube.
Hotend
Hotend
Heats and melts the filament so it can flow. The hotend temperature is set based on the filament type.
Nozzle
Nozzle
The precision tip that deposits melted plastic. Standard is 0.4 mm, with a range from 0.2 mm to 1.0 mm+. You will explore nozzle choice on Day 3.
Heater cartridge
Heater cartridge
A small rod that heats the hotend to printing temperature.
Thermistor
Thermistor
Measures the hotend temperature and reports it to the mainboard so heating stays precise and safe.
Heating and cooling
Temperature control happens in two places - the bed and the print itself - and both matter for quality.Heated bed
Warms the print surface for better adhesion and less warping, especially with ABS and PETG.
Bed thermistor
Monitors the bed temperature so it stays at the target value.
Part cooling fan
Blows air on freshly extruded plastic to solidify it quickly. Critical for clean overhangs, bridges, and fine detail.
Hotend fan
Cools the upper part of the hotend to prevent heat from creeping up and softening filament too early (which causes clogs).
Electronics
The electronics are the brain and nervous system of the machine.Mainboard / controller board
Mainboard / controller board
The brain of the printer. It reads G-code and controls the motors, heaters, fans, and sensors in perfect sync.
Power supply unit (PSU)
Power supply unit (PSU)
Converts wall AC power into the DC voltage (usually 12 V or 24 V) the printer needs.
Display / user interface
Display / user interface
Your control panel. The Adventurer 5M has a color touchscreen for starting prints, leveling, and loading filament.
USB port / storage
USB port / storage
Loads G-code print files. The Adventurer 5M also supports Wi-Fi and Ethernet transfer.
Sensors
Not every printer has these, but they make printing more reliable - and your Adventurer 5M includes them.Auto bed leveling sensor
Measures the bed at many points and compensates for any unevenness automatically. No more manual knob twisting.
Filament runout sensor
Detects when filament breaks or runs out mid-print and pauses so you can reload without ruining the print.
Thermal protection
Circuitry and firmware that prevent overheating and shut things down safely if a fault is detected.
How it all connects
Here is the full chain of events when you print:- The mainboard reads the G-code file.
- It tells the stepper motors to move the head and bed along X, Y, and Z, using endstops to know home.
- The heater cartridge warms the hotend and the heated bed, watched by thermistors.
- The extruder pushes filament into the hotend, where it melts and flows out the nozzle.
- The part cooling fan solidifies each layer while sensors watch for problems.