

Loading your first spool
Your printer is built. Now let’s load filament so it’s ready to print. We will mount the PLA spool on the holder and feed the filament up through the PTFE tube until it reaches the extruder.Your printer came with a spool of PLA filament - the easiest material to print and perfect for your first prints. You will learn about other filament types on Day 4.
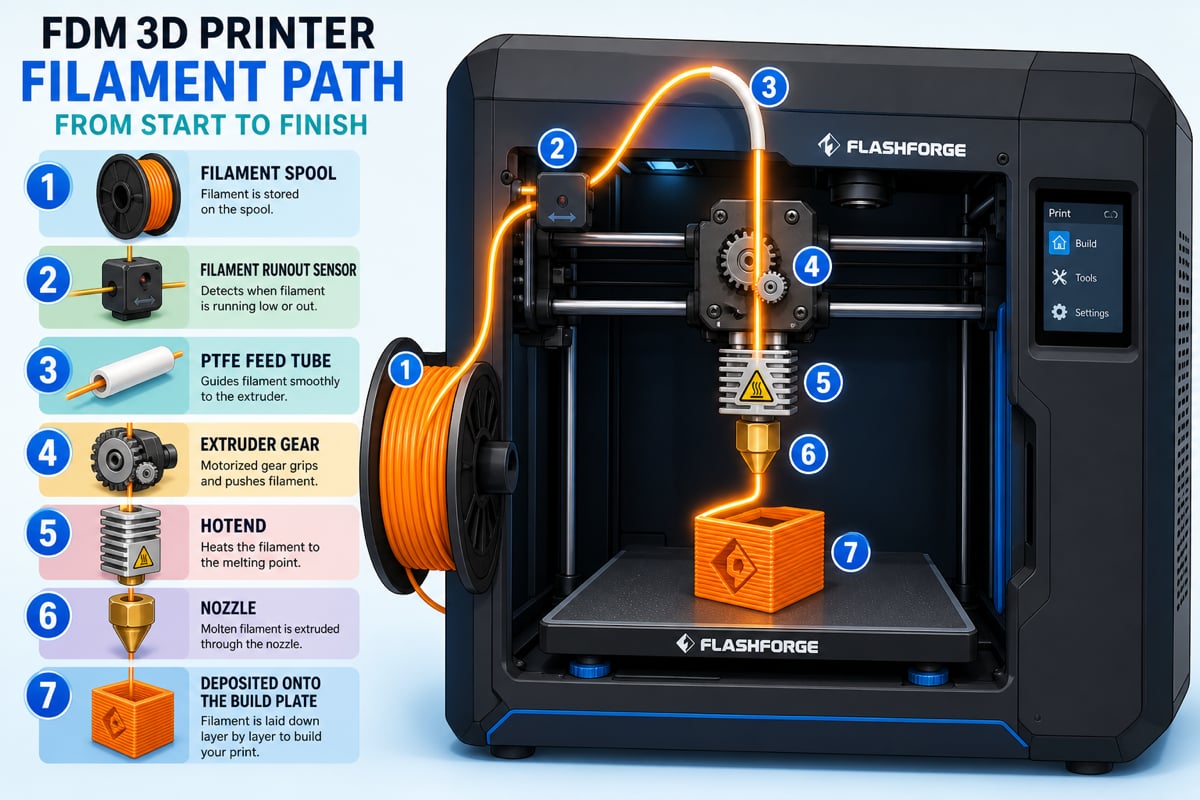
The path filament takes from spool to nozzle
Step-by-step
1
Unpack the filament
Pull the filament spool out of its box. Find the crimped end hooked into the side of the spool that holds the filament in place.
2
Free and trim the end
Unhook the filament end and cut off the bent, crimped tip with your pliers. A clean end feeds far more reliably.
3
Mount the spool on the holder
Place the spool onto the I-shaped holder on the back of the printer. Seat it against the small clasp clip so it cannot fall off. Orient it so filament feeds up toward the tube.
4
Cut a sharp 45-degree point
Trim the filament tip at a 45-degree angle with your pliers to create a spearhead point. This sharp tip slides into the tube much more easily.
5
Feed filament through the tube
Push the pointed filament into the PTFE tube and keep pushing it through. You can watch the tube change color as the filament travels through it.
6
Push until it reaches the extruder
Continue until the filament stops - it has reached the extruder head (the gray piece) and will not push further. The extruder will heat and push it out the nozzle during printing.
The PLA spool is mounted on the holder, the sharpened filament is fed all the way through the tube, and it has reached the extruder head. You are ready to power on and calibrate.