

From model to machine instructions
A 3D printer cannot read a 3D model directly. It needs G-code - a step-by-step list of moves, temperatures, and extrusion amounts. The software that creates G-code from a model is called a slicer, because it cuts your model into hundreds of thin horizontal layers.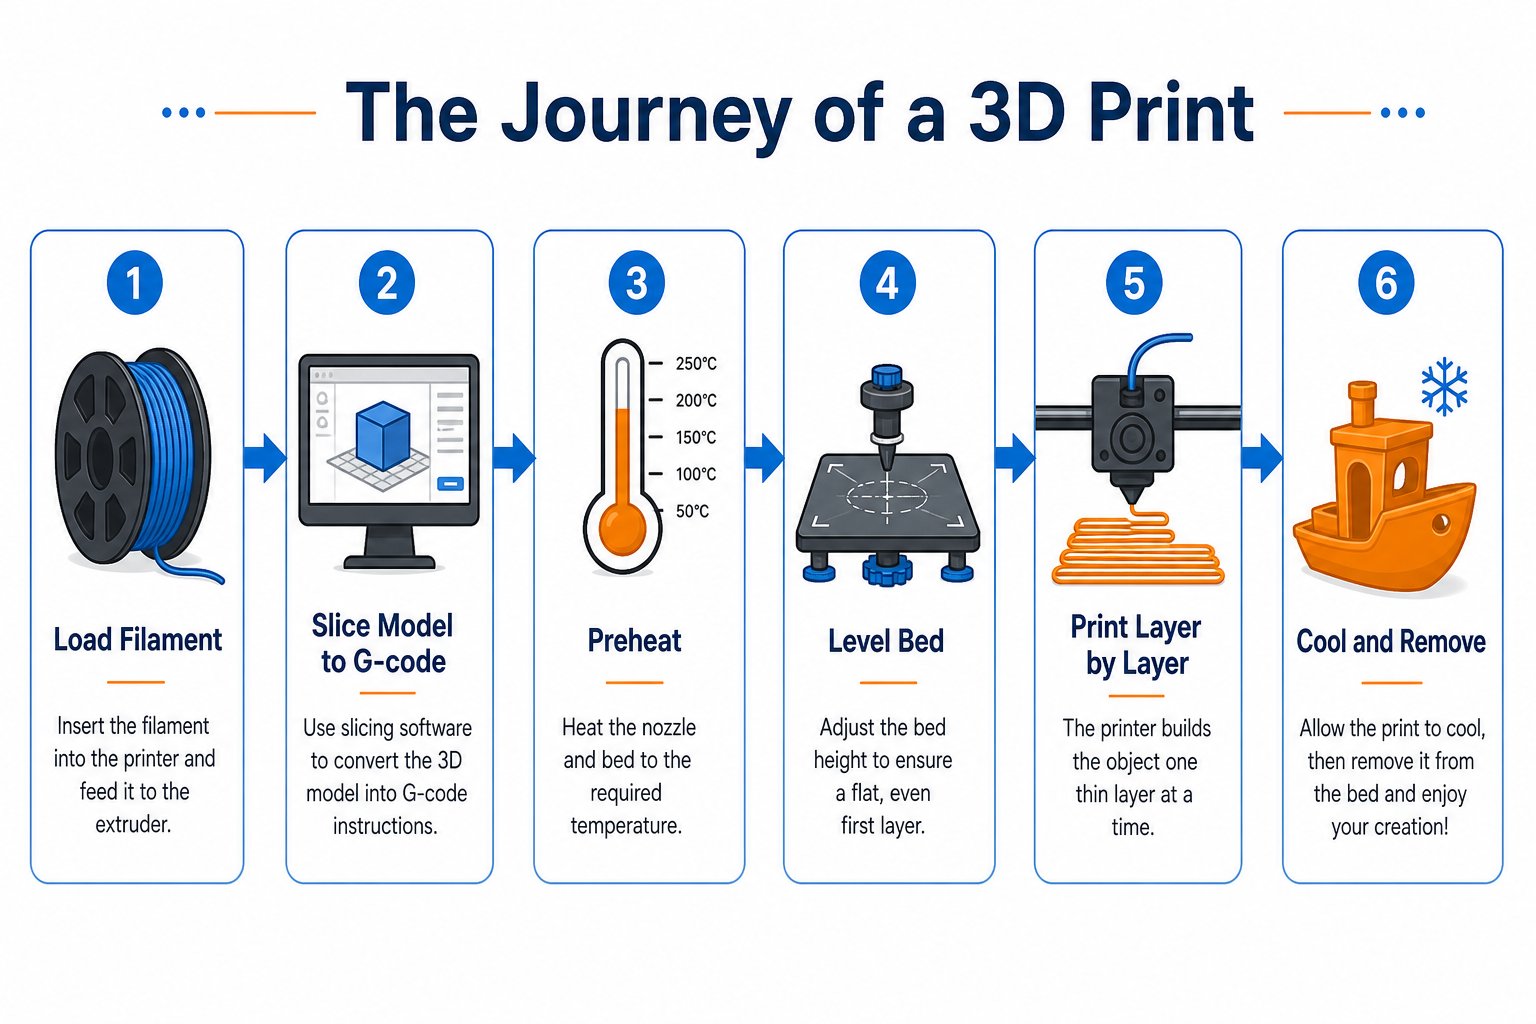
Slicing sits between your 3D model and your printer
The software you will use
Orca-Flashforge (slicer)
A desktop slicer that imports your model, applies print settings, generates G-code, and sends the job to your printer. This is where you control quality, speed, and supports.
Flash Maker (mobile app)
The phone app you bound to your printer during setup. Use it to send jobs, monitor prints, and control the printer remotely.
Orca-Flashforge is Flashforge’s version of the popular open-source OrcaSlicer. Other common slicers include Cura and PrusaSlicer - the concepts are the same across all of them.
The slicing workflow
1
Get a 3D model
Design your own in CAD software (Tinkercad, Fusion 360, or Onshape), or download a ready-made model from a site like Thingiverse, Printables, or MakerWorld. Models come as STL, OBJ, STEP, or 3MF files.
2
Import into the slicer
Open Orca-Flashforge and set it up with your machine (Adventurer 5M) and material (PLA). Import your model onto the virtual build plate.
3
Position and orient the model
Place the model flat and stable on the plate. Orientation affects strength, surface quality, and how many supports you need.
4
Choose your print settings
Set layer height, infill, speed, and supports (explained below). Start with a preset profile if you are unsure.
5
Slice and preview
Click Slice. The software generates G-code and shows a preview with the estimated time and filament usage. Scrub through the layers to check for problems.
6
Send to the printer
Send the job over Wi-Fi through Flash Maker, or export the G-code to a USB drive. Then start the print from the printer or the app.
Key slicer settings
These are the settings you will adjust most often. Understanding them is the difference between a good print and a failed one.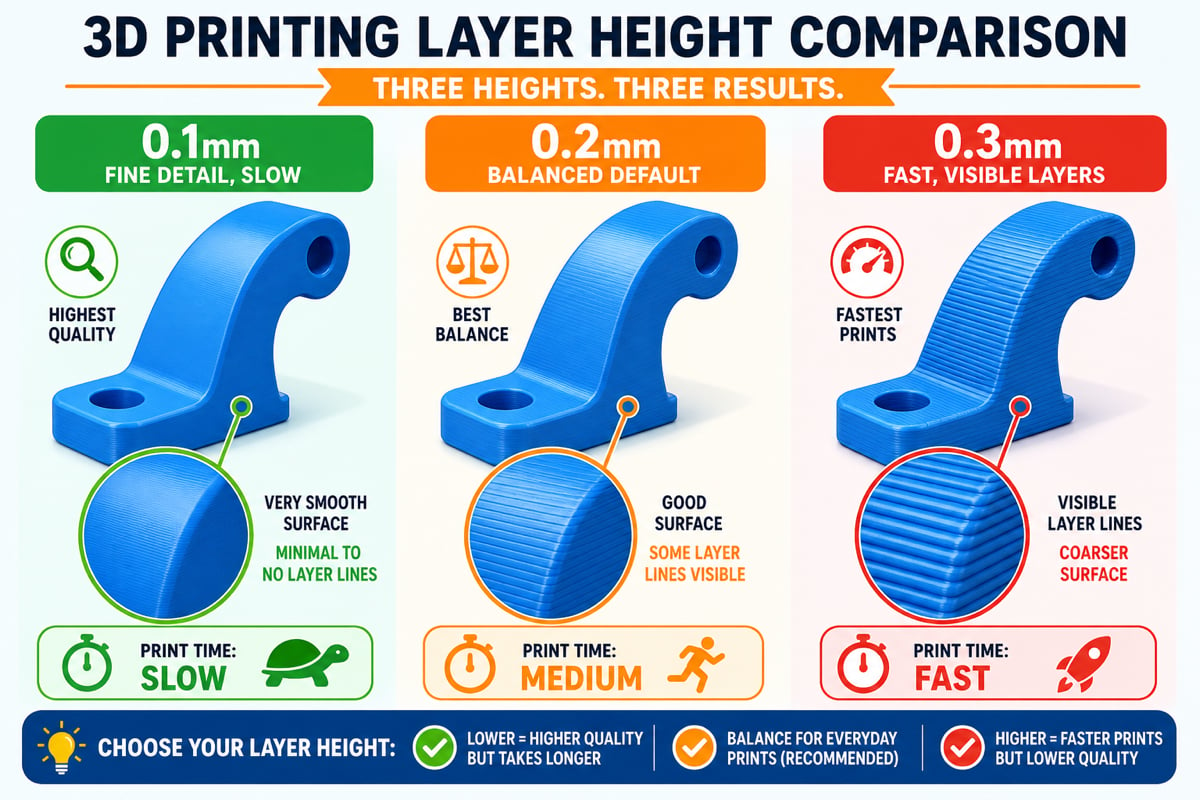
Layer height trades detail against print speed
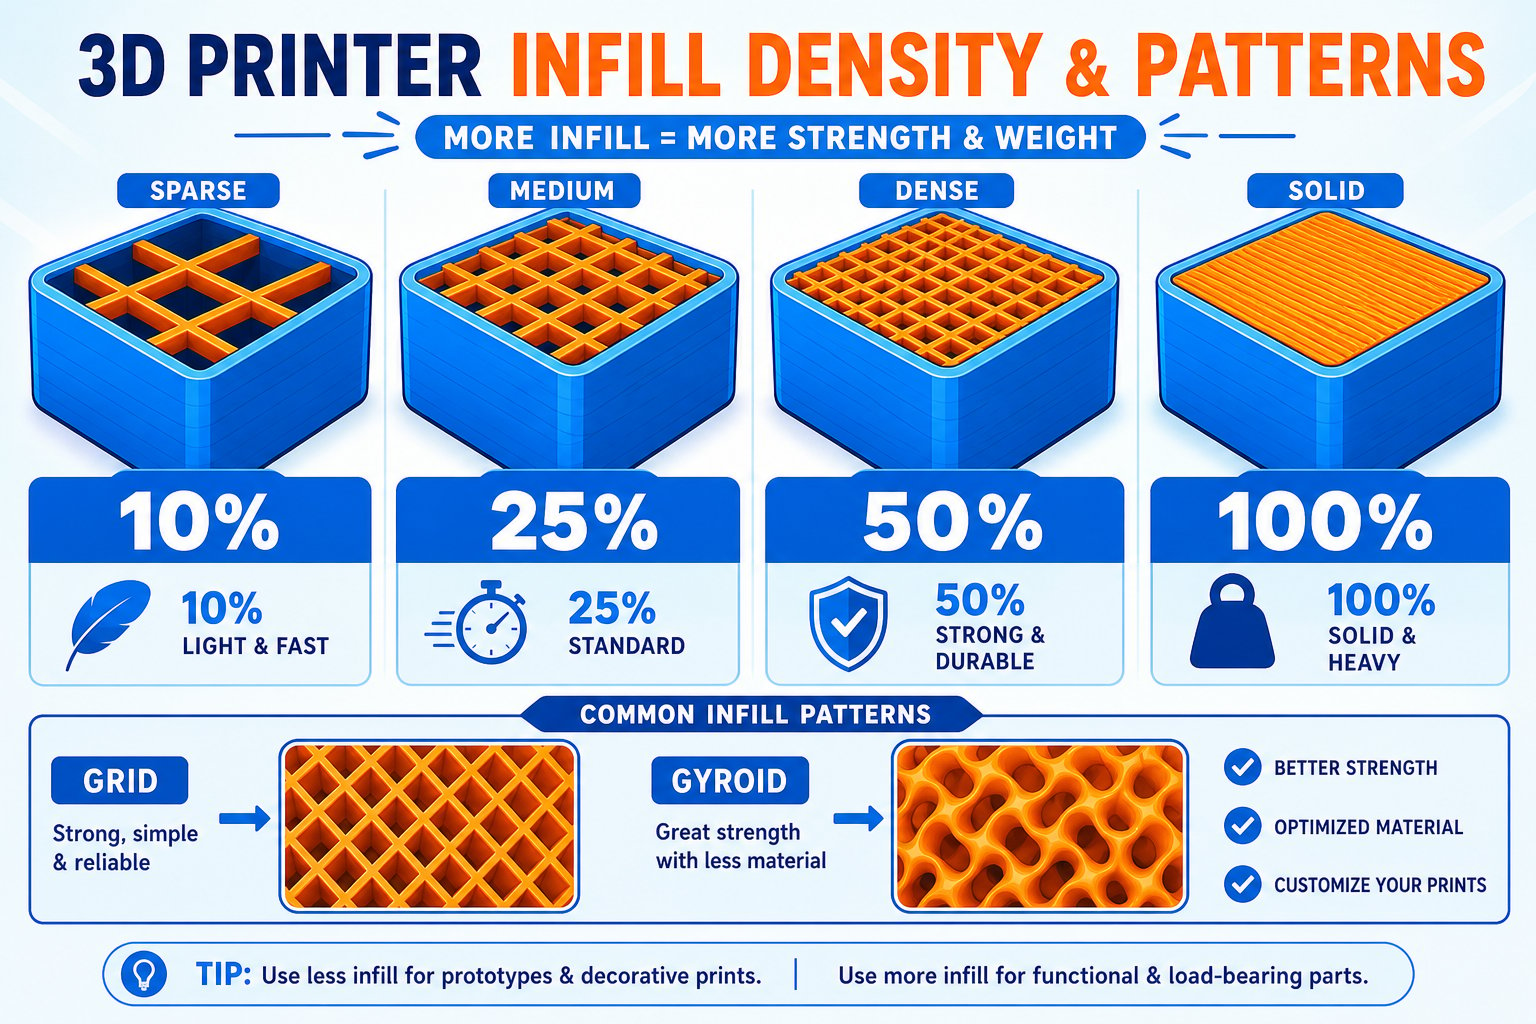
Infill density controls how strong, heavy, and slow your print is
Layer height
Layer height
How thick each layer is, in millimeters. Smaller (0.1 mm) means finer detail but slower prints. Larger (0.3 mm) means faster prints but visible layer lines. 0.2 mm is a great all-around default.
Infill
Infill
The internal fill pattern and density (as a percentage). 10-20% is fine for decorative prints; 40-60%+ for strong, functional parts. More infill means stronger, heavier prints that use more filament and time.
Print speed
Print speed
How fast the nozzle moves. Faster saves time but can hurt quality and adhesion. Slow down for tall, detailed, or tricky prints.
Supports
Supports
Removable scaffolding printed under overhangs that would otherwise print into thin air. Enable supports when your model has steep overhangs (roughly beyond 45 degrees) or floating parts.
Adhesion (brim / raft / skirt)
Adhesion (brim / raft / skirt)
Extra material around the first layer to help it stick. A brim adds a flat border for grip; a raft prints the model on a removable base; a skirt just primes the nozzle without touching the model.
Temperature
Temperature
Nozzle and bed temperatures for your material. The slicer sets sensible defaults per filament, but you can fine-tune them (you will learn material temperatures on Day 4).
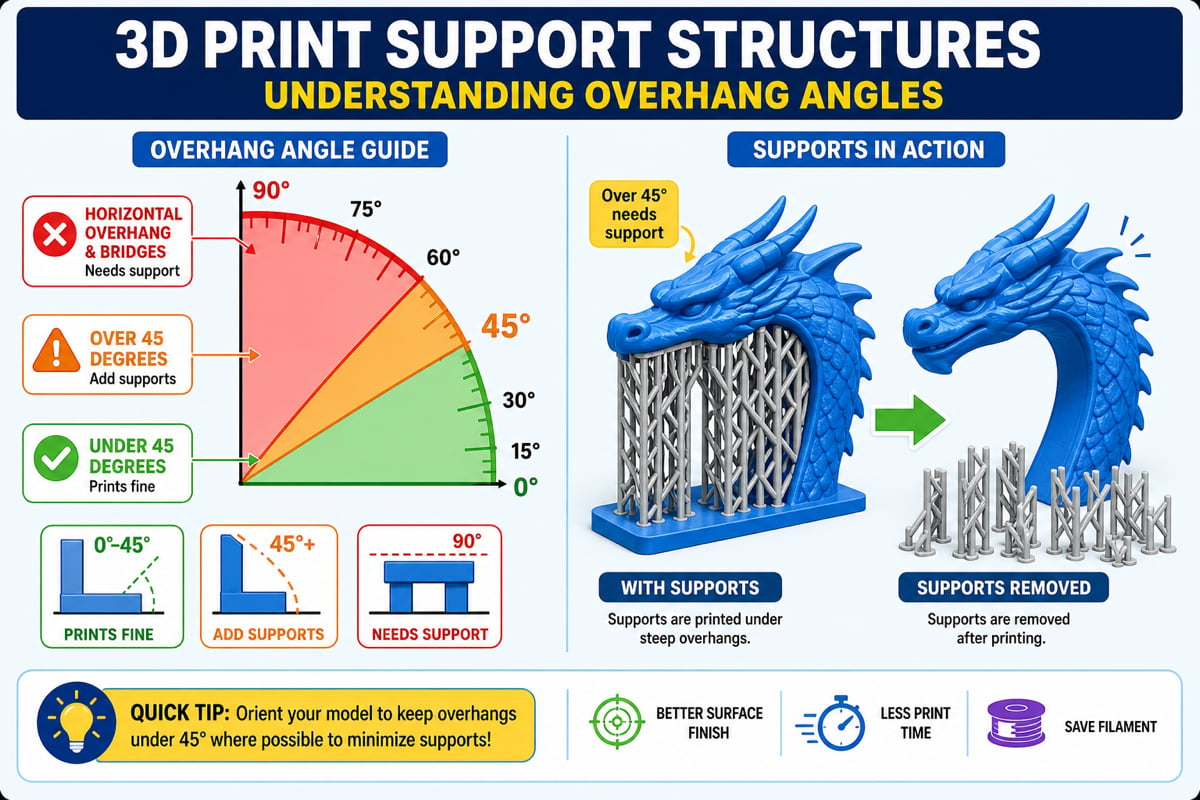
Supports hold up steep overhangs, then break away after printing
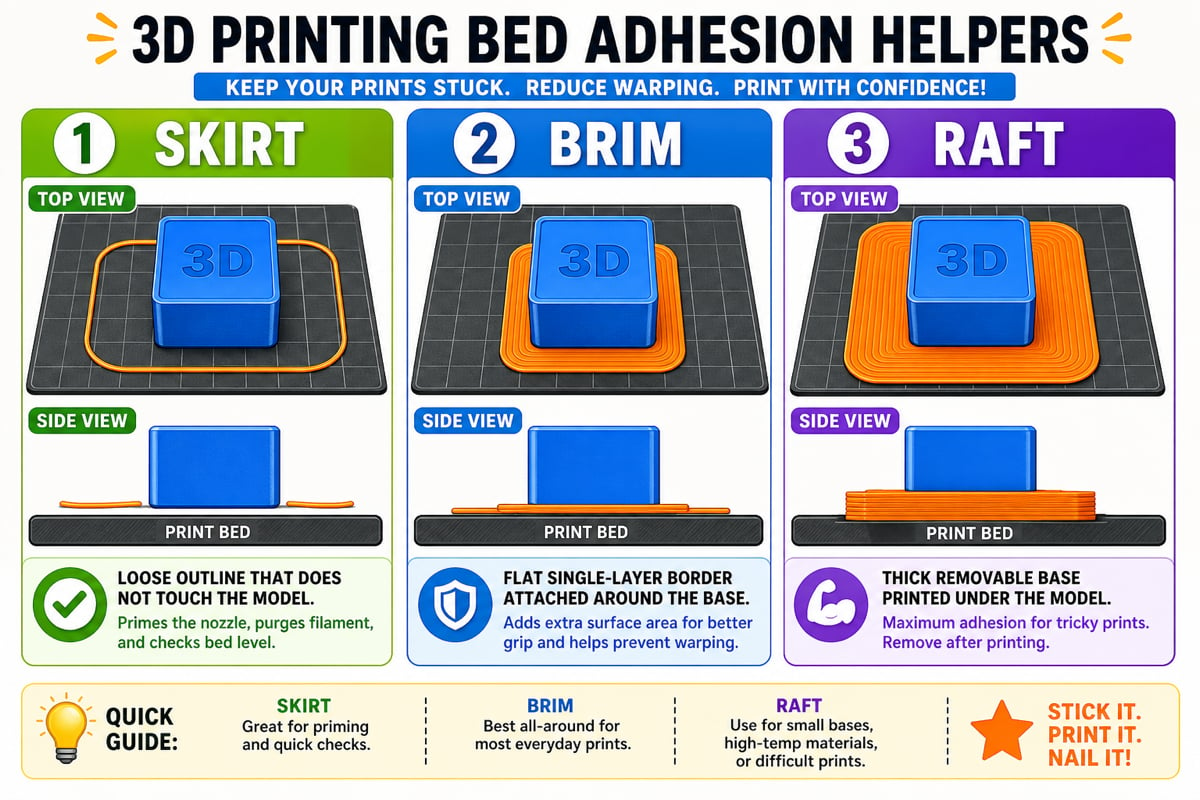
Skirt, brim, and raft each help the first layer stick in different ways
Understanding G-code
G-code is just text - a list of simple commands the printer follows in order. You do not have to write it by hand, but it helps to know what it looks like:Ways to send a print
You understand the model-to-print pipeline: get a model, import and orient it, choose settings, slice to G-code, preview, and send. You know what layer height, infill, speed, and supports do.