

The journey of a 3D print
3D printing is more than just hitting “print.” It is a carefully choreographed process that turns a spool of plastic into a physical, functional object - layer by layer. Let’s follow that journey from the very beginning: loading filament, receiving a design, and executing a print to completion.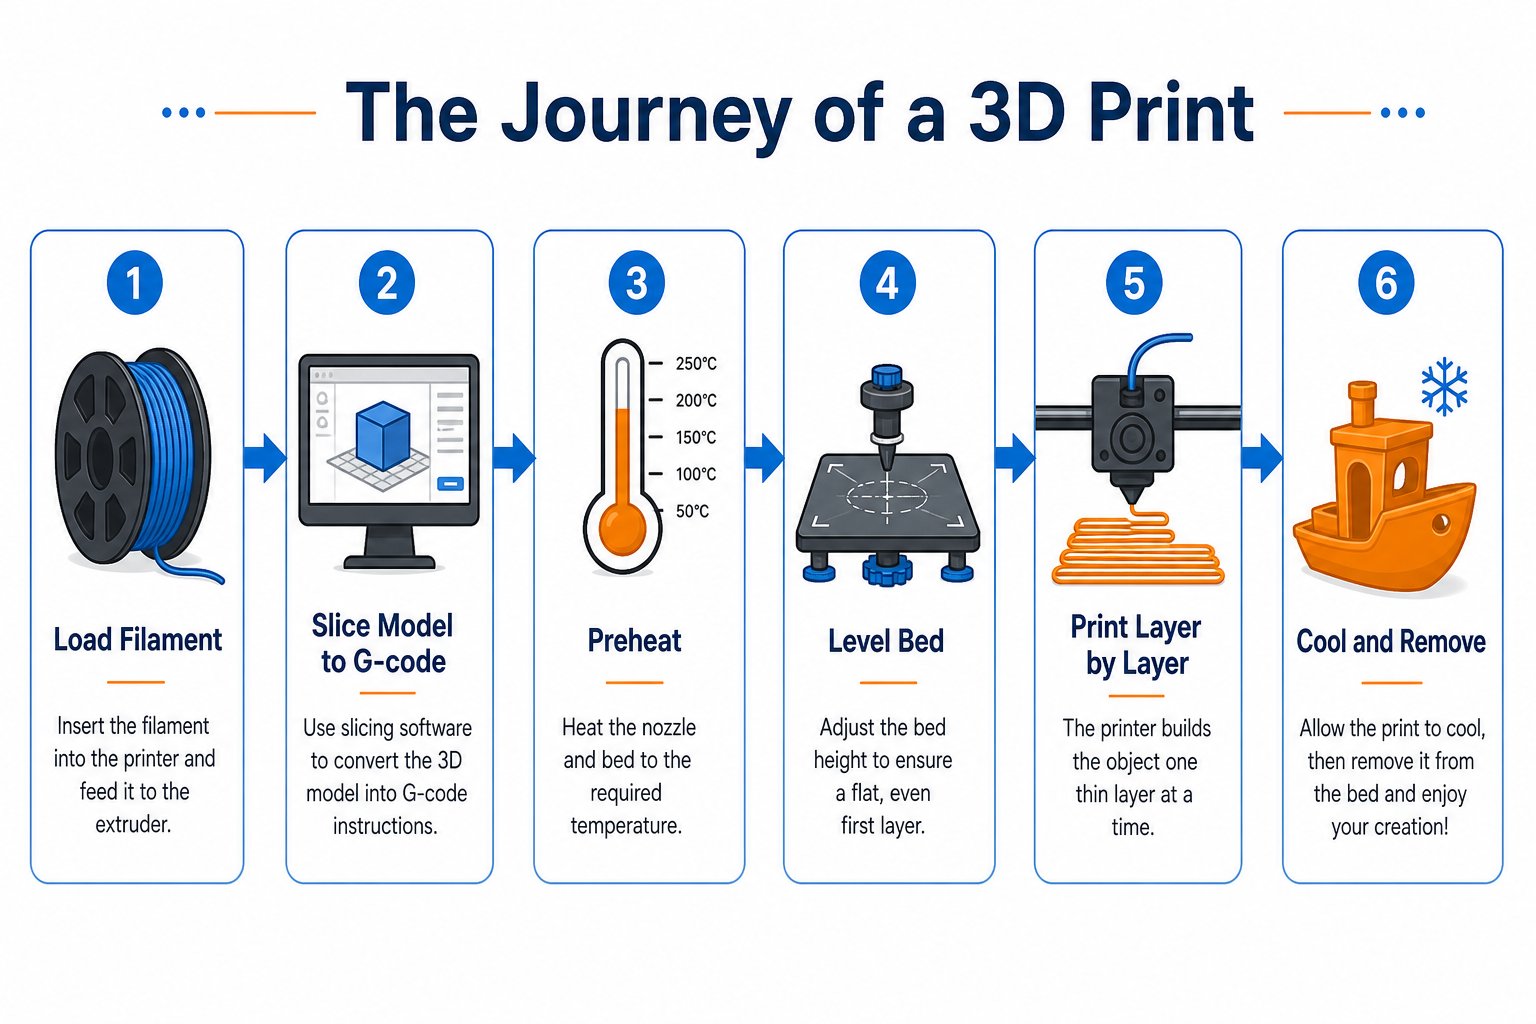
The six core stages of every 3D print
What is FDM?
Your printer uses Fused Deposition Modeling (FDM), also called Fused Filament Fabrication (FFF). The idea is simple:Melt a thin strand of plastic and lay it down in precise paths, one thin layer on top of another, until the layers add up to a 3D object.Each layer is only a fraction of a millimeter thick. Stack hundreds of them and you get a solid part. This is additive manufacturing - you build up material - as opposed to subtractive methods like carving or milling that cut material away.
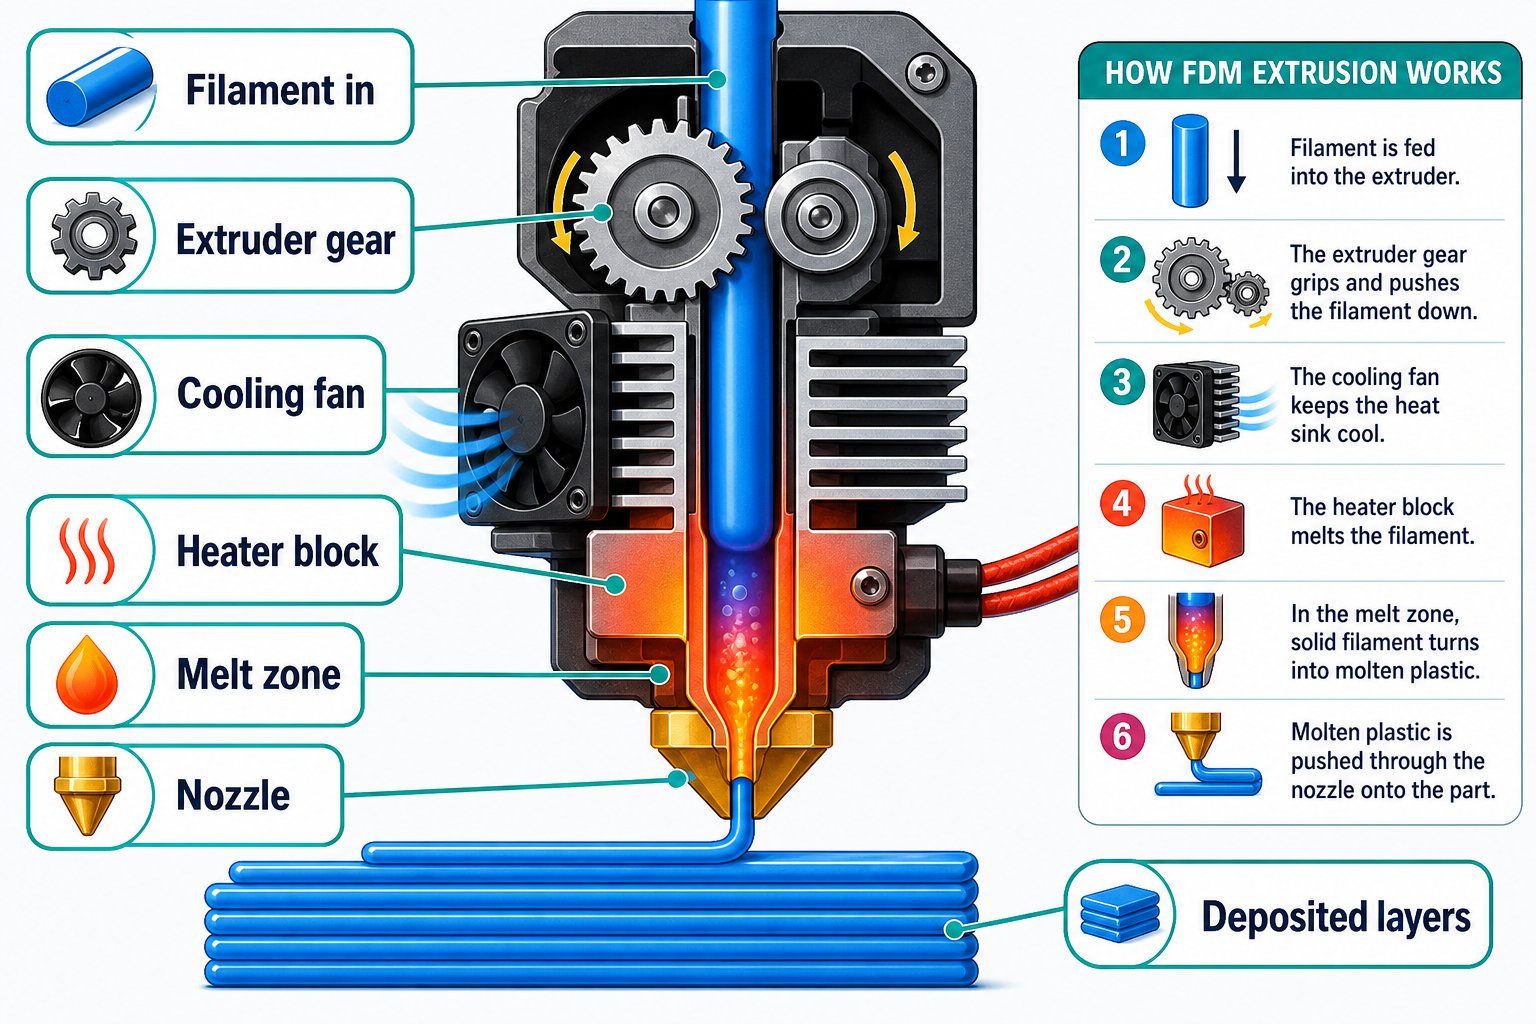
Inside the extruder and hotend: how filament becomes a printed layer
Step by step
Step 1: Loading the filament
It all begins with filament - a long strand of thermoplastic wound on a spool. This could be PLA, PETG, ABS, or another type, each with different properties and temperature requirements. The filament is fed into the printer’s extruder, where gears grab it and guide it down toward the hotend. But nothing melts yet - the printer still needs instructions.
Step 2: Receiving the G-code file
A designer creates a 3D model, then runs it through slicing software like Orca-Flashforge, Cura, or PrusaSlicer. Slicing turns the model into a special language called G-code. G-code tells the printer exactly what to do: where to move, how fast, how hot, and how much filament to push out. The file is loaded via USB, or sent over Wi-Fi.
Step 3: Preheating the printer
Before anything prints, the printer heats up. The hotend rises to between 190 C and 250 C depending on the filament, melting the plastic just enough to squeeze through the nozzle. At the same time, the heated bed warms up to help the first layer stick. A warm bed prevents warping and keeps layers flat.
Step 4: Bed leveling and calibration
The printer checks that the nozzle is the correct distance from the bed. Too far and filament will not stick; too close and the nozzle scrapes or clogs. The Adventurer 5M uses automatic bed leveling to measure and adjust the distance across the whole bed. Once leveled, the printer knows exactly where to begin.
Step 5: Priming the extruder
Before the real print starts, the printer extrudes a small line of filament off to the side. This is called priming - it confirms melted plastic is flowing smoothly and no clog has formed.
Step 6: The print begins
Now the action starts. The printer moves along the X, Y, and Z axes as it lays down the first layer. This is the most important part of the whole print - if the first layer sticks properly, the rest usually succeeds. The printer then continues, layer by layer, drawing the shape in melted plastic.
Step 7: Monitoring and adjustments
During the print you can monitor temperature, speed, and layer progress. Cooling fans turn on to solidify each layer. If something goes wrong - filament runs out or layers shift - you can pause or stop the print.
Step 8: Print finishes and cools down
After the final layer, the printer stops extruding and cools. The hotend and bed gradually drop in temperature. Once cool, you gently remove the print. Flexible plates let the part pop off; others need a scraper.
Step 9: Post-processing (optional)
Depending on the print, you may remove supports, sand edges, or glue parts together. Some prints can be painted or polished for a professional finish.
The three axes of motion
An FDM printer positions the nozzle in 3D space using three axes: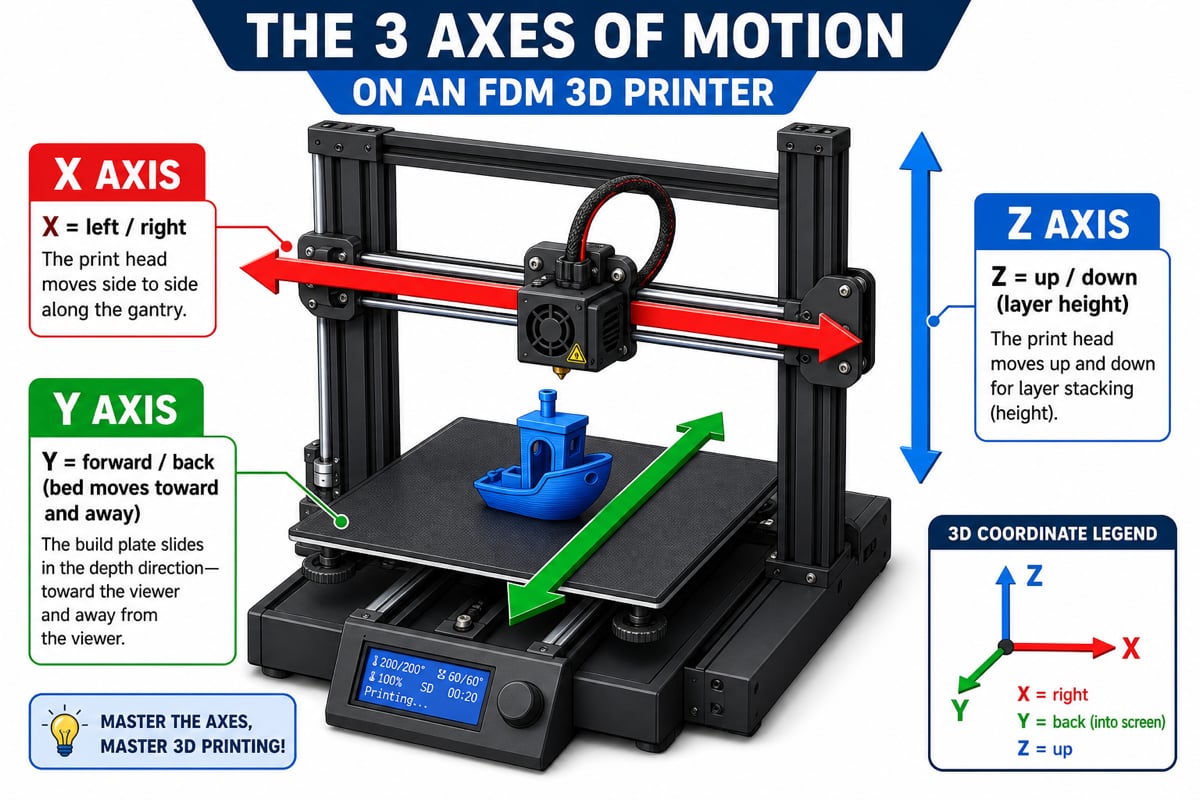
The X, Y, and Z axes of motion on a 3D printer
X axis
Left and right movement of the print head.
Y axis
Forward and back. On the Adventurer 5M, the build plate moves to create the Y motion.
Z axis
Up and down. After each layer finishes, the Z axis raises the print head so the next layer can be laid on top.
Why the first layer matters most
If you remember one thing from today, remember this: the first layer makes or breaks a print.- If the first layer sticks evenly to the bed, the rest of the print has a stable foundation.
- If it does not stick, the print can peel up, shift, or turn into a tangled mess of plastic (a “spaghetti” failure).
Adhesion helpers like a glue stick or painter’s tape give the first layer extra grip. The Adventurer 5M includes a washable glue stick for exactly this purpose.