

Your computer trusts keyboards completely
When you plug a keyboard into your computer, something interesting happens: the operating system trusts it immediately. No permission prompt. No security scan. No “are you sure?” dialog. The computer accepts every keystroke as if a legitimate user is sitting at the desk. This behavior is by design. Keyboards are Human Interface Devices (HID) - the USB device class that includes keyboards, mice, and game controllers. Operating systems have trusted HID devices unconditionally since the early days of USB because you need your keyboard to work the moment you plug it in, before you can even type a password. Keystroke injection exploits this trust. A keystroke injection device looks like a USB flash drive on the outside, but when you plug it in, the computer sees a keyboard. The device then “types” pre-programmed commands at superhuman speed - hundreds of keystrokes per second - executing whatever script the attacker loaded onto it.The USB Rubber Ducky is the most well-known keystroke injection tool. Created by Hak5, it looks like an ordinary USB flash drive but registers as a keyboard when plugged into a target computer.
History of the USB Rubber Ducky
The USB Rubber Ducky was created by Darren Kitchen, founder of Hak5, in 2010. It wasn’t originally designed as an attack tool - Kitchen built it to solve a mundane IT problem.- The origin story
- Pop culture impact
- Evolution
Kitchen was working as an IT administrator and got tired of manually typing the same commands over and over - fixing printers, mapping network drives, configuring workstations. He wanted a device that could automate repetitive keyboard input, plug-and-play, on any computer.The result was a USB device with a microcontroller, a microSD card slot for storing scripts, and firmware that made it register as a keyboard. The Rubber Ducky was born.What Kitchen quickly realized - and what made it legendary - was that this same capability could be used for offensive security. If a device can type anything a human can type, it can also open a terminal, download malware, exfiltrate data, or create a backdoor account.
How it works
The attack chain is straightforward. You write a script, compile it, load it onto the device, and plug it in.1
Write a payload in DuckyScript
DuckyScript is the scripting language designed specifically for the USB Rubber Ducky. You write human-readable commands like
STRING, DELAY, GUI r, and ENTER. Each command maps to a keyboard action.2
Compile the script to inject.bin
The Rubber Ducky doesn’t read raw DuckyScript - it reads compiled binary files. You use PayloadStudio (Hak5’s web-based IDE) to compile your
.txt script into an inject.bin file.3
Load inject.bin onto the microSD card
The Rubber Ducky stores its payload on a removable microSD card. You put the device into arming mode (where it appears as a flash drive), copy
inject.bin to the root of the drive, and eject it.4
Plug the Rubber Ducky into the target computer
When you insert the Rubber Ducky into a USB port, the target computer’s operating system detects a new HID keyboard device. No driver installation is needed - it uses standard USB HID drivers that every operating system has built in.
5
The payload executes automatically
The Rubber Ducky begins “typing” the pre-programmed keystrokes immediately. It can open applications, type commands, navigate menus, download files, modify settings - anything a human with a keyboard can do, but in seconds.
The entire process - from plugging in to payload completion - typically takes between 3 and 15 seconds depending on the complexity of the script. That’s faster than most people can react.
The hardware
The USB Rubber Ducky is a purpose-built piece of hardware. Here’s what it looks like and what each component does.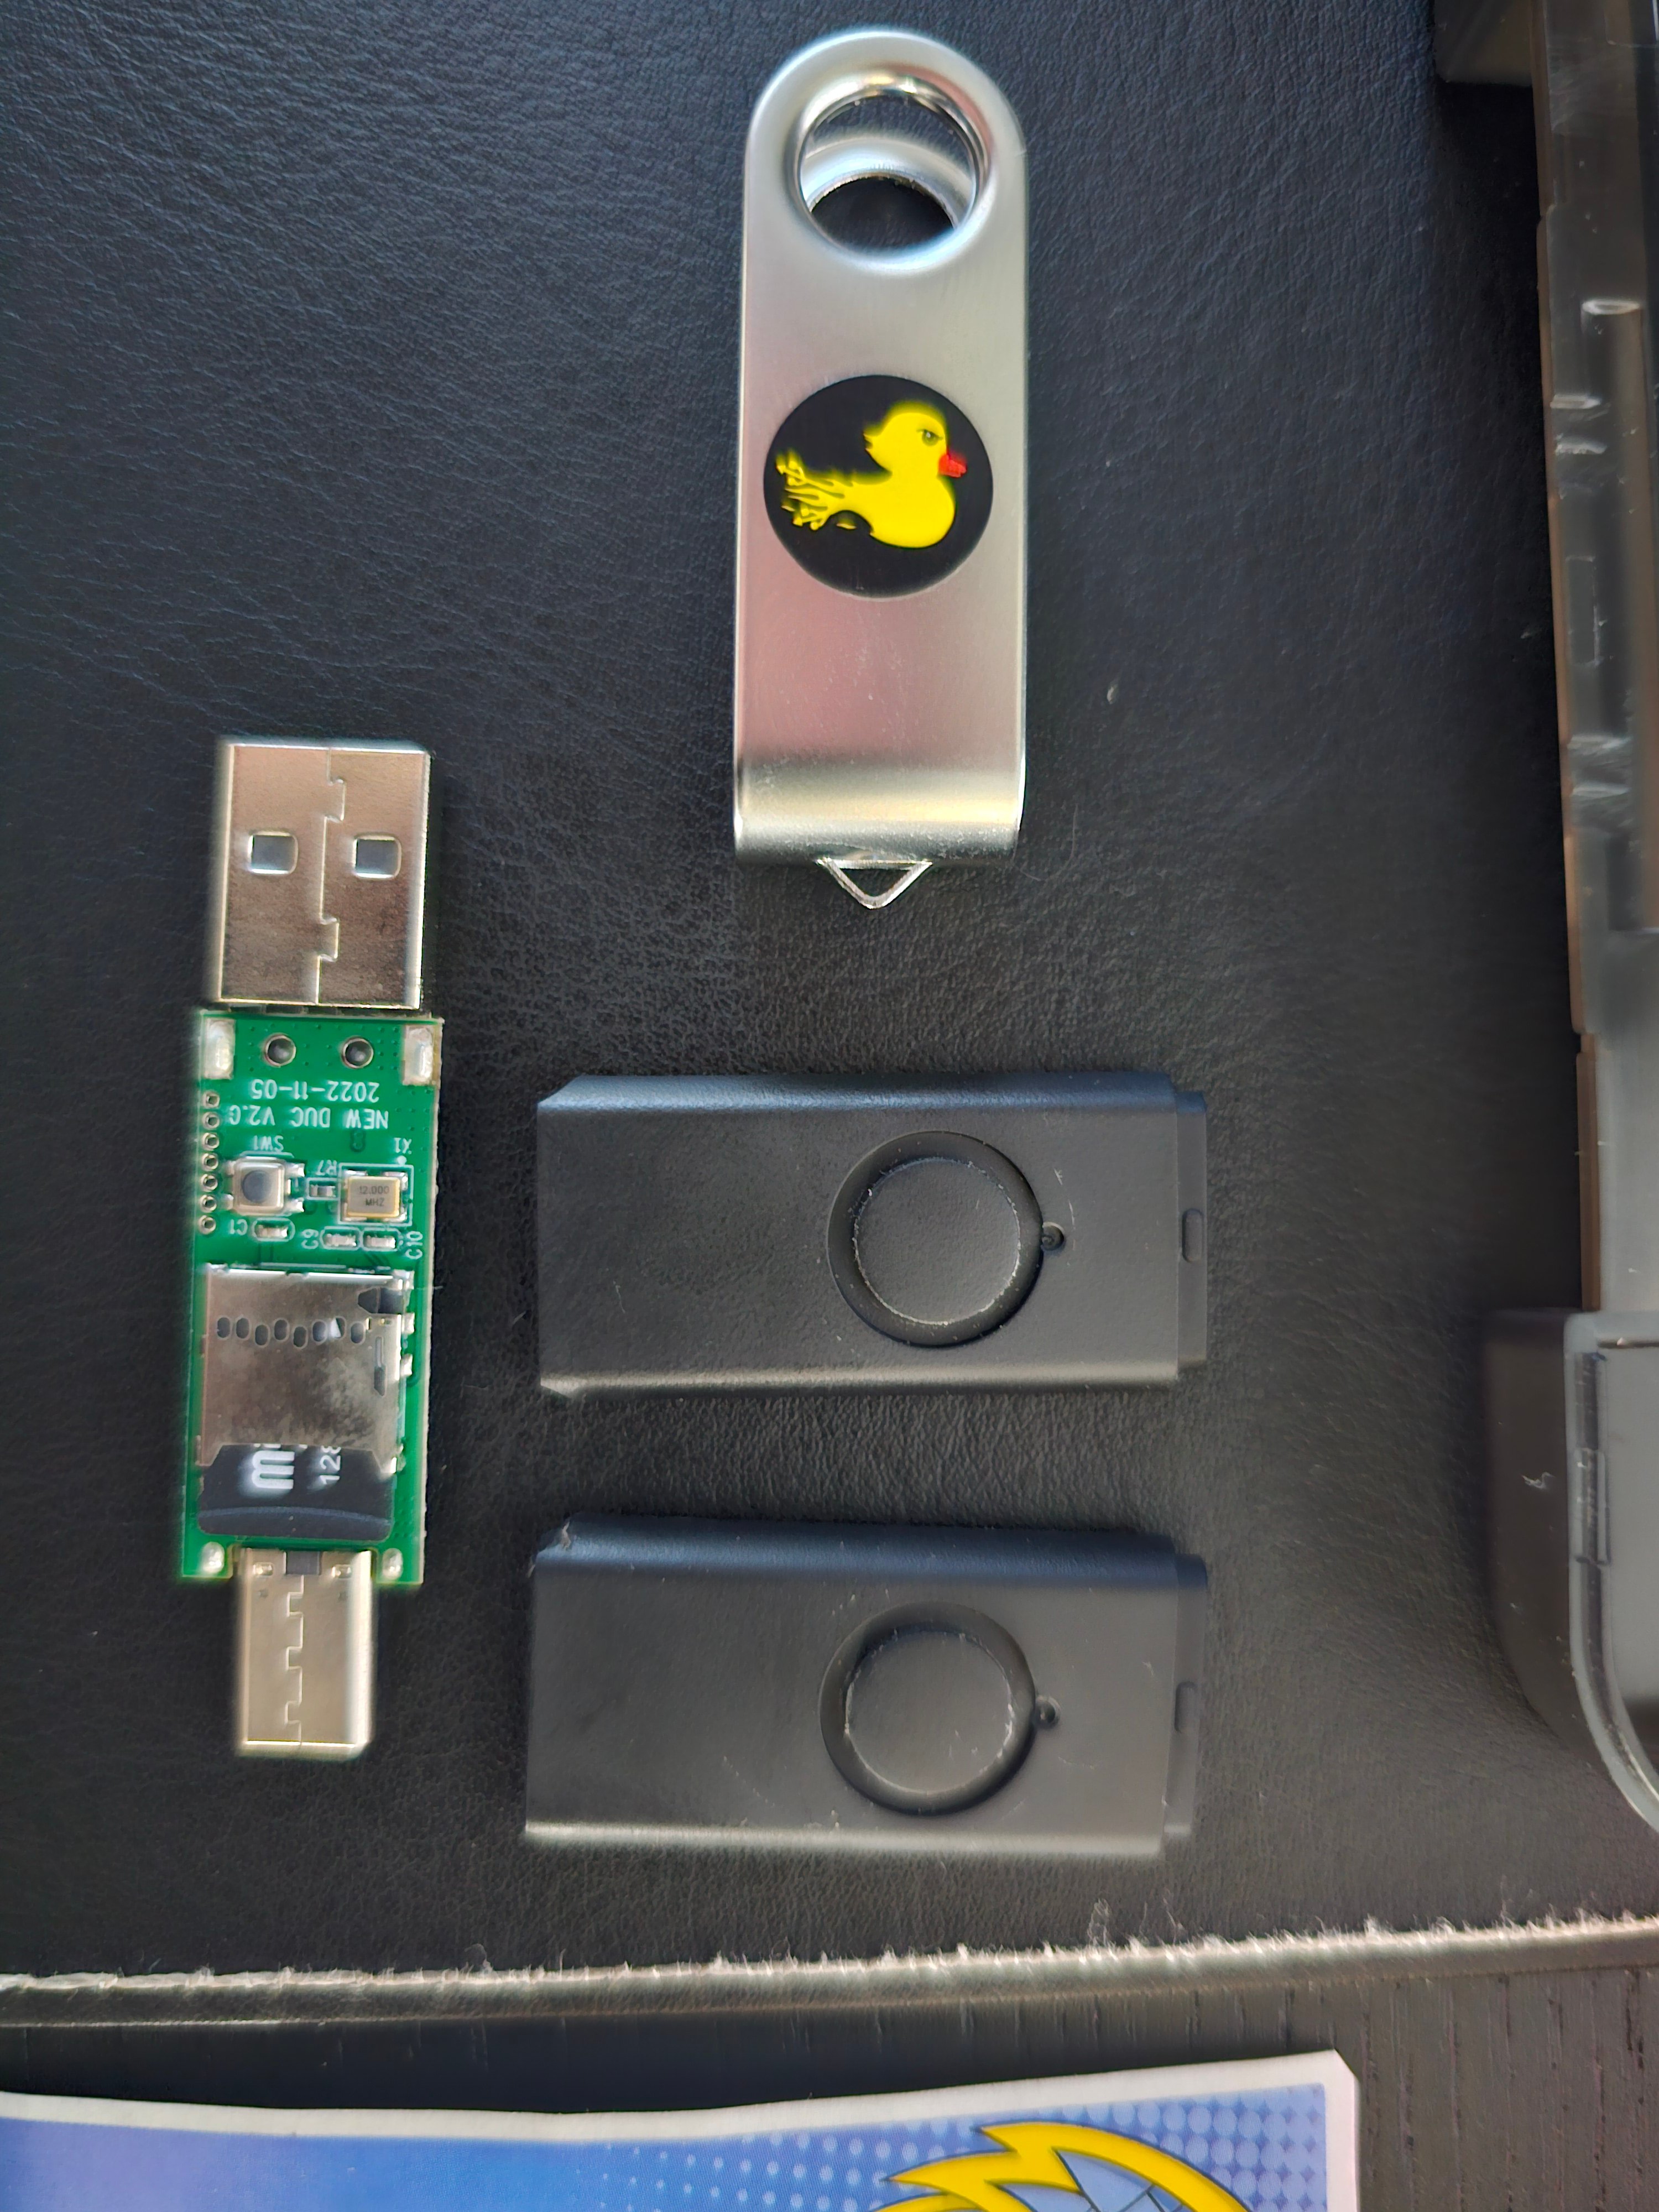
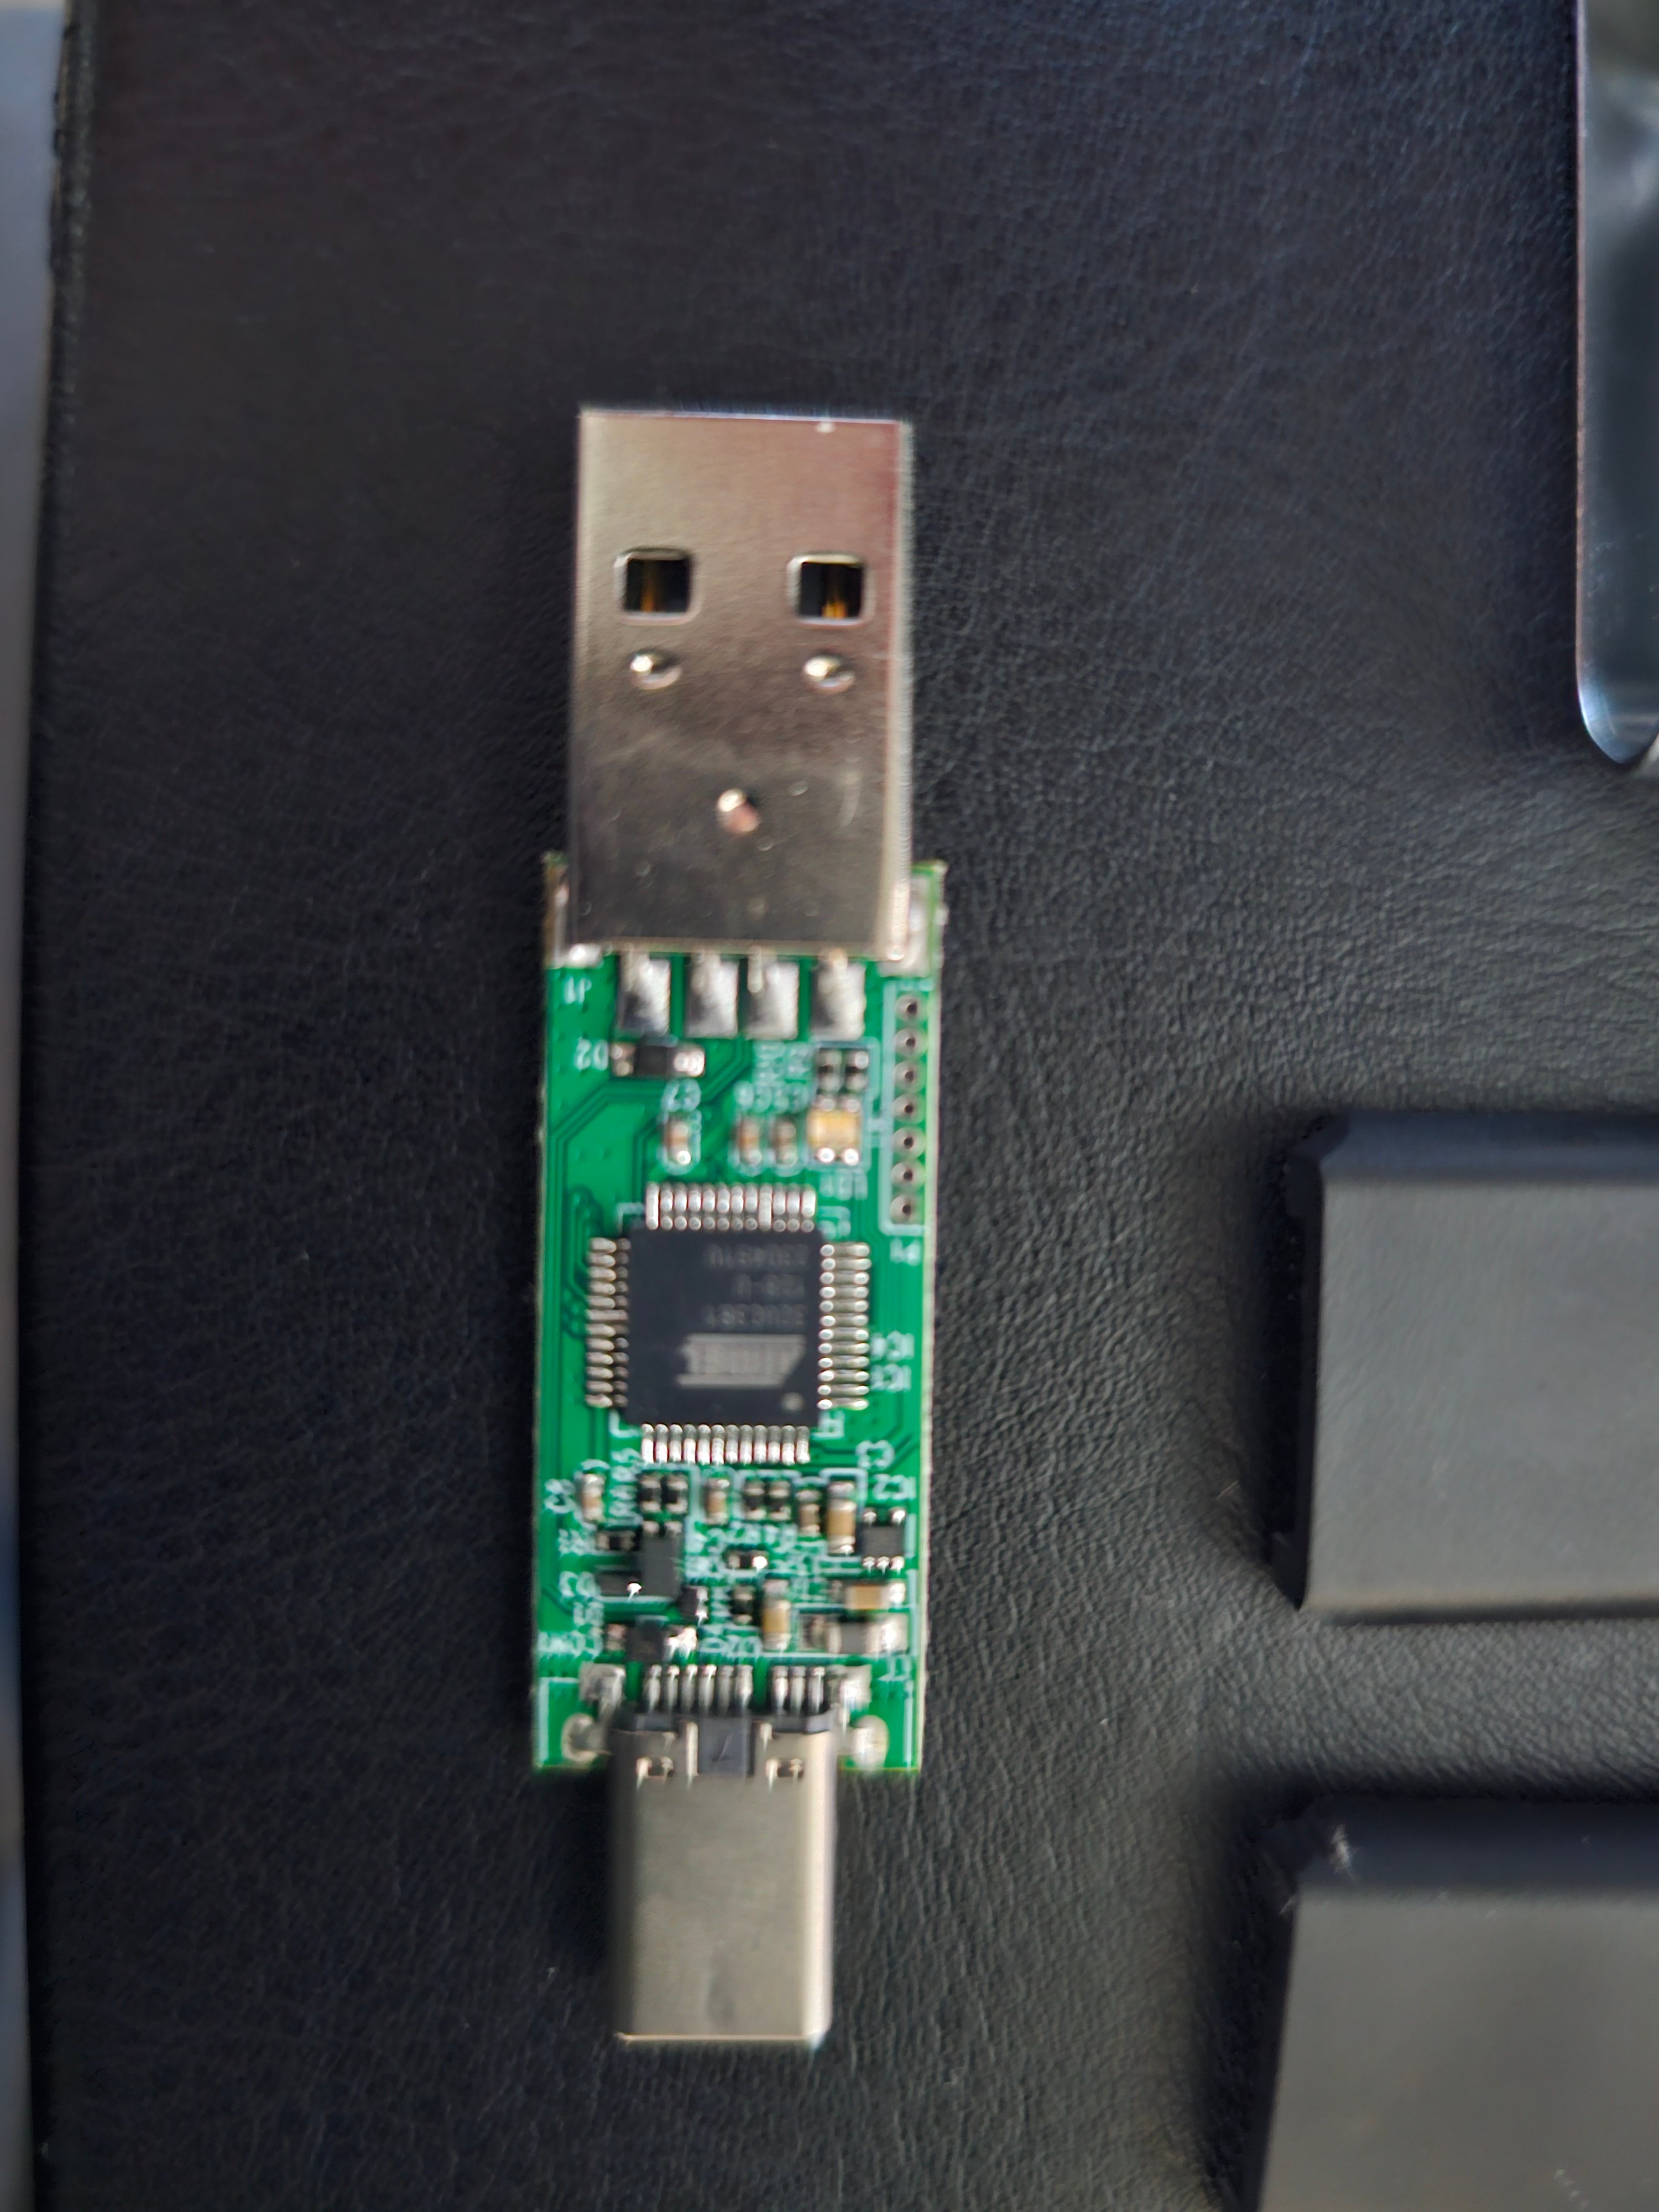
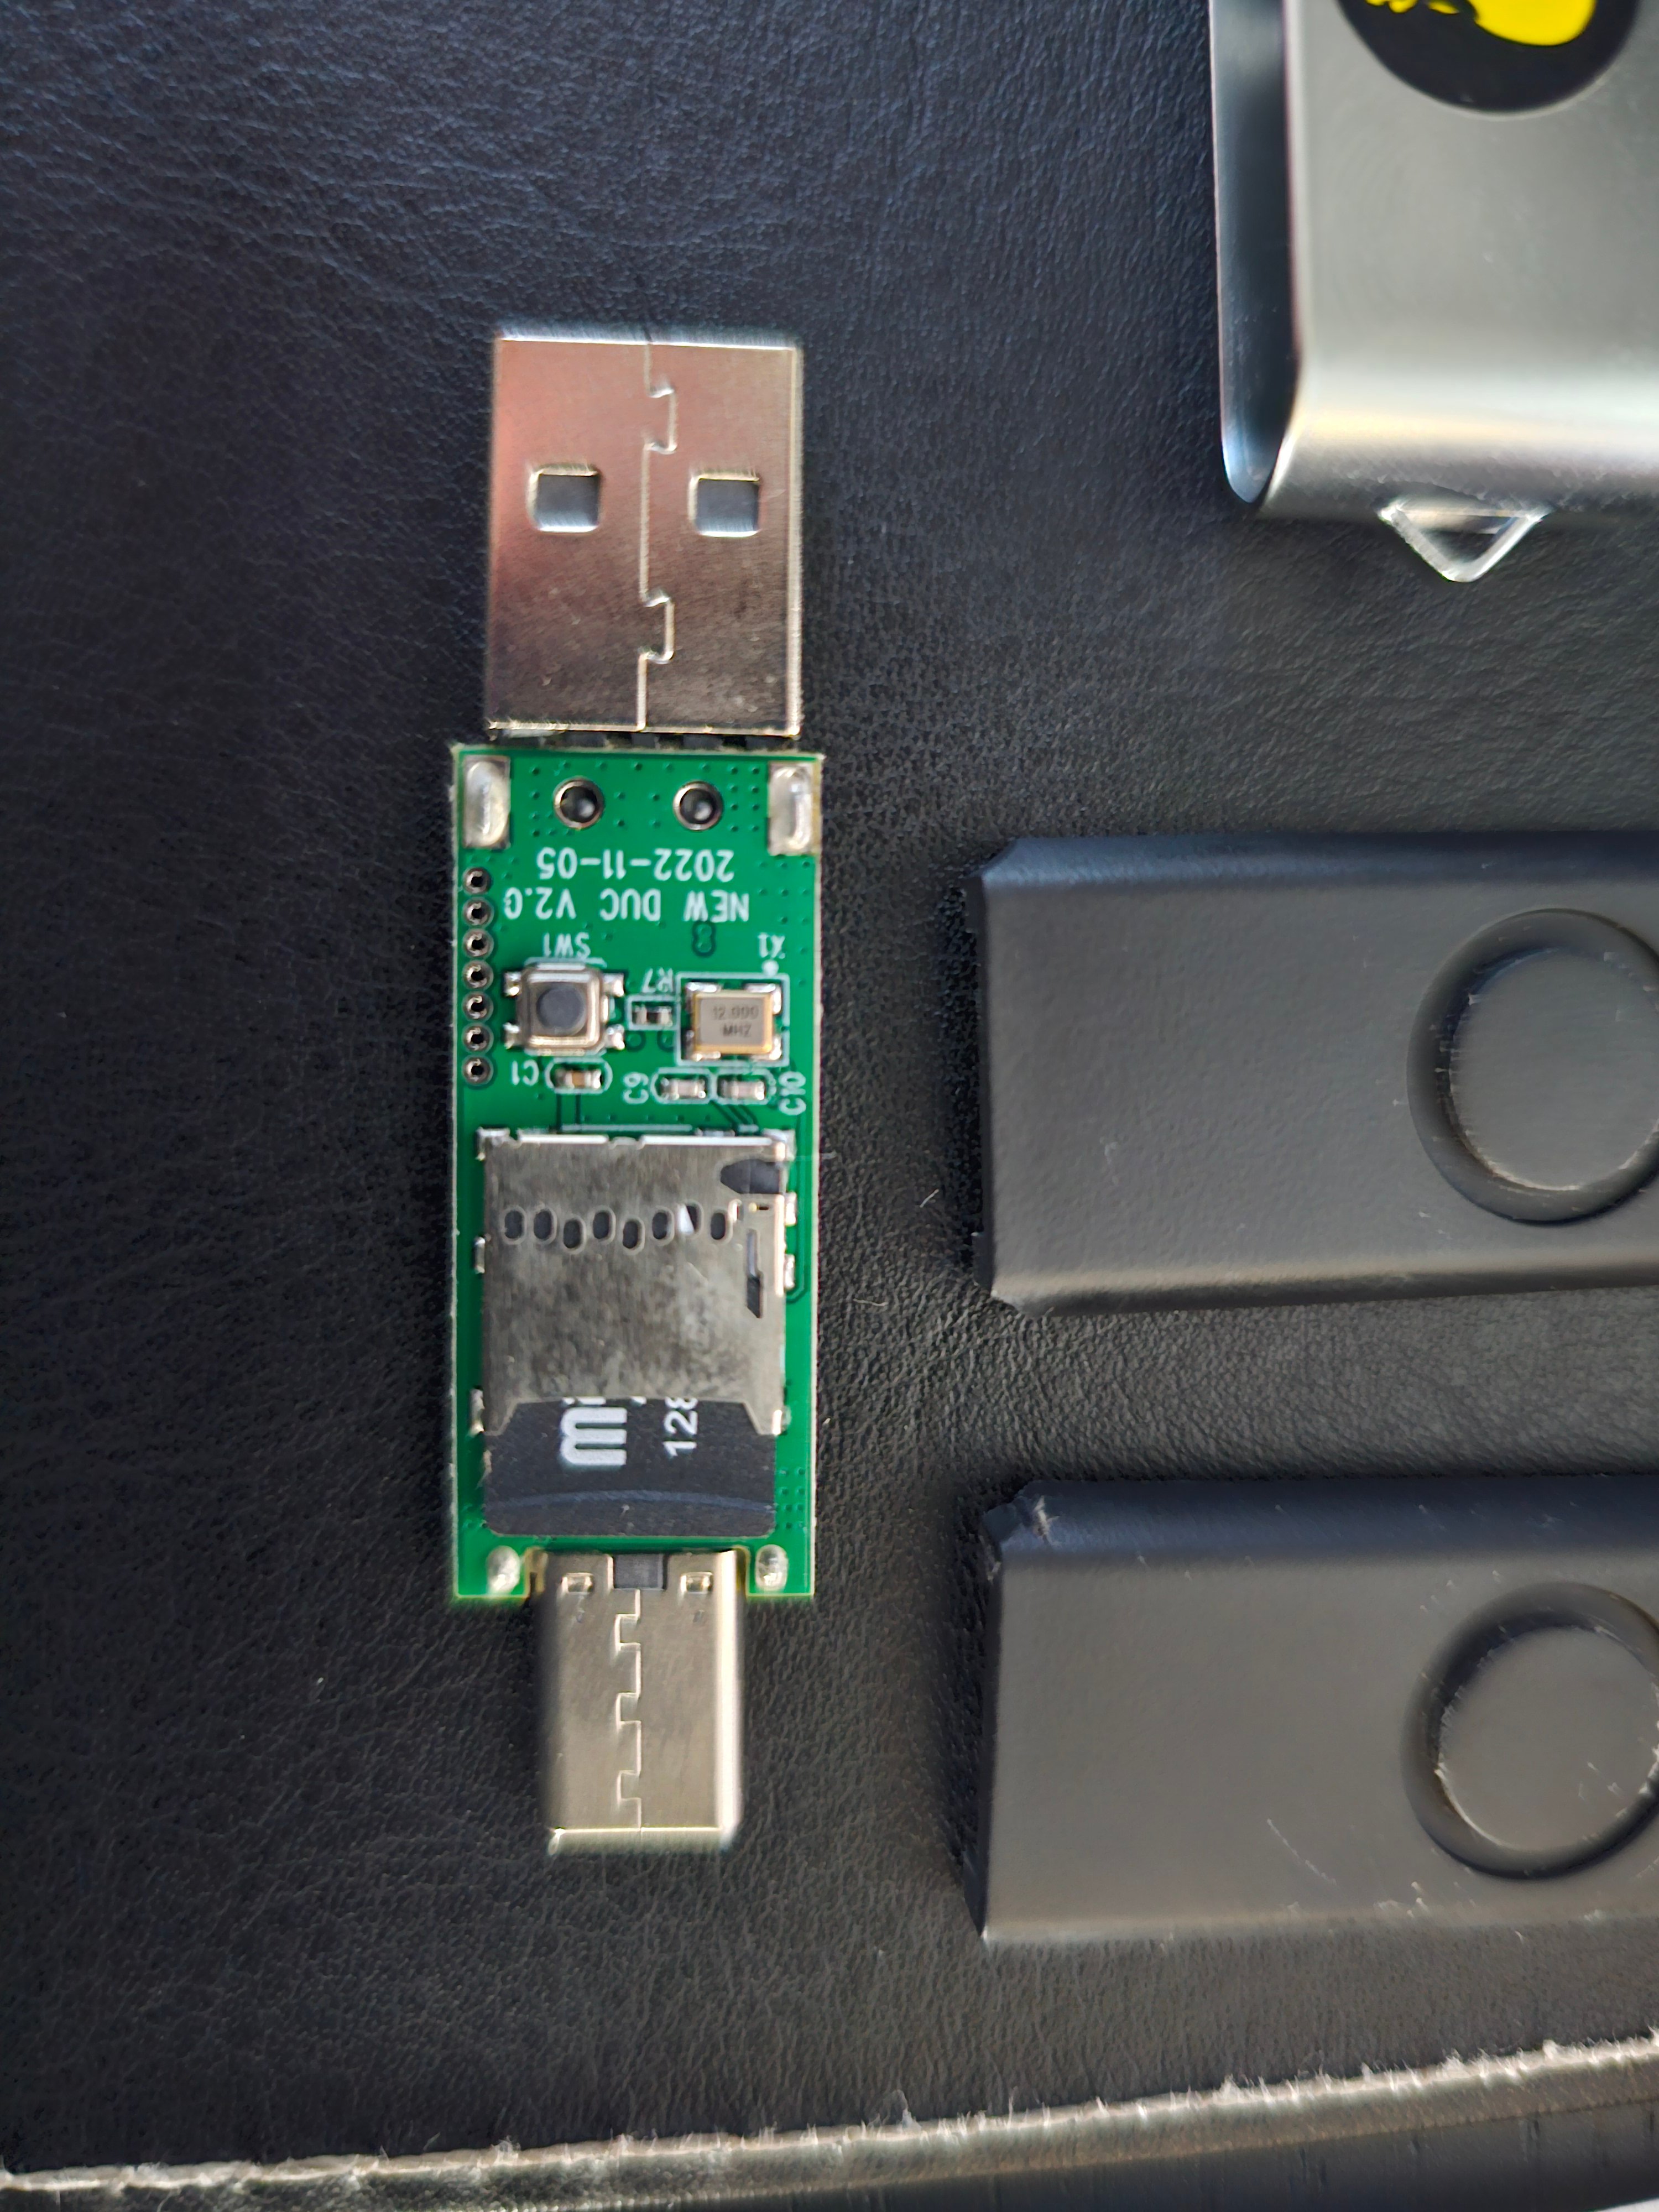
inject.bin from the root of the microSD card on boot. You can swap microSD cards to quickly change between different payloads.
Key concepts
Before you start writing payloads, you need to understand five key terms. You will use these throughout the rest of Day 5.HID (Human Interface Device)
HID (Human Interface Device)
HID is the USB device class for input devices - keyboards, mice, game controllers, and touchscreens. When a USB device identifies itself as an HID keyboard, the operating system loads generic keyboard drivers and starts accepting keystrokes immediately.The Rubber Ducky’s firmware tells the computer “I’m a keyboard” via the USB HID protocol. The computer has no reason to question this - it’s the same protocol that your actual keyboard uses.This is why no special drivers or permissions are needed. The operating system is designed to trust HID devices by default.
Payload
Payload
A payload is the script that tells the Rubber Ducky what to type. It’s a set of instructions - open this application, type this command, press these keys, wait this long.Payloads range from harmless pranks (opening a YouTube video) to devastating attacks (creating backdoor accounts, exfiltrating data, installing remote access tools). The device itself is neutral - the payload determines what it does.You will write payloads in DuckyScript and compile them into
inject.bin files using PayloadStudio.DuckyScript
DuckyScript
DuckyScript is the programming language created by Hak5 specifically for writing USB Rubber Ducky payloads. It uses simple, human-readable commands that map directly to keyboard actions.For example:
STRING Hellotypes the word “Hello”ENTERpresses the Enter keyGUI rpresses Windows+R (opens the Run dialog)DELAY 1000waits one second
Arming mode
Arming mode
Arming mode is when the Rubber Ducky presents itself as a USB flash drive instead of a keyboard. In this mode, the computer mounts the microSD card as a removable drive (usually labeled “DUCKY”), and you can copy files to it.You use arming mode to:
- Load a new
inject.binpayload onto the device - Remove or replace an existing payload
- Check what payload is currently loaded
Attack mode
Attack mode
Attack mode is the default operating mode. When the Rubber Ducky is plugged in with a valid
inject.bin on its microSD card, it registers as a keyboard and immediately begins executing the payload.In attack mode:- The computer sees a keyboard, not a flash drive
- The payload executes automatically - no user interaction required
- The LED can provide visual feedback (if the payload uses
LED_R,LED_G, etc.) - The device cannot be browsed as a storage device
Why this matters for defense
The USB Rubber Ducky is a penetration testing tool, but the attack technique it uses - keystroke injection via malicious USB devices - is a real-world threat. Understanding this attack helps you defend against it.USB baiting
Attackers intentionally leave malicious USB devices in parking lots, lobbies, and conference rooms, hoping someone picks one up and plugs it in. This is a form of social engineering - it preys on human curiosity. Remember the social engineering attacks you learned about on Day 2? USB baiting is one of the most effective.
Supply chain attacks
Some attackers modify legitimate USB devices before they reach the target - intercepting shipments and adding keystroke injection hardware inside ordinary-looking devices.
Insider threats
An insider with physical access to a workstation can plug in a Rubber Ducky in seconds. The attack completes before anyone notices, and the device can be removed immediately.
No signature to detect
Traditional antivirus and endpoint detection tools look for malicious software. Keystroke injection doesn’t install software - it uses the computer’s own tools against it. This makes it invisible to most security products.
How organizations defend against keystroke injection
Knowledge check
Test your understanding before moving on.Why does keystroke injection work?
Why does keystroke injection work?
Operating systems trust USB HID (keyboard) devices unconditionally. When a device identifies itself as a keyboard, the OS accepts its keystrokes without any security verification. The Rubber Ducky exploits this trust by registering as a keyboard and “typing” pre-programmed commands.
Why can't antivirus detect a Rubber Ducky attack?
Why can't antivirus detect a Rubber Ducky attack?
Antivirus software scans for malicious files and known malware signatures. The Rubber Ducky doesn’t install files - it types commands using the computer’s own legitimate tools (Run dialog, terminal, PowerShell). From the antivirus perspective, a user is just typing on their keyboard.
What's the difference between arming mode and attack mode?
What's the difference between arming mode and attack mode?
Arming mode: The Rubber Ducky appears as a flash drive. You use this mode to load payloads onto the microSD card.Attack mode: The Rubber Ducky appears as a keyboard and executes the payload. This is the default mode when the device is plugged in with a valid
inject.bin file.