> ## Documentation Index
> Fetch the complete documentation index at: https://stem-docs.intellectualpoint.com/llms.txt
> Use this file to discover all available pages before exploring further.
# Introduction to GenAI & LLMs
> Think, Talk, Drive - build an AI-powered robot that sees, hears, speaks, and moves using large language models and vision AI.
## Think, Talk, Drive
Welcome to the GenAI and LLMs STEM Workshop. Over five days, you will go from unboxing your robot to having a full conversation with an AI that can see, hear, speak, and physically move.
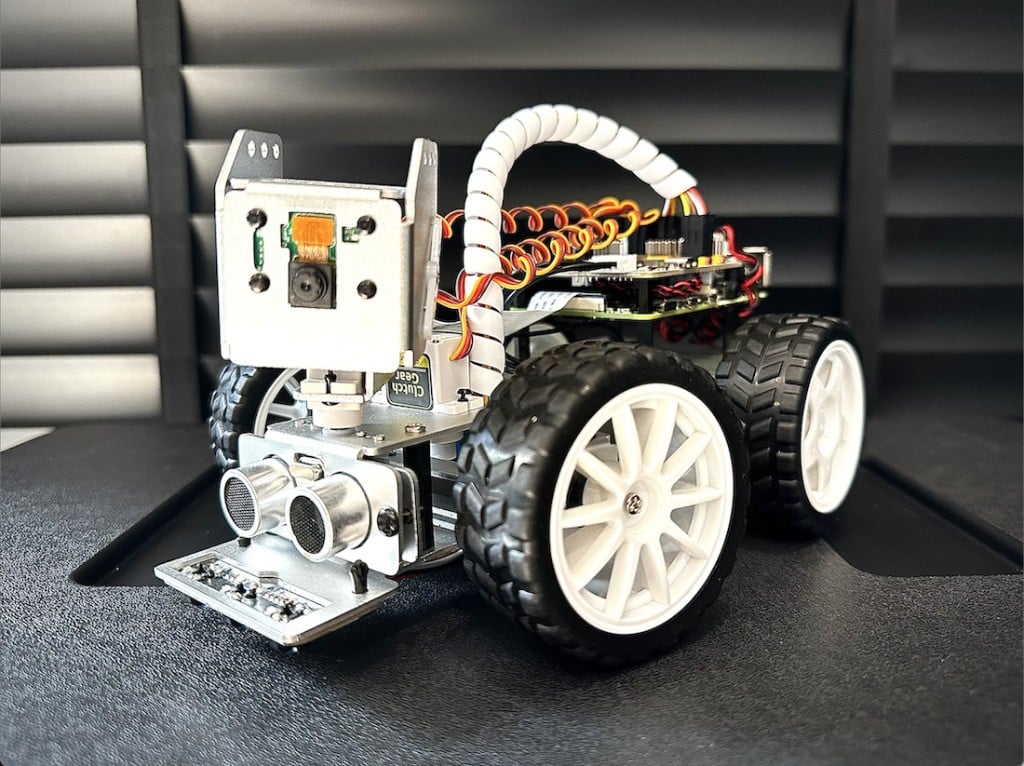 This is a fully virtual camp. Your robot kit has been shipped to you pre-assembled with an SD card, card reader, and WiFi dongle included.
### What you will build
By the end of this week, your robot will be able to:
* **Move** on command using keyboard controls and programmed sequences
* **Speak** using text-to-speech, announcing its actions aloud
* **Follow lines** autonomously using onboard sensors
* **Detect colors and faces** with classical computer vision
* **Hold a conversation** by connecting to a large language model
* **See and describe its surroundings** using a vision language model
* **Act on what it sees** by combining vision AI with physical tool calls
### Your week at a glance
Flash your SD card, connect to your robot over SSH, calibrate servos, and validate all sensors.
Write movement programs, give the robot a voice with text-to-speech, follow lines, and detect colors.
Learn how large language models work, connect to the OpenAI API, build a voice chatbot, and control the robot with LLM tool calls.
Feed the robot's camera into a vision language model so it can describe what it sees and act on visual information.
Discuss AI risks and ethics, explore data privacy, build a robot reporter that tours and narrates its surroundings, and discover resources for continued learning.
### Hardware overview
Your robot kit includes:
| Component | Purpose |
| ------------------------------ | -------------------------------------------------- |
| Raspberry Pi | The brain of the robot, runs all code |
| Robot HAT | Motor and sensor controller board |
| 2-axis camera module | Pan and tilt camera for vision |
| Ultrasonic sensor | Measures distance to obstacles |
| Grayscale/line-tracking sensor | Detects light and dark surfaces for line following |
| Speaker | Audio output for text-to-speech |
| Microphone | Voice input for speech-to-text |
| Wheels and servos | Steering and movement |
### Before you start
Confirm your kit contains: robot (pre-assembled), SD card, SD card reader, and WiFi dongle.
The evening before Day 1, plug in your robot and confirm the power LED lights up. This saves time on the first morning.
This is a fully virtual camp. Your robot kit has been shipped to you pre-assembled with an SD card, card reader, and WiFi dongle included.
### What you will build
By the end of this week, your robot will be able to:
* **Move** on command using keyboard controls and programmed sequences
* **Speak** using text-to-speech, announcing its actions aloud
* **Follow lines** autonomously using onboard sensors
* **Detect colors and faces** with classical computer vision
* **Hold a conversation** by connecting to a large language model
* **See and describe its surroundings** using a vision language model
* **Act on what it sees** by combining vision AI with physical tool calls
### Your week at a glance
Flash your SD card, connect to your robot over SSH, calibrate servos, and validate all sensors.
Write movement programs, give the robot a voice with text-to-speech, follow lines, and detect colors.
Learn how large language models work, connect to the OpenAI API, build a voice chatbot, and control the robot with LLM tool calls.
Feed the robot's camera into a vision language model so it can describe what it sees and act on visual information.
Discuss AI risks and ethics, explore data privacy, build a robot reporter that tours and narrates its surroundings, and discover resources for continued learning.
### Hardware overview
Your robot kit includes:
| Component | Purpose |
| ------------------------------ | -------------------------------------------------- |
| Raspberry Pi | The brain of the robot, runs all code |
| Robot HAT | Motor and sensor controller board |
| 2-axis camera module | Pan and tilt camera for vision |
| Ultrasonic sensor | Measures distance to obstacles |
| Grayscale/line-tracking sensor | Detects light and dark surfaces for line following |
| Speaker | Audio output for text-to-speech |
| Microphone | Voice input for speech-to-text |
| Wheels and servos | Steering and movement |
### Before you start
Confirm your kit contains: robot (pre-assembled), SD card, SD card reader, and WiFi dongle.
The evening before Day 1, plug in your robot and confirm the power LED lights up. This saves time on the first morning.