> ## Documentation Index
> Fetch the complete documentation index at: https://stem-docs.intellectualpoint.com/llms.txt
> Use this file to discover all available pages before exploring further.
# The AT-66BL app
> Step up to the AT-66BL app - a full Scratch-style coding studio with pairing over Bluetooth, guided levels, live control, and a powerful block workspace.
## Level up your coding
You've written your first programs on echo.pitsco.com. Today you graduate to the **AT-66BL app** - a full, Scratch-style coding studio for the Echo drone. It has more block categories, real **variables** and **lists**, **custom blocks**, message **broadcasting**, and math **operators**. This is where you build the programs for your capstone.
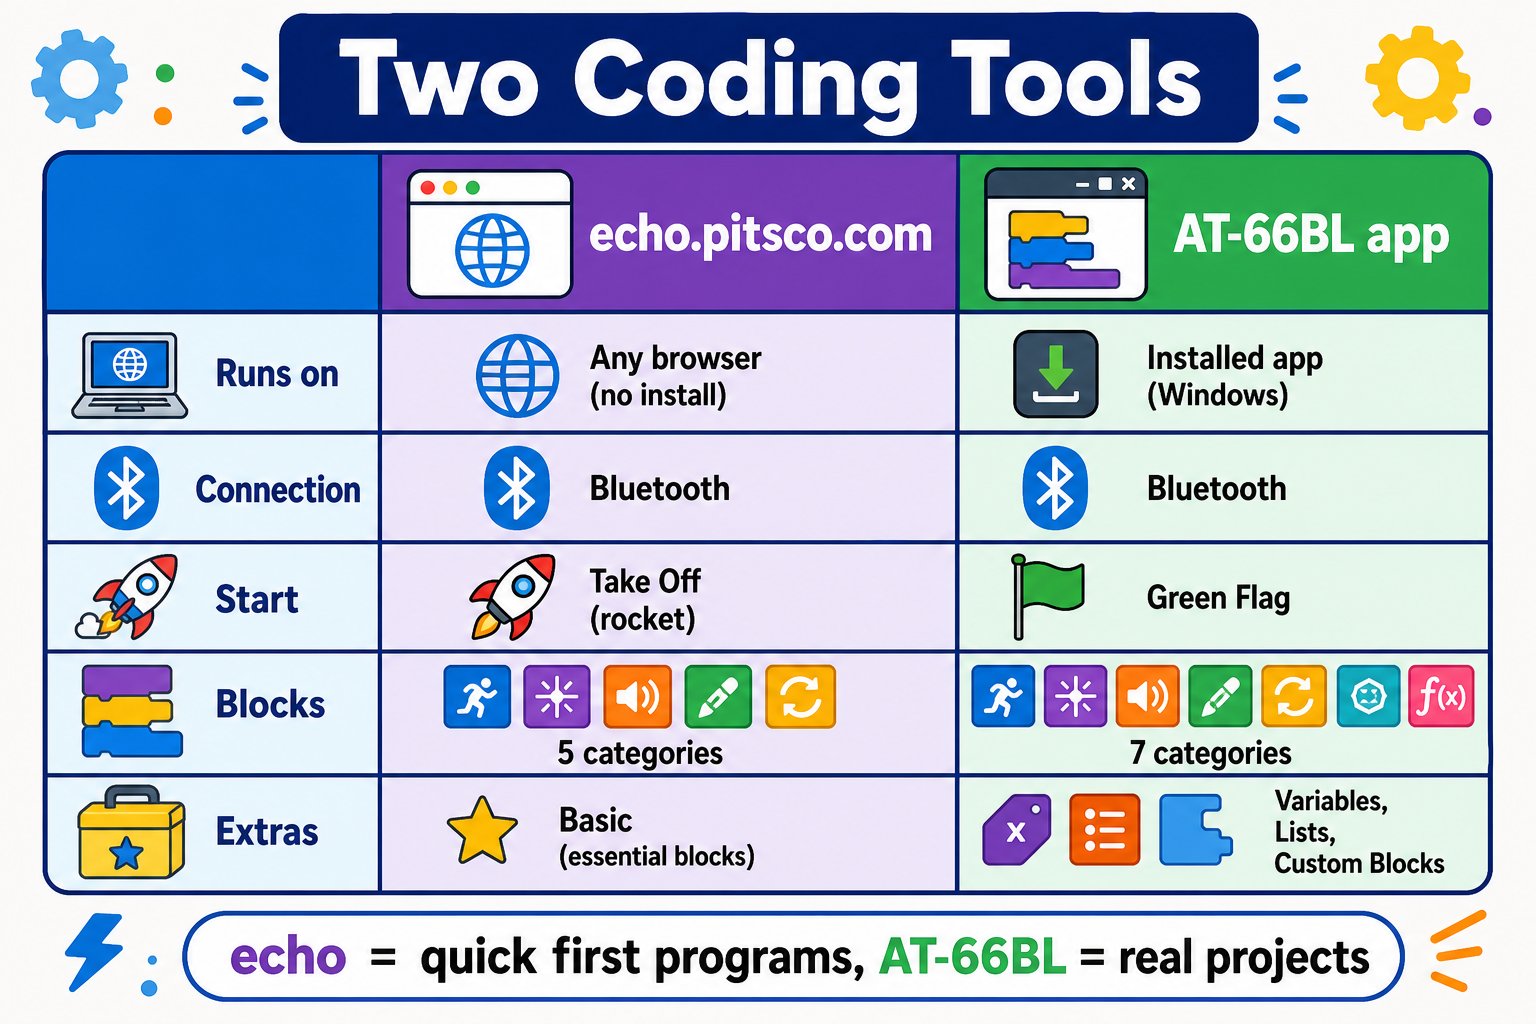
**AT-66BL vs echo.pitsco.com** - Same drone, same Bluetooth idea, but AT-66BL is a much bigger toolbox. echo.pitsco.com is great for quick first programs; AT-66BL is where you build real projects.
| | echo.pitsco.com | AT-66BL app |
| ----------------- | -------------------------------------------- | -------------------------------------------------------------- |
| Runs on | Any browser | Installed app (PC / Chromebook) |
| Connection | Web Bluetooth | Bluetooth |
| Start block | Program starts at **take off** | **when 🏳 clicked** (green flag) |
| Blocks | Flight, Control, Loops, Variables, Functions | Fly, Events, Control, Sensing, Operators, Variables, My Blocks |
| Variables & lists | Basic | Full (set/change/show/hide + lists) |
| Custom blocks | Functions | **Make a Block** |
| Modes | Coding only | Control, Game, Program, CommandPad |
 ## Get the app
| Device | App | Where to get it |
| --------------- | -------------- | --------------- |
| PC / Windows 10 | **AT66BL-UWP** | Microsoft Store |
| Chromebook | **AT-66BL** | Google Play |
**Instructor:** install the app on every machine before camp starts. On school-managed devices you may need IT to approve the install. Do a test pair with one drone the day before so you know the classroom's Bluetooth works.
## The main menu
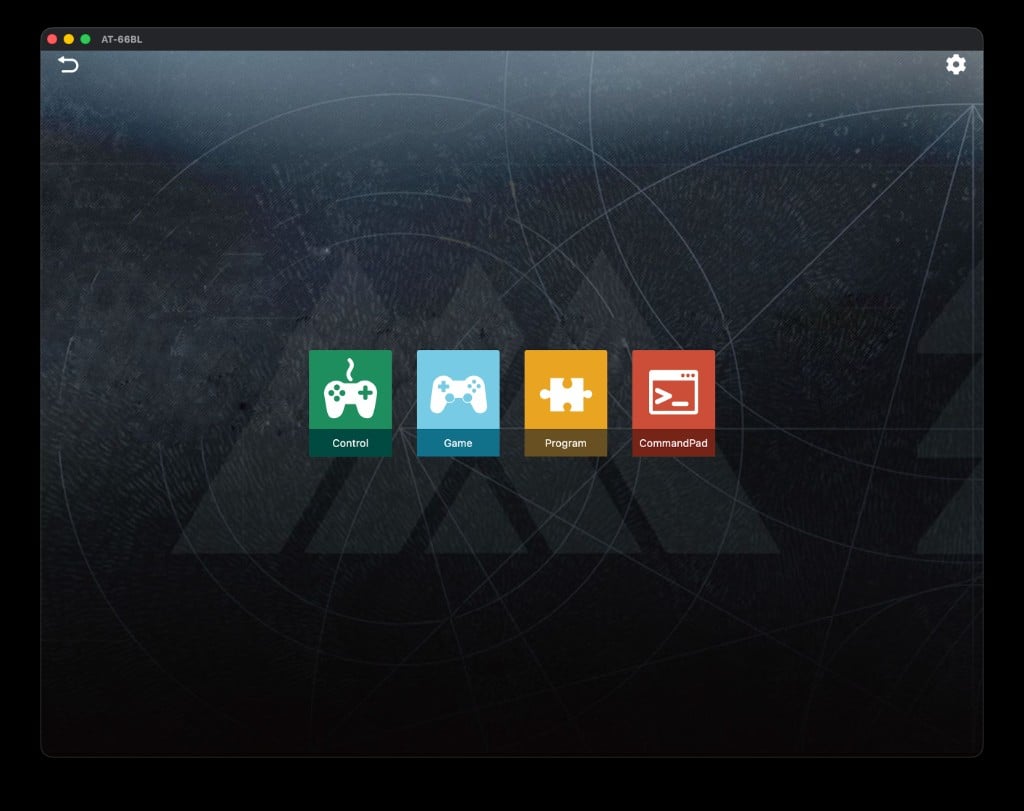
When you open the app you land on the main menu with four modes. Today we live in **Program**, but it's worth knowing what each one does.
## Get the app
| Device | App | Where to get it |
| --------------- | -------------- | --------------- |
| PC / Windows 10 | **AT66BL-UWP** | Microsoft Store |
| Chromebook | **AT-66BL** | Google Play |
**Instructor:** install the app on every machine before camp starts. On school-managed devices you may need IT to approve the install. Do a test pair with one drone the day before so you know the classroom's Bluetooth works.
## The main menu
When you open the app you land on the main menu with four modes. Today we live in **Program**, but it's worth knowing what each one does.
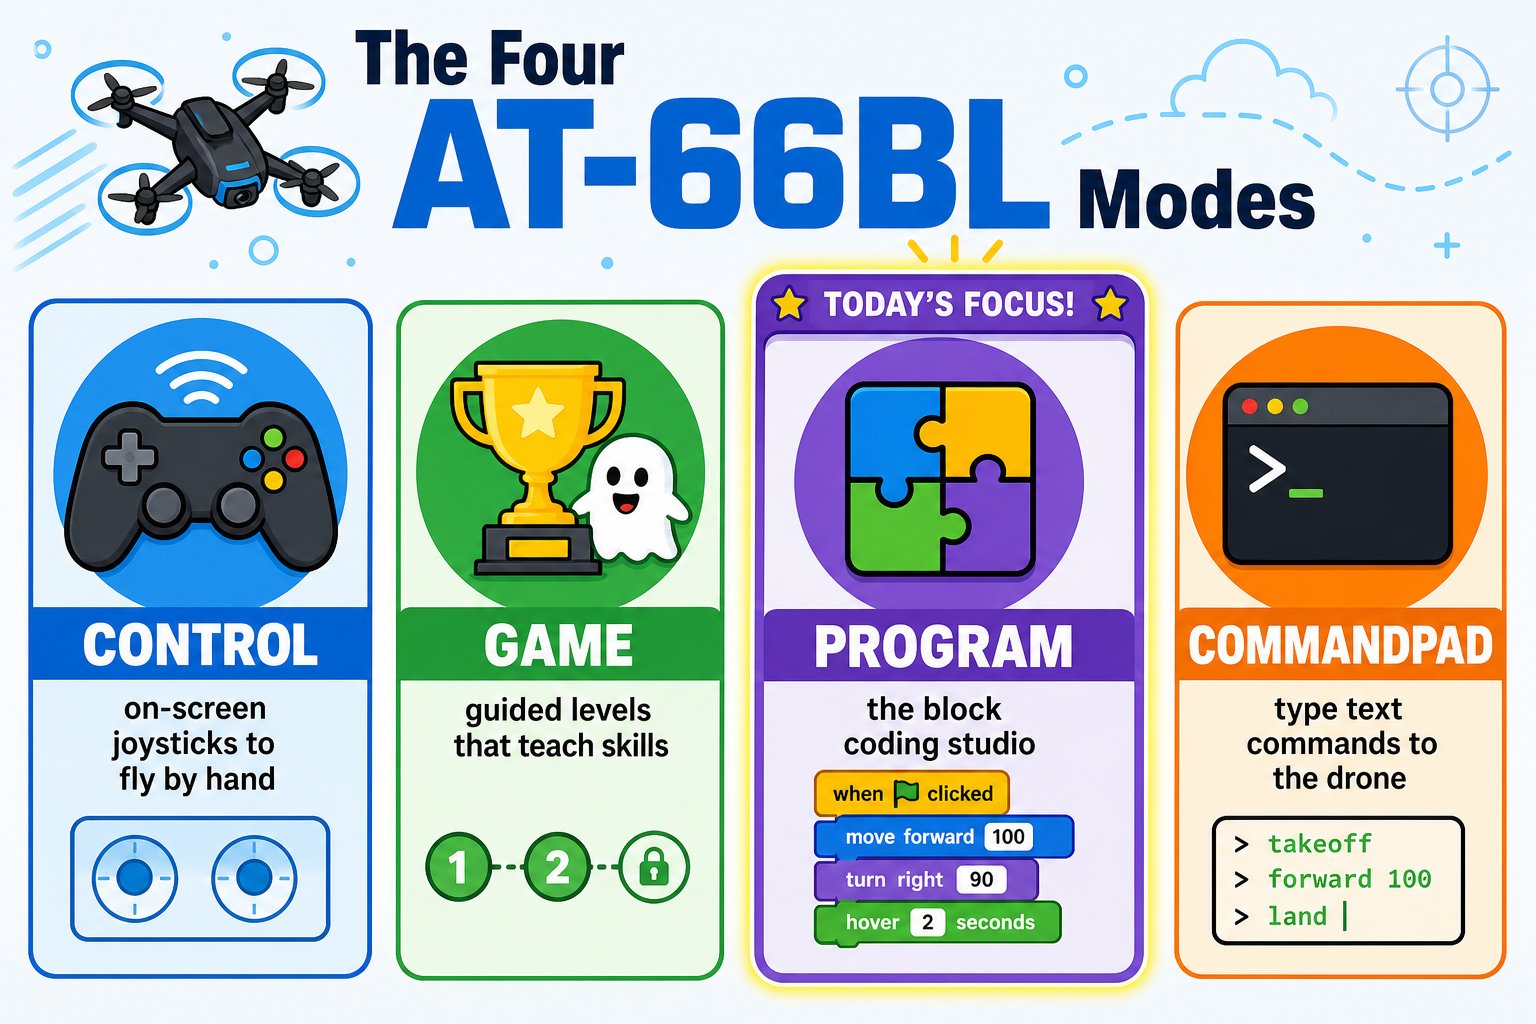 On-screen **joysticks** to fly the drone by hand - like a virtual controller.
Guided **Levels** that teach flight skills one challenge at a time.
The **block coding** studio - this is where we build our programs today.
A **text command** console for typing commands directly to the drone.
## Pair the drone over Bluetooth
Before you can run code or fly, the app has to find your drone.
Power on the Echo and set it on a flat surface. Make sure Bluetooth is on for your computer.
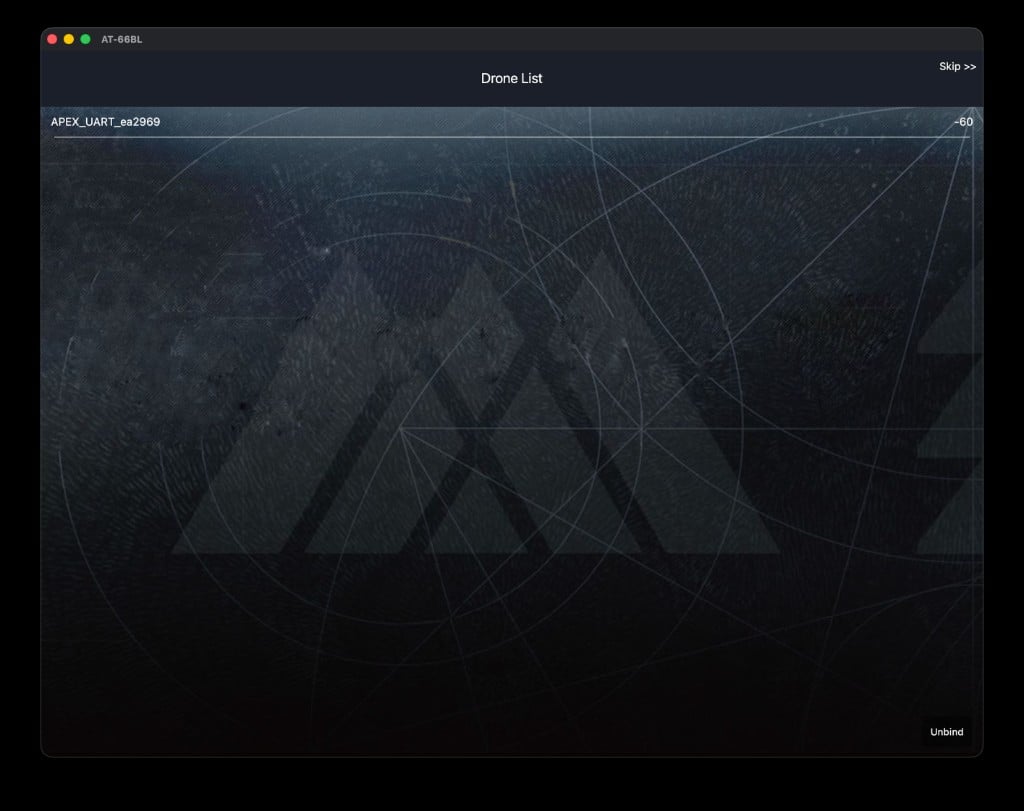
The app scans for nearby drones. Your Echo shows up as **APEX\_UART\_xxxxxx** with a signal strength number (like `-60`). A smaller number closer to 0 means a stronger signal.
On-screen **joysticks** to fly the drone by hand - like a virtual controller.
Guided **Levels** that teach flight skills one challenge at a time.
The **block coding** studio - this is where we build our programs today.
A **text command** console for typing commands directly to the drone.
## Pair the drone over Bluetooth
Before you can run code or fly, the app has to find your drone.
Power on the Echo and set it on a flat surface. Make sure Bluetooth is on for your computer.
The app scans for nearby drones. Your Echo shows up as **APEX\_UART\_xxxxxx** with a signal strength number (like `-60`). A smaller number closer to 0 means a stronger signal.
 Tap your drone's name to connect. The **Bluetooth icon** at the top of the screen turns solid when you're paired. Use **Unbind** later to disconnect.
If two drones show up, check the last characters (like `ea2969`) against the sticker on **your** drone so you don't fly a classmate's. In a room full of drones, only power on the one you're pairing.
## Game mode: guided Levels
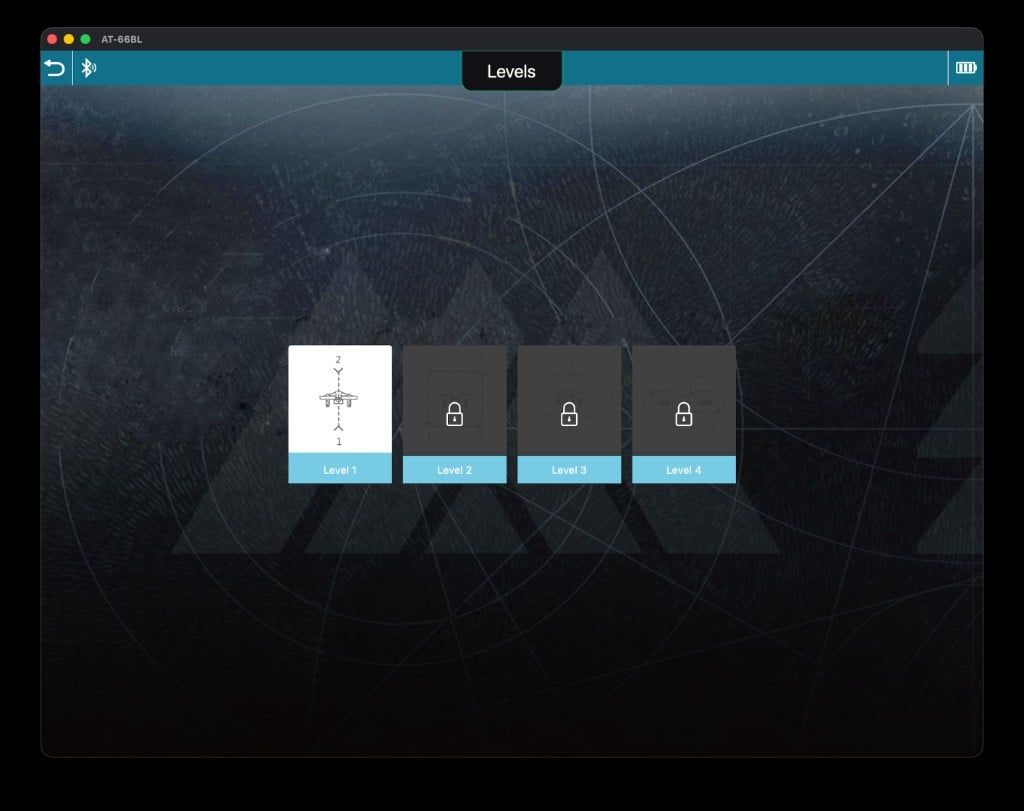
**Game** mode is a great warm-up. It unlocks flight challenges one at a time - Level 1 teaches straight take off and landing, and each new level adds a skill. Students who finish early can push into higher levels.
Tap your drone's name to connect. The **Bluetooth icon** at the top of the screen turns solid when you're paired. Use **Unbind** later to disconnect.
If two drones show up, check the last characters (like `ea2969`) against the sticker on **your** drone so you don't fly a classmate's. In a room full of drones, only power on the one you're pairing.
## Game mode: guided Levels
**Game** mode is a great warm-up. It unlocks flight challenges one at a time - Level 1 teaches straight take off and landing, and each new level adds a skill. Students who finish early can push into higher levels.
 ## Control mode: fly by hand
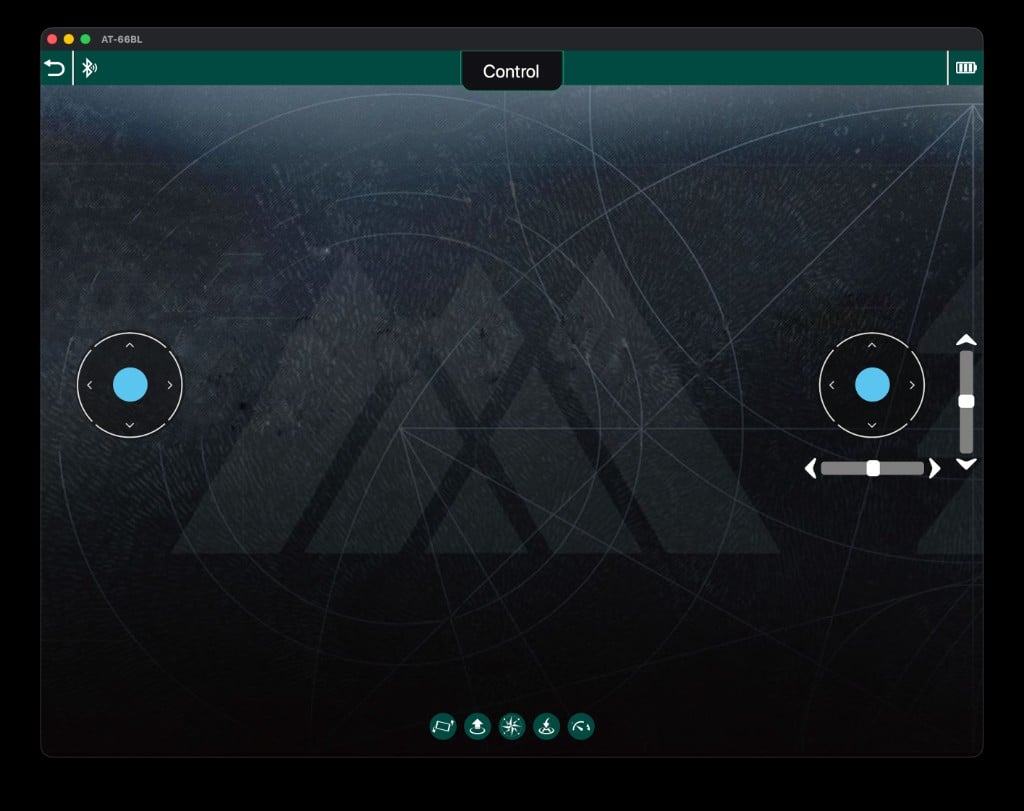
**Control** mode gives you two on-screen joysticks, just like the Day 2 controller. The left stick handles throttle and yaw (up/down, turn), the right stick handles pitch and roll (forward/back, left/right). The buttons along the bottom trigger take off, land, and flips.
## Control mode: fly by hand
**Control** mode gives you two on-screen joysticks, just like the Day 2 controller. The left stick handles throttle and yaw (up/down, turn), the right stick handles pitch and roll (forward/back, left/right). The buttons along the bottom trigger take off, land, and flips.
 **Instructor:** use Control mode as a quick "does everyone's drone fly?" check before diving into code. If a drone flies fine here but not in a program, the problem is the code, not the hardware.
## Program mode: the block workspace
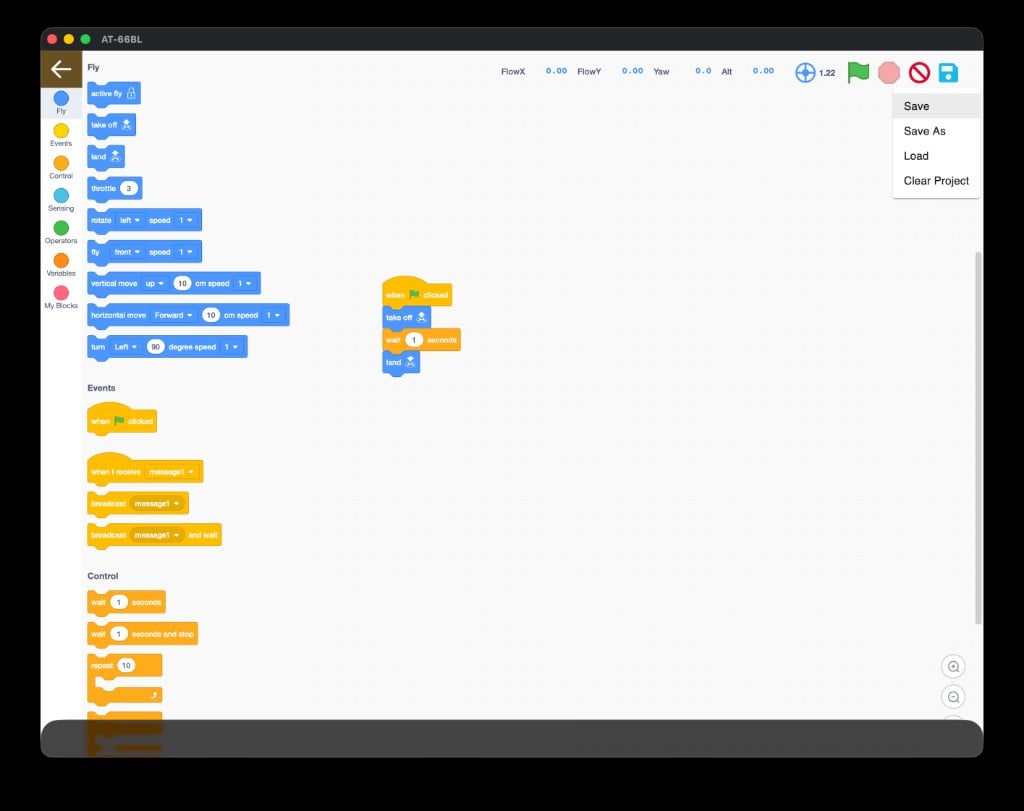
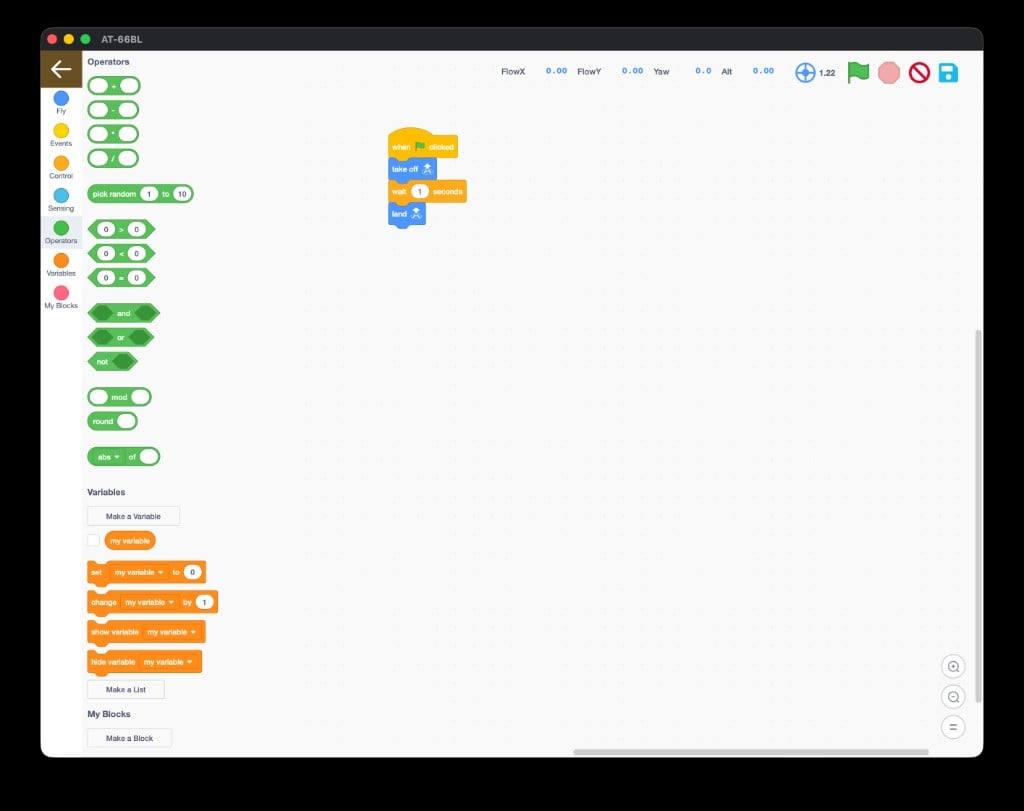
Tap **Program** to open the coding studio. This is a Scratch-style workspace: block **categories** run down the left, you **drag blocks** into the middle, and the **run controls** live in the top-right.
**Instructor:** use Control mode as a quick "does everyone's drone fly?" check before diving into code. If a drone flies fine here but not in a program, the problem is the code, not the hardware.
## Program mode: the block workspace
Tap **Program** to open the coding studio. This is a Scratch-style workspace: block **categories** run down the left, you **drag blocks** into the middle, and the **run controls** live in the top-right.
 ### The seven categories
Take off, land, and every movement command.
Start your program - **when 🏳 clicked** - and send messages.
Loops, waits, and **if-then** decisions.
The **timer** for timing routines.
Math and comparisons: `+`, `-`, `random`, `>`, `and`, `or`.
Make variables and lists to store values.
And **My Blocks**, where you build your own custom blocks with **Make a Block**.
### The run controls (top-right)
| Icon | What it does |
| ----------------- | -------------------------------- |
| 🏳 **Green flag** | Runs your program |
| 🔴 **Red circle** | Stops the program |
| 🚫 **No-entry** | Emergency stop - cuts the motors |
| 💾 **Save** | Saves your project |
Know where the **red stop** and **no-entry** buttons are *before* you run anything. If the drone does something unexpected, hitting stop is your fastest way to end the flight safely.
## Save, load, and clear
Click the **save icon** to open the file menu: **Save**, **Save As**, **Load**, and **Clear Project**. Save early and often so a crash never costs you your work.
### The seven categories
Take off, land, and every movement command.
Start your program - **when 🏳 clicked** - and send messages.
Loops, waits, and **if-then** decisions.
The **timer** for timing routines.
Math and comparisons: `+`, `-`, `random`, `>`, `and`, `or`.
Make variables and lists to store values.
And **My Blocks**, where you build your own custom blocks with **Make a Block**.
### The run controls (top-right)
| Icon | What it does |
| ----------------- | -------------------------------- |
| 🏳 **Green flag** | Runs your program |
| 🔴 **Red circle** | Stops the program |
| 🚫 **No-entry** | Emergency stop - cuts the motors |
| 💾 **Save** | Saves your project |
Know where the **red stop** and **no-entry** buttons are *before* you run anything. If the drone does something unexpected, hitting stop is your fastest way to end the flight safely.
## Save, load, and clear
Click the **save icon** to open the file menu: **Save**, **Save As**, **Load**, and **Clear Project**. Save early and often so a crash never costs you your work.
 Have students name their saves clearly (like `square_flight` or `alex_capstone`) so they can find the right project fast during demos.
The AT-66BL app is installed, your drone is paired over Bluetooth (Bluetooth icon solid), and you can open **Program** mode and find all seven block categories.
See exactly what every block does before you start building.
Have students name their saves clearly (like `square_flight` or `alex_capstone`) so they can find the right project fast during demos.
The AT-66BL app is installed, your drone is paired over Bluetooth (Bluetooth icon solid), and you can open **Program** mode and find all seven block categories.
See exactly what every block does before you start building.