> ## Documentation Index
> Fetch the complete documentation index at: https://stem-docs.intellectualpoint.com/llms.txt
> Use this file to discover all available pages before exploring further.
# Maintaining your printer
> Keep your Ender 3 printing reliably with simple cleaning, lubrication, belt tension, and calibration habits.
## A well-kept printer prints well
Your Ender 3 is a mechanical machine. A few minutes of care keeps it accurate and reliable for years. This page covers the maintenance habits that prevent most problems before they start.
## Routine maintenance
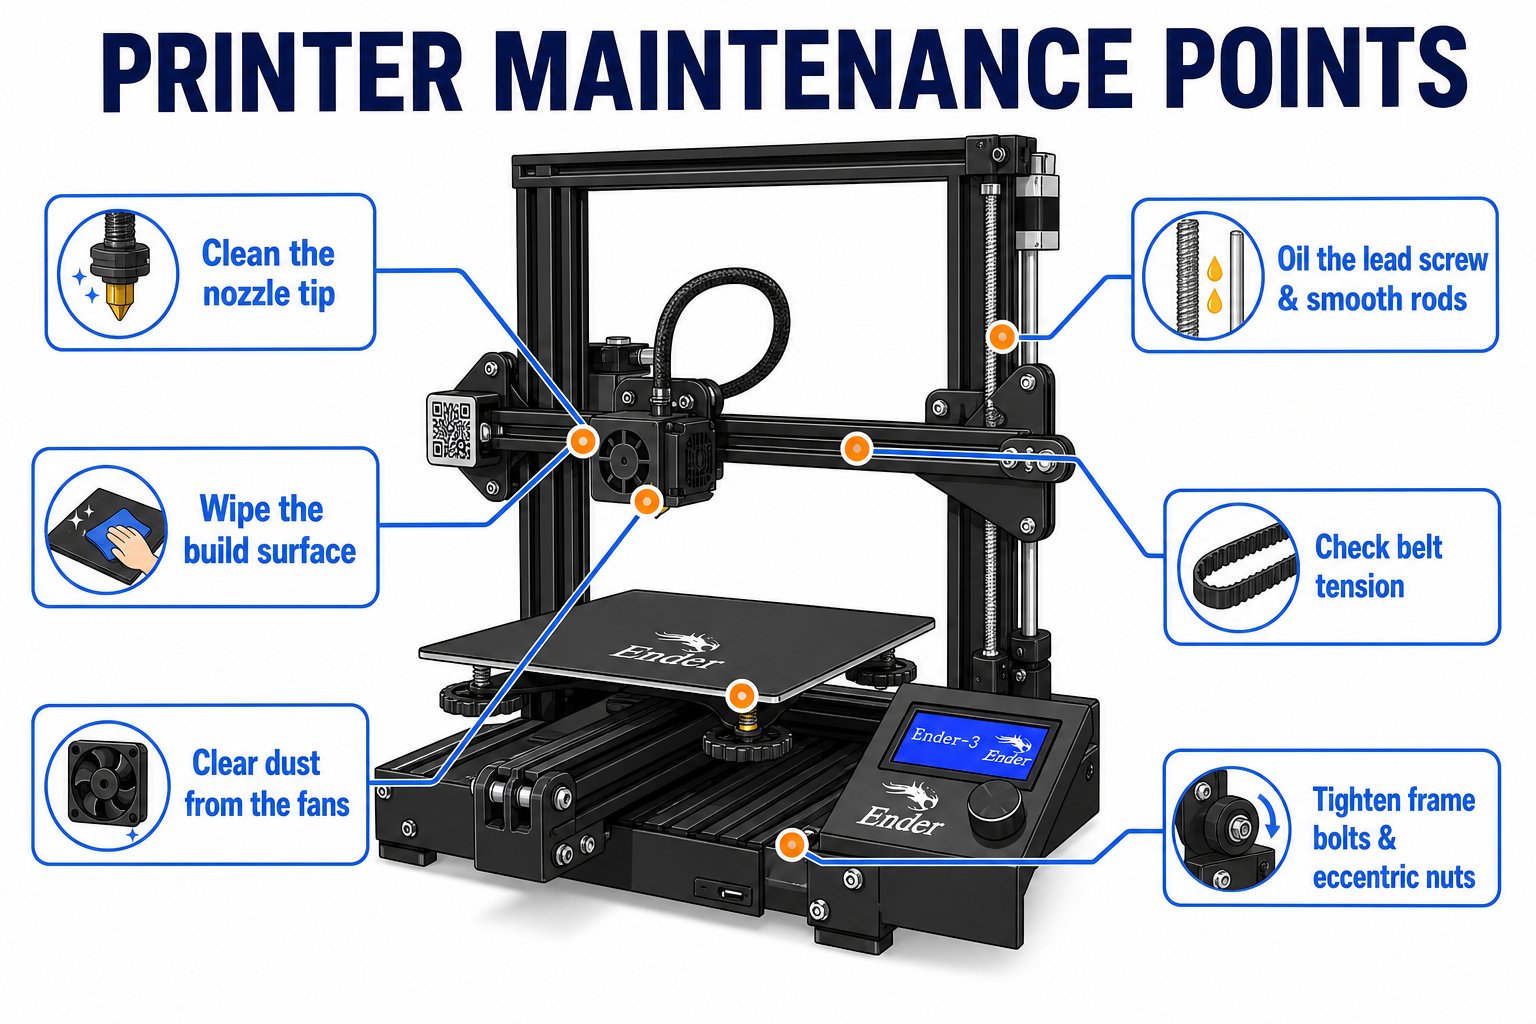 * Wipe the **build plate** with isopropyl alcohol before big prints to remove oils
* Clear plastic bits and dust off the nozzle, bed, and rails
* Keep the area around the printer free of clutter
* Add a little machine grease to the **Z-axis lead screw** occasionally
* Keep the rails clean; a dry PTFE lubricant keeps rollers smooth
* Do **not** over-oil - excess grease attracts dust
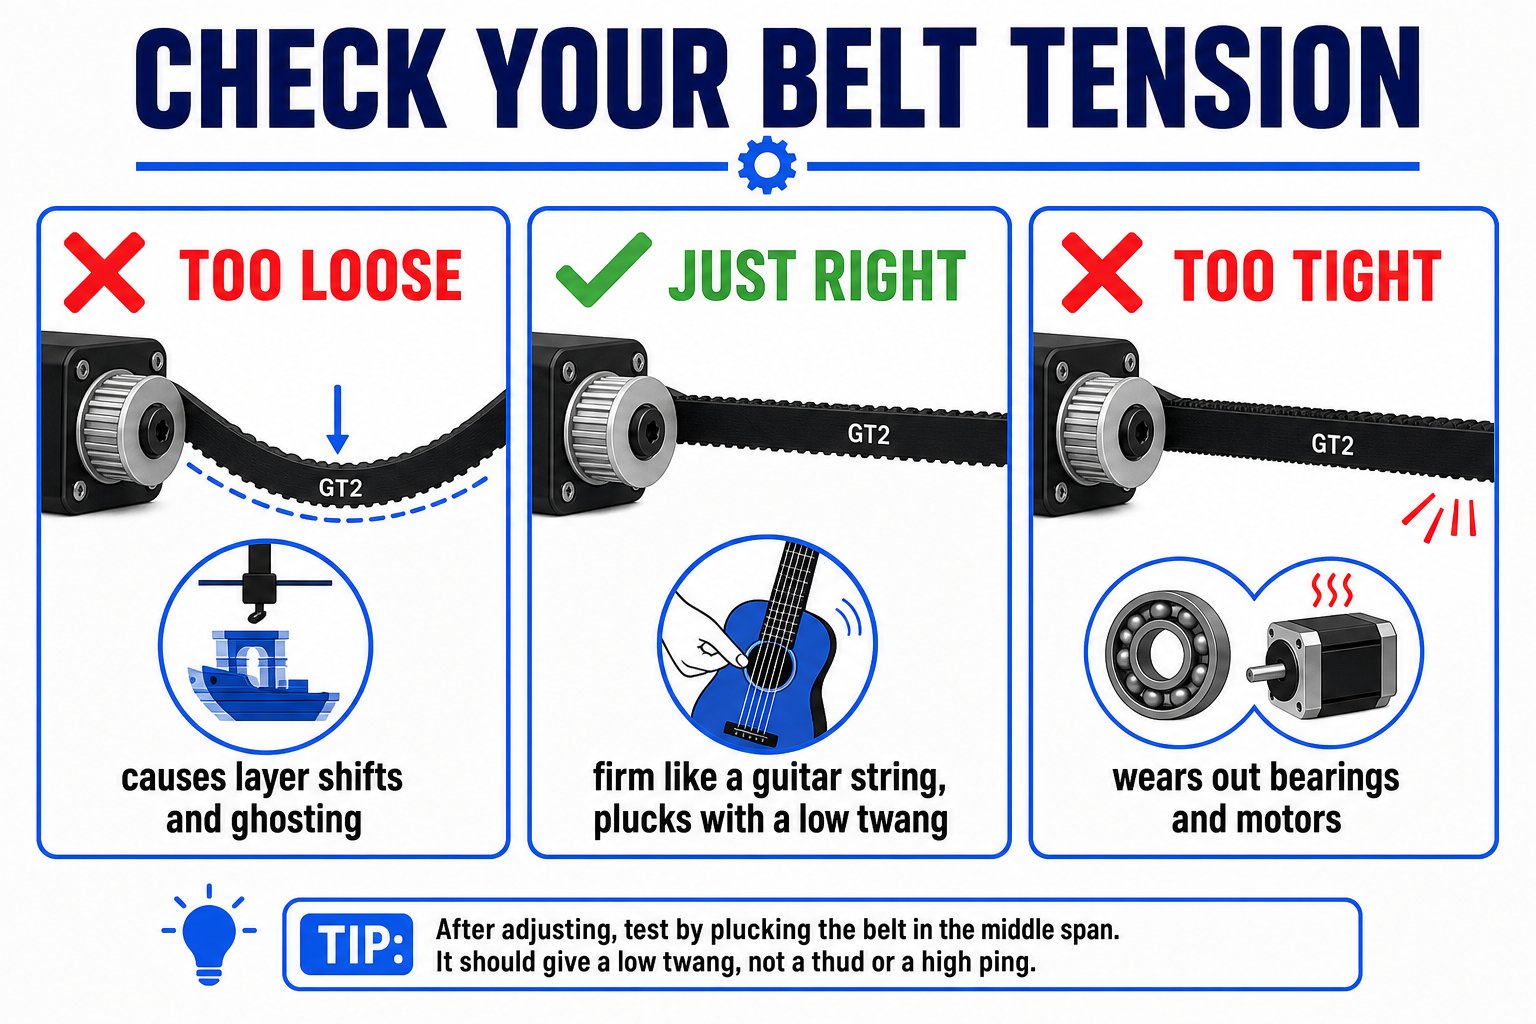
* X and Y **belts** should be firm, not sloppy - a loose belt causes layer shifting and ghosting
* Pluck the belt: it should give a low twang, not flop
* The Ender 3 has belt tensioner knobs to adjust without tools
* Wipe the **build plate** with isopropyl alcohol before big prints to remove oils
* Clear plastic bits and dust off the nozzle, bed, and rails
* Keep the area around the printer free of clutter
* Add a little machine grease to the **Z-axis lead screw** occasionally
* Keep the rails clean; a dry PTFE lubricant keeps rollers smooth
* Do **not** over-oil - excess grease attracts dust
* X and Y **belts** should be firm, not sloppy - a loose belt causes layer shifting and ghosting
* Pluck the belt: it should give a low twang, not flop
* The Ender 3 has belt tensioner knobs to adjust without tools
 * Make sure the **PTFE tube** is seated fully at both ends
* Check the extruder gear grips the filament firmly
* Look for tangles on the spool before long prints
* A worn or clogged nozzle causes under-extrusion - nozzles are cheap and replaceable
* Clear small clogs with a "cold pull" or a fine cleaning needle
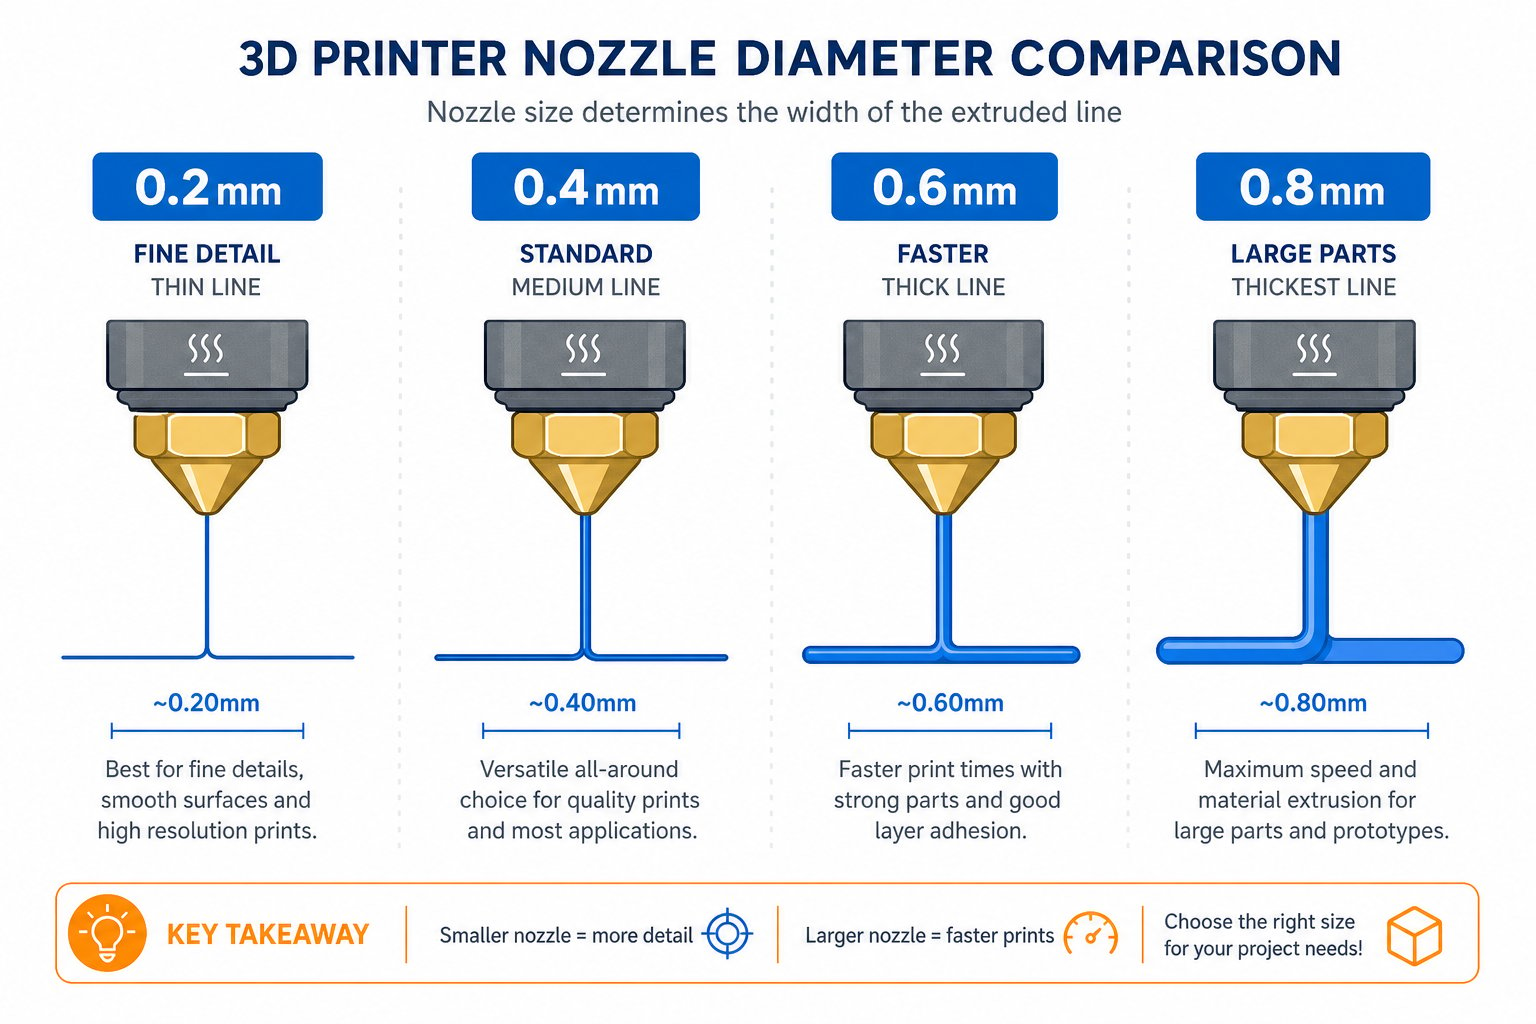
* Nozzles come in different diameters - a wider nozzle prints faster with thicker lines, a narrow one prints finer detail
* Make sure the **PTFE tube** is seated fully at both ends
* Check the extruder gear grips the filament firmly
* Look for tangles on the spool before long prints
* A worn or clogged nozzle causes under-extrusion - nozzles are cheap and replaceable
* Clear small clogs with a "cold pull" or a fine cleaning needle
* Nozzles come in different diameters - a wider nozzle prints faster with thicker lines, a narrow one prints finer detail
 ## Re-calibration habits
Things drift over time. Re-check these when print quality drops:
The most common fix. Re-run the paper test whenever the first layer stops sticking well.
If a rail feels wobbly, snug the eccentric roller nuts so the rollers grip without binding.
Make sure the gantry is vertical and the frame is square - a tilted frame skews prints.
Keeping Cura and printer firmware current brings fixes and better defaults.
## Optimal print-quality tips
Quality PLA stored in a sealed bag with silica gel prints far more consistently.
Adjust layer height, infill, and speed to match the job - fine detail wants thin layers; strong parts want more infill.
Most problems appear early. A good first layer is the foundation of a good print.
Note what you cleaned, adjusted, or replaced so you can spot patterns.
Ten minutes of maintenance a month prevents most failed prints. Treat your printer like the precision tool it is and it will reward you with clean, reliable prints.
## Re-calibration habits
Things drift over time. Re-check these when print quality drops:
The most common fix. Re-run the paper test whenever the first layer stops sticking well.
If a rail feels wobbly, snug the eccentric roller nuts so the rollers grip without binding.
Make sure the gantry is vertical and the frame is square - a tilted frame skews prints.
Keeping Cura and printer firmware current brings fixes and better defaults.
## Optimal print-quality tips
Quality PLA stored in a sealed bag with silica gel prints far more consistently.
Adjust layer height, infill, and speed to match the job - fine detail wants thin layers; strong parts want more infill.
Most problems appear early. A good first layer is the foundation of a good print.
Note what you cleaned, adjusted, or replaced so you can spot patterns.
Ten minutes of maintenance a month prevents most failed prints. Treat your printer like the precision tool it is and it will reward you with clean, reliable prints.