> ## Documentation Index
> Fetch the complete documentation index at: https://stem-docs.intellectualpoint.com/llms.txt
> Use this file to discover all available pages before exploring further.
# Set up Tinkercad
> Create a free Tinkercad account and learn the CAD workspace where you will design every model this week.
## Where your designs begin
To print something you first have to design it. **Tinkercad** is a free, browser-based **CAD** (computer-aided design) tool made by Autodesk. It is powerful enough to build real models but simple enough to learn in a day - perfect for your first designs and your capstone project.
 ## Create your account
Go to [tinkercad.com](https://www.tinkercad.com/) and click **Sign Up** at the top right.
Choose **Create a personal account**, then **Sign up with email**.
Enter your birthday, your email, and a password, then click **Done**. Confirm your email if asked.
From your dashboard, click **Create → 3D Design**. You now have a blank workplane.
Students under 13 may need a parent or teacher to set up access. Your instructor can provide a class code if your camp uses one.
## The Tinkercad workspace
## Create your account
Go to [tinkercad.com](https://www.tinkercad.com/) and click **Sign Up** at the top right.
Choose **Create a personal account**, then **Sign up with email**.
Enter your birthday, your email, and a password, then click **Done**. Confirm your email if asked.
From your dashboard, click **Create → 3D Design**. You now have a blank workplane.
Students under 13 may need a parent or teacher to set up access. Your instructor can provide a class code if your camp uses one.
## The Tinkercad workspace
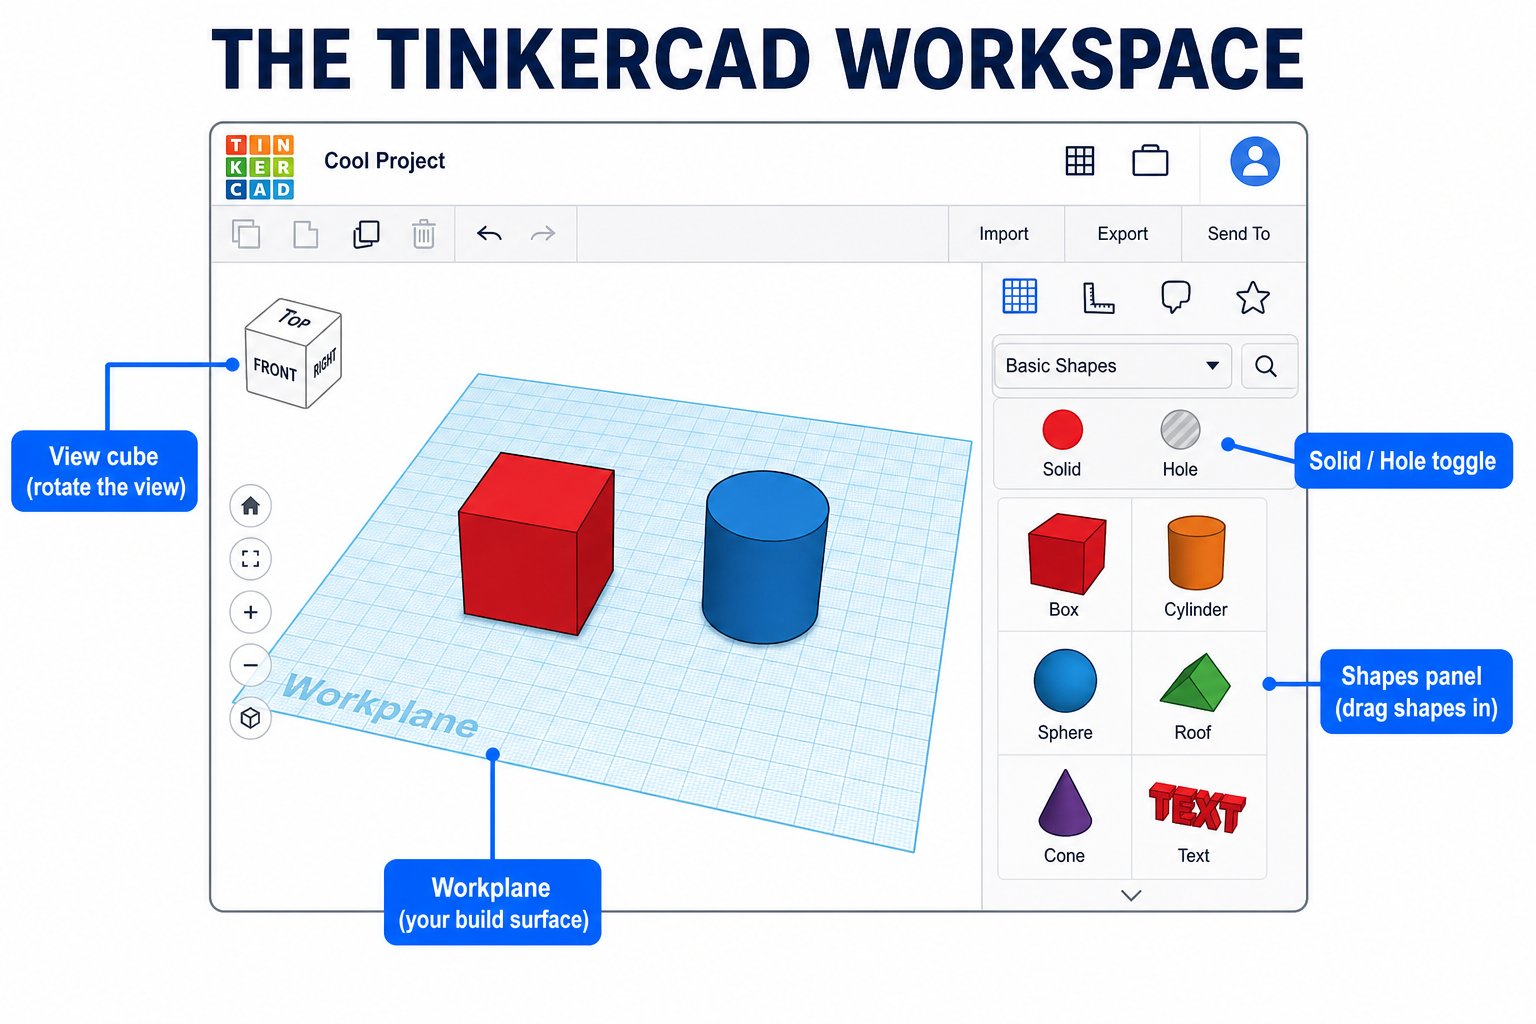 The blue grid is your build surface. Anything you place here is what gets printed.
On the right are ready-made shapes - boxes, cylinders, spheres, text, and more. Drag them onto the workplane.
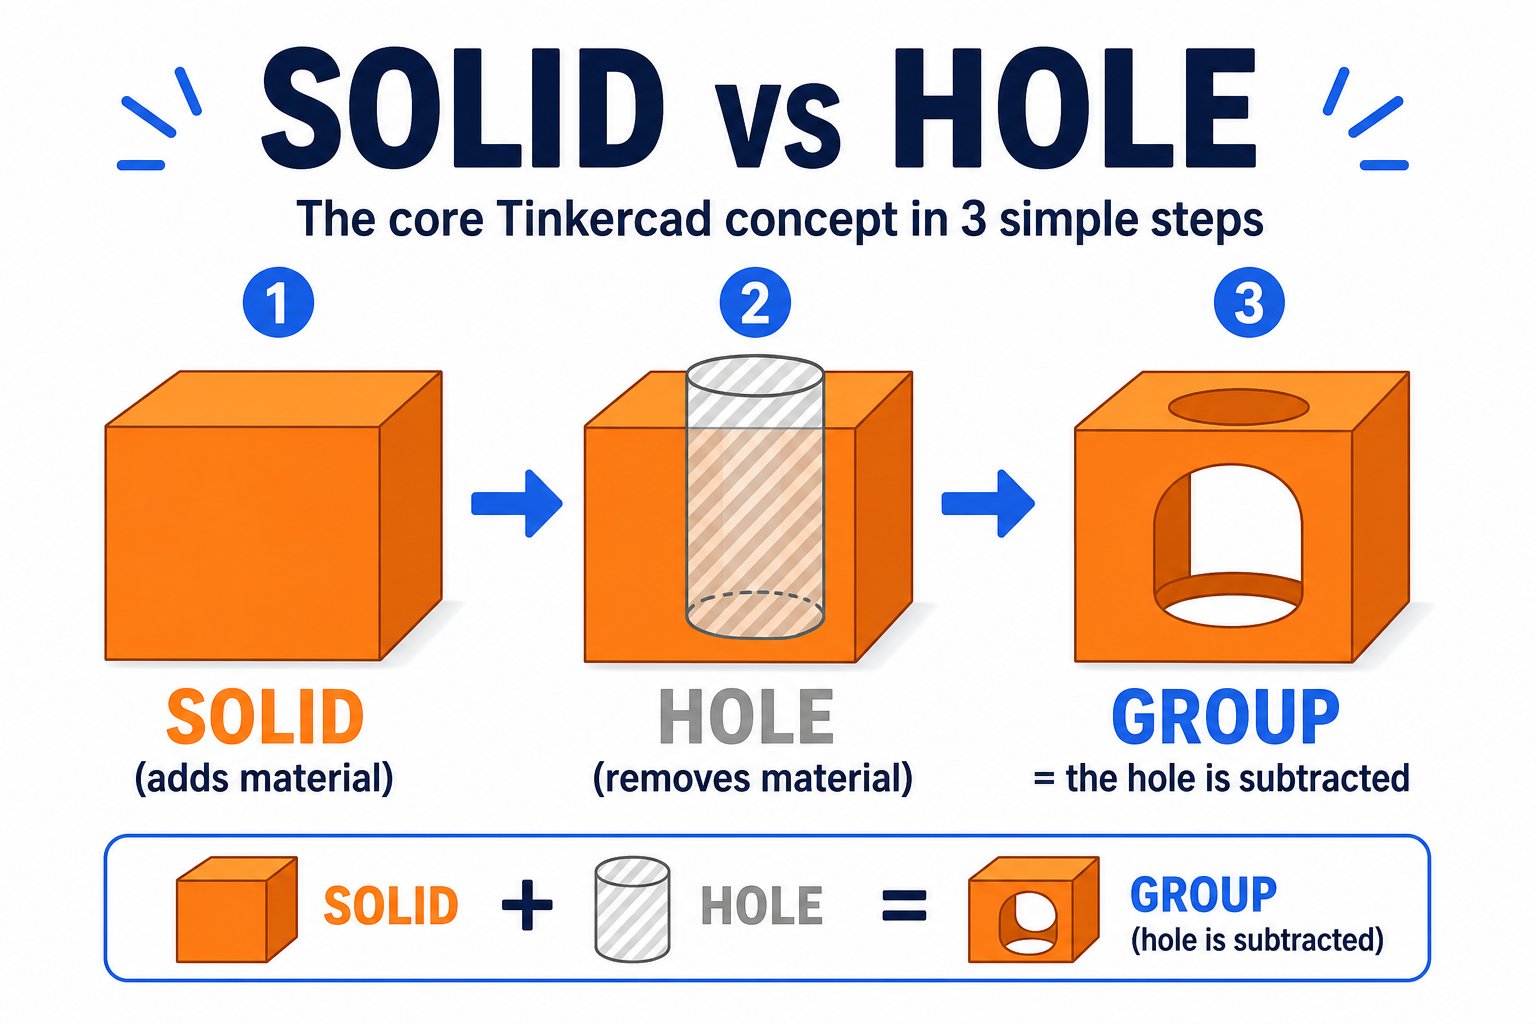
Every shape is either a **solid** (adds material) or a **hole** (carves material away). This is how you cut and combine shapes.
**Group** merges shapes into one; **Align** snaps them to a shared edge or center.
The blue grid is your build surface. Anything you place here is what gets printed.
On the right are ready-made shapes - boxes, cylinders, spheres, text, and more. Drag them onto the workplane.
Every shape is either a **solid** (adds material) or a **hole** (carves material away). This is how you cut and combine shapes.
**Group** merges shapes into one; **Align** snaps them to a shared edge or center.
 ## Moving around the view
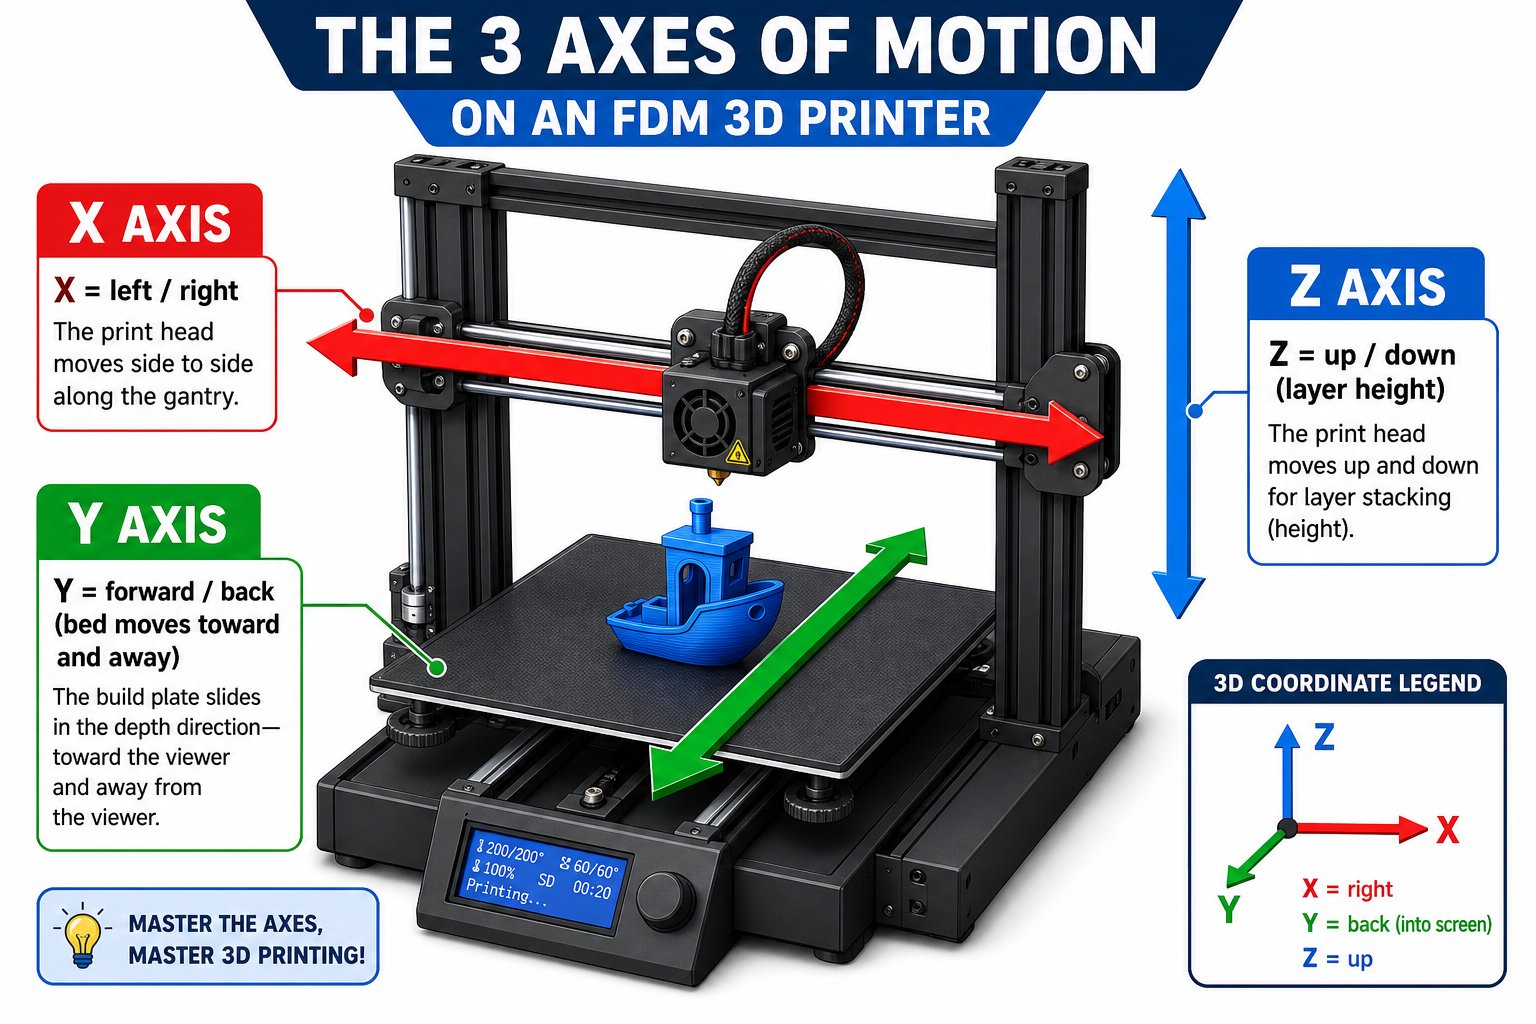 Right-click and drag (or use the orientation cube in the corner) to orbit around your model.
Scroll to zoom; hold shift and drag to pan. Get comfortable looking at your design from every angle.
Click a shape and drag the white handles to resize, or type exact dimensions in millimeters.
Right-click and drag (or use the orientation cube in the corner) to orbit around your model.
Scroll to zoom; hold shift and drag to pan. Get comfortable looking at your design from every angle.
Click a shape and drag the white handles to resize, or type exact dimensions in millimeters.
 ## The five core moves
Almost every Tinkercad design uses just these actions:
1. **Drag** a shape onto the workplane
2. **Resize** it to the dimensions you want
3. **Position** it (move and raise/lower on the workplane)
4. **Combine** solids and holes to add and subtract material
5. **Group** everything into a single model, then **Export**
When your design is ready, use **Export → STL** to download it, then open that `.stl` in Cura to slice and print. Design in Tinkercad, slice in Cura, print on your Ender 3 - that is the full pipeline you will use all week.
Your Tinkercad account works, you have opened a new 3D design, and you can drag, resize, and rotate a shape. You are ready to design your first model.
## The five core moves
Almost every Tinkercad design uses just these actions:
1. **Drag** a shape onto the workplane
2. **Resize** it to the dimensions you want
3. **Position** it (move and raise/lower on the workplane)
4. **Combine** solids and holes to add and subtract material
5. **Group** everything into a single model, then **Export**
When your design is ready, use **Export → STL** to download it, then open that `.stl` in Cura to slice and print. Design in Tinkercad, slice in Cura, print on your Ender 3 - that is the full pipeline you will use all week.
Your Tinkercad account works, you have opened a new 3D design, and you can drag, resize, and rotate a shape. You are ready to design your first model.