> ## Documentation Index
> Fetch the complete documentation index at: https://stem-docs.intellectualpoint.com/llms.txt
> Use this file to discover all available pages before exploring further.
# Z-axis motor install
> Mount the Z-axis motor on the back-left and drop in the lead screw.
## Installing the Z-axis motor
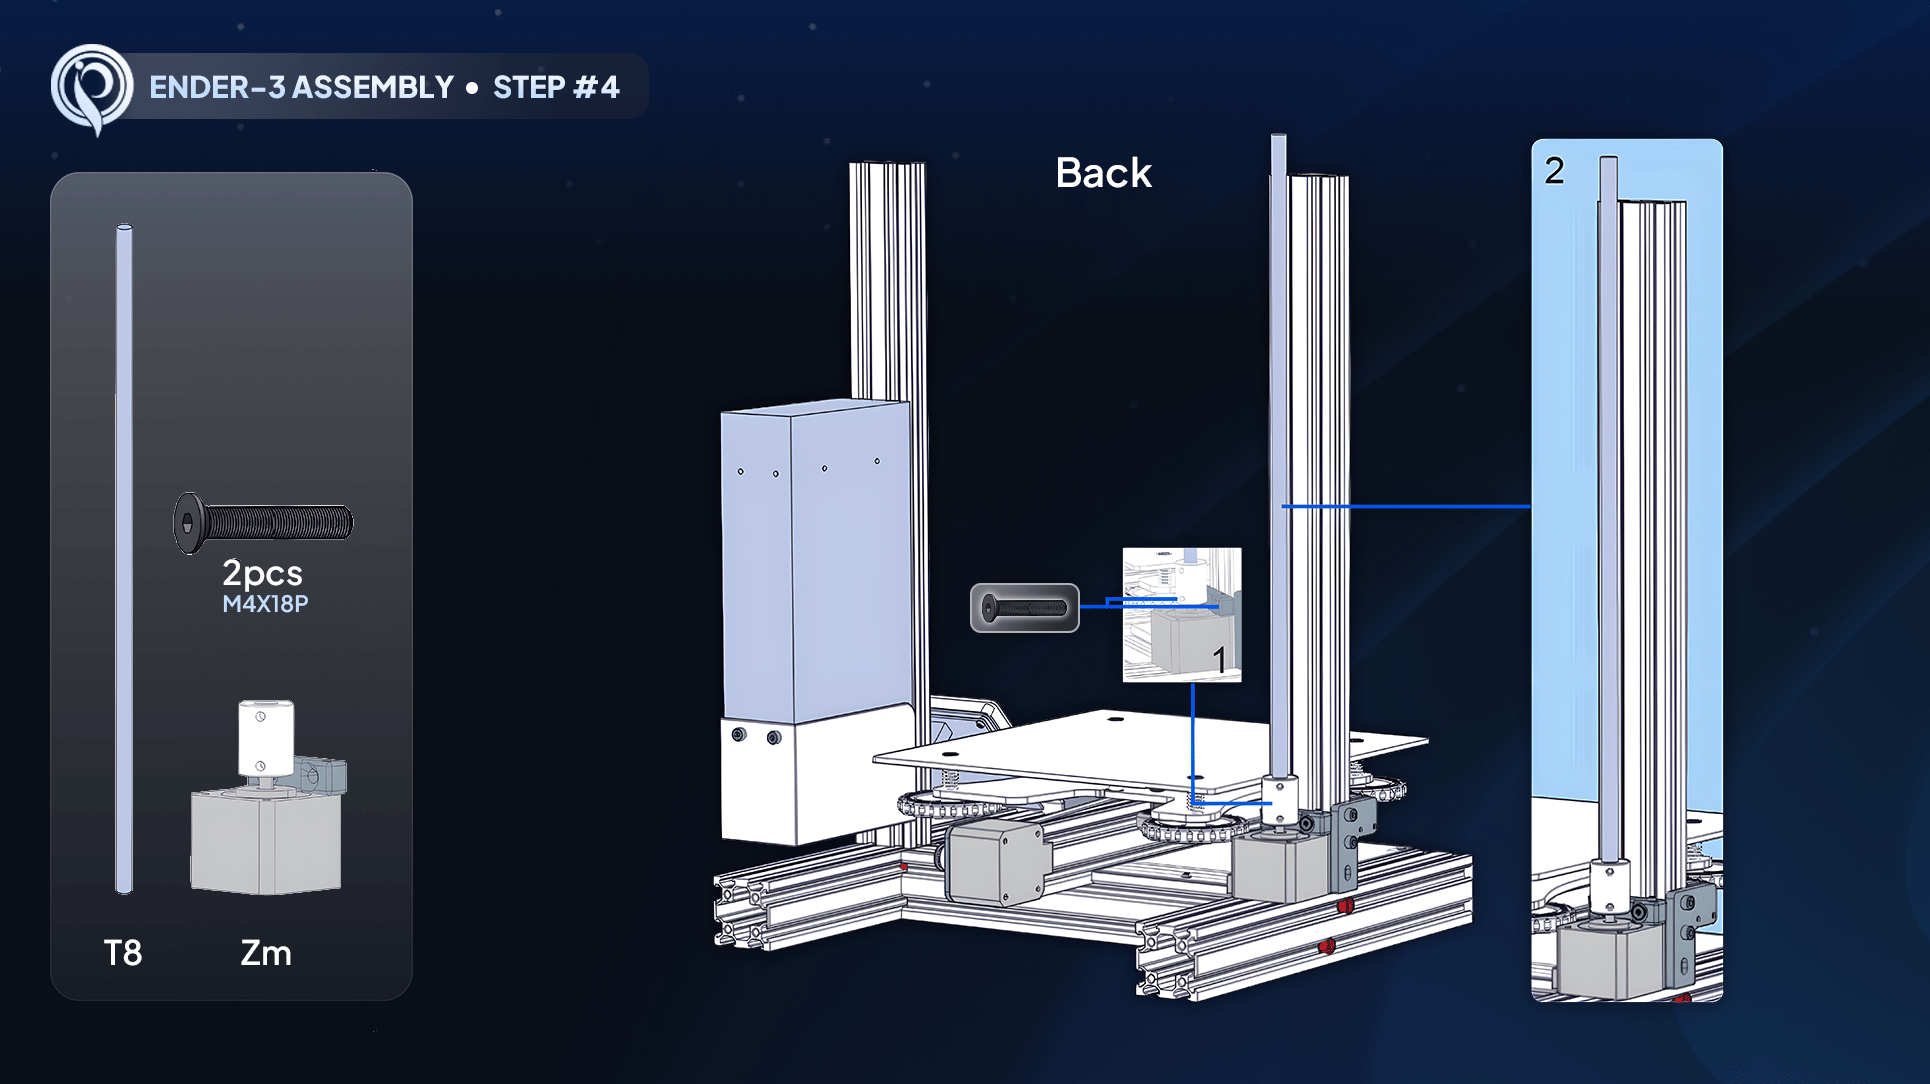
The **Z-axis motor** is the metal cube with a spinning cylinder on top. It turns the lead screw that raises and lowers your print head - one layer height at a time. It mounts on the back-left of the printer.
For this step you need the **two M4x18 screws** (black, flat head) and the **number 3 Allen wrench** (the middle size).
 ## Step-by-step
Set the Z-axis motor next to the **left** of the Ender logo with the black mounting bracket facing you. Slide it back and drop it onto the left rail until it stops against the bar. Notice the small white clip - a cable connects here later.
The two holes in the black bracket line up with holes in the rail. Confirm with your screwdriver that they pass through.
Thread the two **M4x18** screws from the front, through the bracket, into the rail. Hand-thread both, then tighten with the number 3 Allen wrench until firm.
Take the long threaded rod (pull off its black sleeve) and lower it through the hole on top of the Z-axis motor. It threads onto the coupler and hangs in place on its own.
The Z-axis motor is bolted firmly to the back-left, both M4x18 screws are tight, and the lead screw is seated in the coupler on top of the motor.
## Up next
Directly across from the motor, you install the **Z-axis limit switch** that stops the head from crashing into the bed.
## Step-by-step
Set the Z-axis motor next to the **left** of the Ender logo with the black mounting bracket facing you. Slide it back and drop it onto the left rail until it stops against the bar. Notice the small white clip - a cable connects here later.
The two holes in the black bracket line up with holes in the rail. Confirm with your screwdriver that they pass through.
Thread the two **M4x18** screws from the front, through the bracket, into the rail. Hand-thread both, then tighten with the number 3 Allen wrench until firm.
Take the long threaded rod (pull off its black sleeve) and lower it through the hole on top of the Z-axis motor. It threads onto the coupler and hangs in place on its own.
The Z-axis motor is bolted firmly to the back-left, both M4x18 screws are tight, and the lead screw is seated in the coupler on top of the motor.
## Up next
Directly across from the motor, you install the **Z-axis limit switch** that stops the head from crashing into the bed.