> ## Documentation Index
> Fetch the complete documentation index at: https://stem-docs.intellectualpoint.com/llms.txt
> Use this file to discover all available pages before exploring further.
# Roller bracket (bar end)
> Attach the roller bracket to the end of the extruder bar to guide the belt.
## Capping the extruder bar
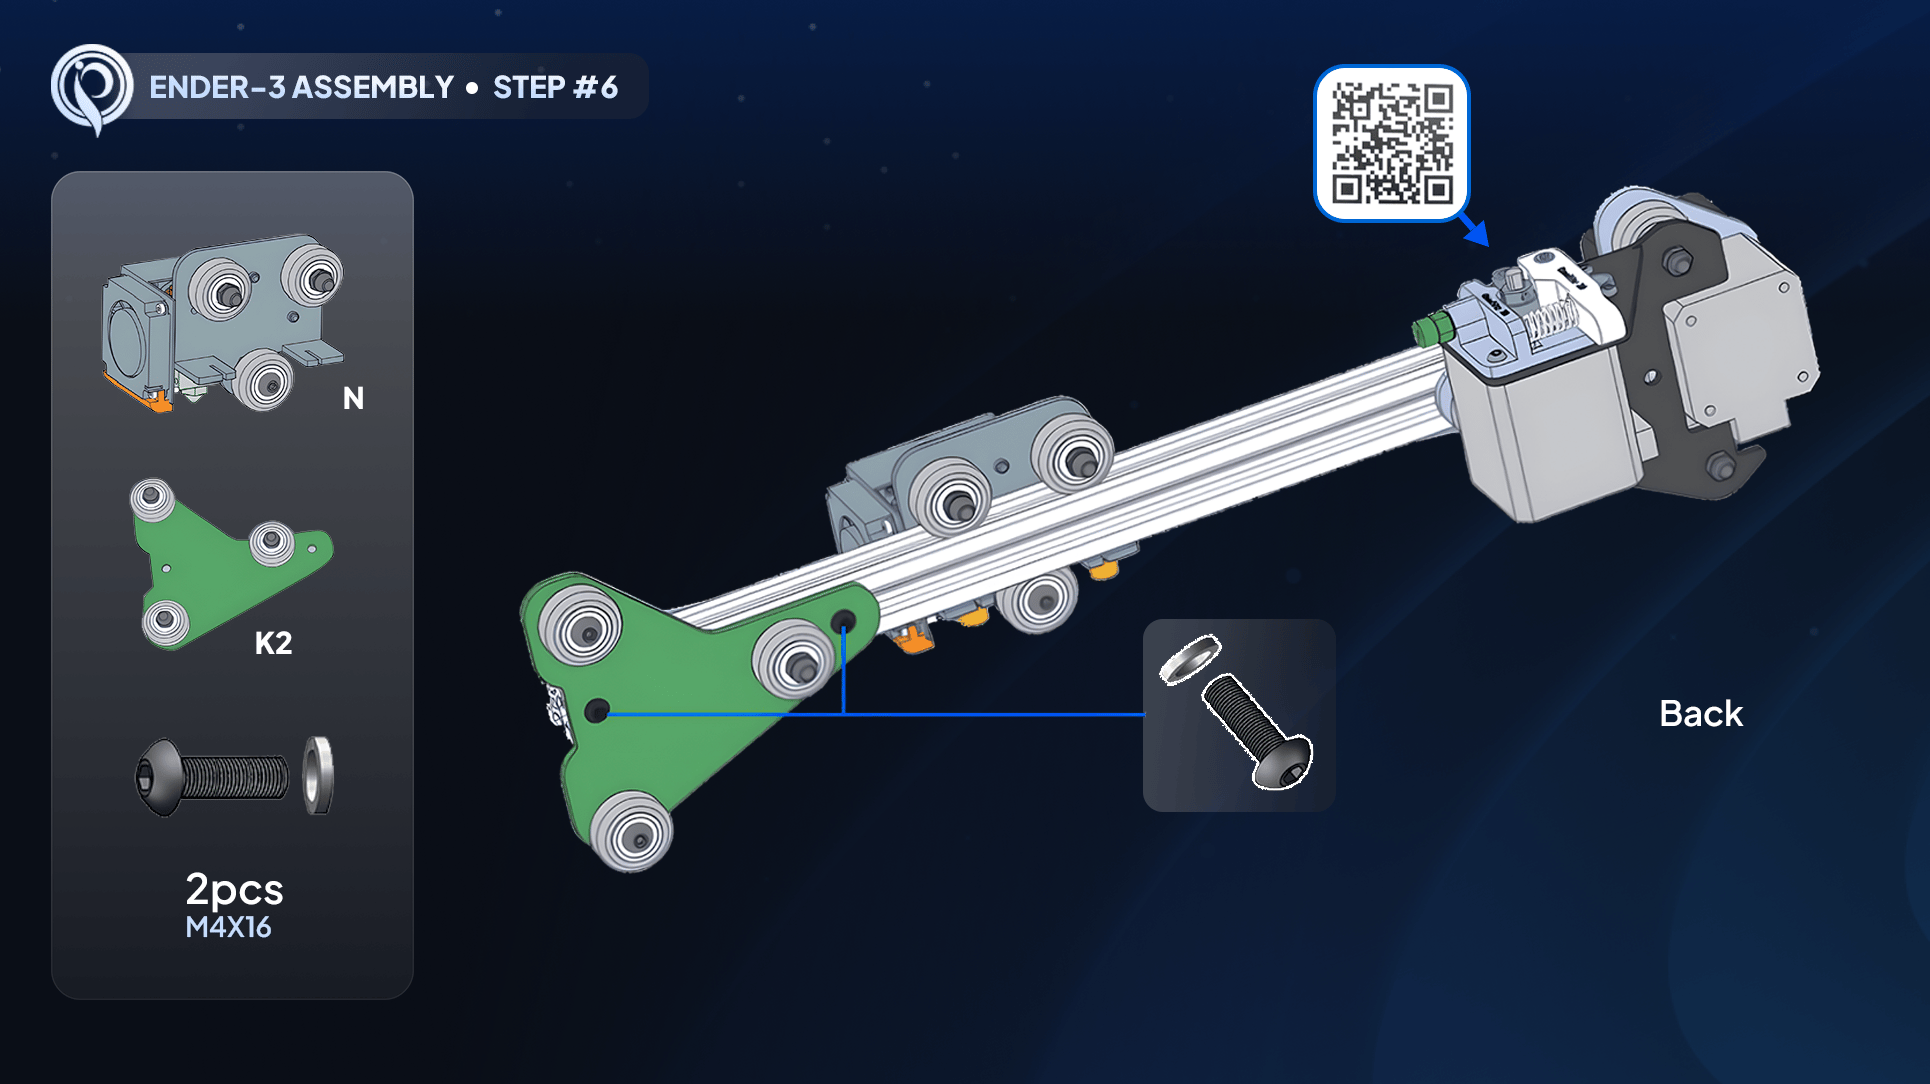
The **roller bracket** is the pyramid-shaped piece with three wheels. It attaches to the end of the extruder bar, where it will guide and tension the belt that moves your print head.
For this step you need **two more M4x16 screws** (from the same bag as before) and the **number 3 Allen wrench**.
 ## Step-by-step
The bracket has **three wheels on one side and four nuts on the other**. The bar end has a metal cutout that houses a nut. The **single wheel** seats into that cutout; the two bracket holes line up with the two remaining bar holes.
Slide the bracket onto the bar end so the single wheel drops into the cutout and the piece sits flush. The wheels must be on the **same side** as the extruder carriage's rollers.
Feed the two **M4x16** screws through the bar and hand-thread them with the number 3 Allen wrench (one between the two wheels, one by the single wheel). Line them up carefully, then tighten both fully.
The roller bracket is bolted firmly to the end of the bar, its wheels are on the same side as the carriage rollers, and the cable still trails to the back.
## Up next
The extruder bar is fully assembled. Now you mount it onto the top of the **printer gantry**.
## Step-by-step
The bracket has **three wheels on one side and four nuts on the other**. The bar end has a metal cutout that houses a nut. The **single wheel** seats into that cutout; the two bracket holes line up with the two remaining bar holes.
Slide the bracket onto the bar end so the single wheel drops into the cutout and the piece sits flush. The wheels must be on the **same side** as the extruder carriage's rollers.
Feed the two **M4x16** screws through the bar and hand-thread them with the number 3 Allen wrench (one between the two wheels, one by the single wheel). Line them up carefully, then tighten both fully.
The roller bracket is bolted firmly to the end of the bar, its wheels are on the same side as the carriage rollers, and the cable still trails to the back.
## Up next
The extruder bar is fully assembled. Now you mount it onto the top of the **printer gantry**.