> ## Documentation Index
> Fetch the complete documentation index at: https://stem-docs.intellectualpoint.com/llms.txt
> Use this file to discover all available pages before exploring further.
# How 3D printing works
> Follow the full journey of a 3D print, from a spool of plastic to a finished object, one layer at a time.
## The journey of a 3D print
3D printing turns a digital idea into a real, physical object you can hold. It does this by building the object **one thin layer at a time** out of melted plastic. Before you build your printer, let's follow that journey from start to finish so every step of assembly and printing makes sense.
 ## What is FDM?
Your Ender 3 uses **Fused Deposition Modeling (FDM)**, also called Fused Filament Fabrication (FFF). The idea is simple:
> Melt a thin strand of plastic and lay it down in precise paths, one thin layer on top of another, until the layers add up to a 3D object.
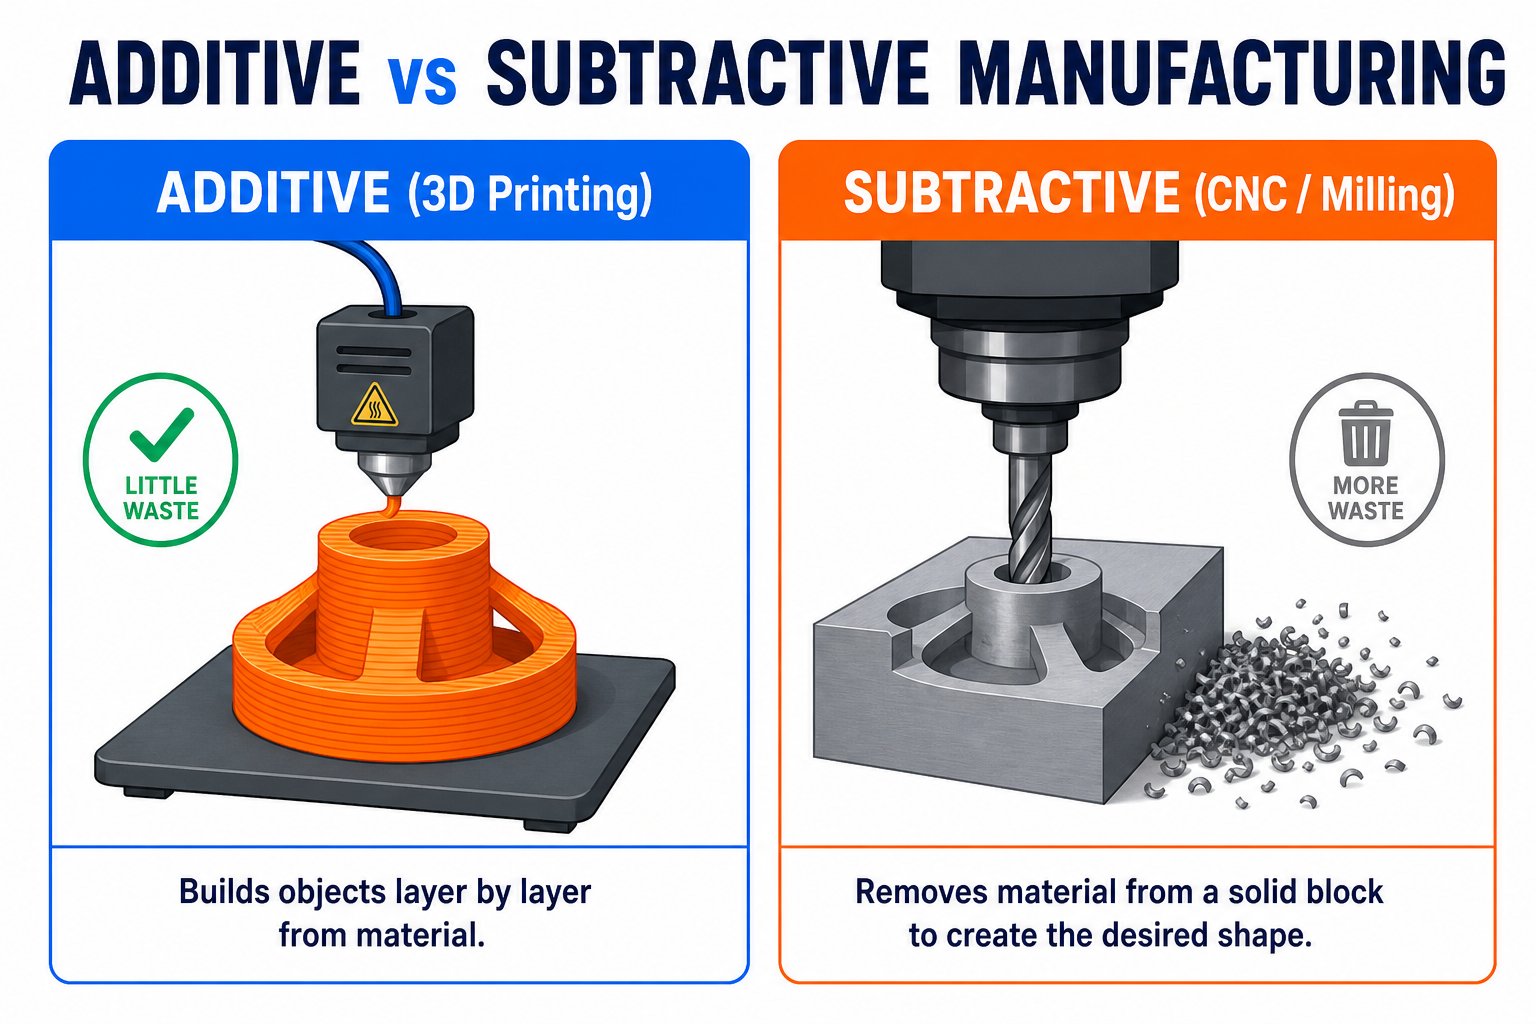
Each layer is only a fraction of a millimeter thick. Stack hundreds of them and you get a solid part. This is **additive** manufacturing - you build material up - as opposed to **subtractive** methods like carving or milling that cut material away.
## What is FDM?
Your Ender 3 uses **Fused Deposition Modeling (FDM)**, also called Fused Filament Fabrication (FFF). The idea is simple:
> Melt a thin strand of plastic and lay it down in precise paths, one thin layer on top of another, until the layers add up to a 3D object.
Each layer is only a fraction of a millimeter thick. Stack hundreds of them and you get a solid part. This is **additive** manufacturing - you build material up - as opposed to **subtractive** methods like carving or milling that cut material away.
 ## Step by step
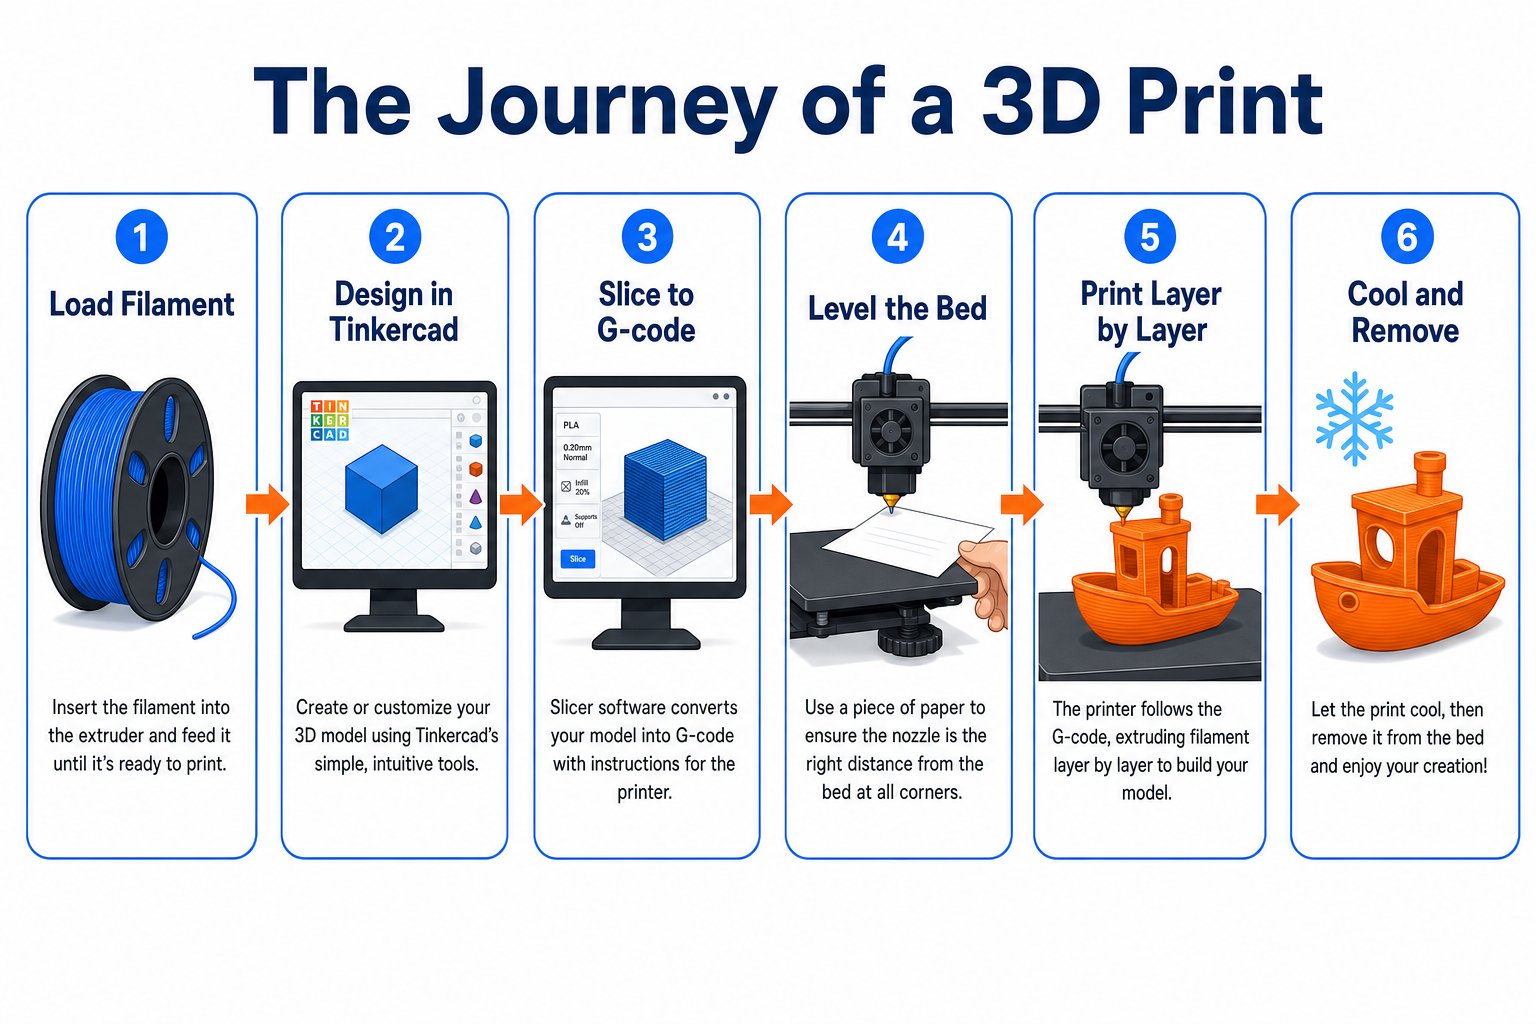
Every print starts as a **3D model** - a digital shape. You will design your own models this week in **Tinkercad**, a free online CAD (computer-aided design) tool. You can also download ready-made models from sites like Thingiverse.
A printer cannot read a 3D model directly. **Slicing software** like **UltiMaker Cura** cuts the model into hundreds of horizontal layers and writes a set of instructions called **G-code**. G-code tells the printer exactly where to move, how fast, how hot, and how much plastic to push out.
**Filament** is a long strand of plastic wound on a spool - your kit comes with **PLA**, the easiest material to print. The filament feeds into the **extruder**, which grabs it and pushes it down toward the hotend.
The **hotend** heats to around 200 C for PLA, melting the plastic just enough to flow through the nozzle. The **heated bed** warms up too, so the first layer sticks and does not warp.
The nozzle must sit the perfect distance from the bed - about the thickness of a sheet of paper. Too far and plastic will not stick; too close and it scrapes or clogs. On the Ender 3 you level the bed by hand using the **paper test** and four corner knobs.
The printer moves along the **X, Y, and Z axes**, laying down the first layer of melted plastic. This first layer is the most important part of the whole print - if it sticks well, the rest usually succeeds.
After each layer, the Z axis raises the nozzle a fraction of a millimeter and the next layer is drawn on top. A **cooling fan** solidifies each layer as it is laid down. This repeats hundreds of times.
When the last layer finishes, the printer stops and cools down. Once cool, you flex or pop the print off the bed. Your object is done!
## The three axes of motion
An FDM printer positions the nozzle in 3D space using three axes:
Left and right movement of the print head along the gantry.
Forward and back. On the Ender 3, the **build plate itself moves** to create the Y motion - this is why it is called a "bed-slinger."
Up and down. After each layer, the Z-axis lead screw raises the print head so the next layer can be laid on top.
## Why the first layer matters most
If you remember one thing from today, remember this: **the first layer makes or breaks a print.**
* If the first layer sticks evenly to the bed, the print has a stable foundation.
* If it does not stick, the print can peel up, shift, or turn into a tangled mess of plastic (a "spaghetti" failure).
That is why bed leveling, bed temperature, and a clean surface matter so much - and why we spend real time on leveling in this camp.
Keep this journey in mind all week. When a print fails later, you will be able to ask "which step went wrong?" - design, slicing, loading, heating, leveling, or adhesion - and fix it fast.
## Step by step
Every print starts as a **3D model** - a digital shape. You will design your own models this week in **Tinkercad**, a free online CAD (computer-aided design) tool. You can also download ready-made models from sites like Thingiverse.
A printer cannot read a 3D model directly. **Slicing software** like **UltiMaker Cura** cuts the model into hundreds of horizontal layers and writes a set of instructions called **G-code**. G-code tells the printer exactly where to move, how fast, how hot, and how much plastic to push out.
**Filament** is a long strand of plastic wound on a spool - your kit comes with **PLA**, the easiest material to print. The filament feeds into the **extruder**, which grabs it and pushes it down toward the hotend.
The **hotend** heats to around 200 C for PLA, melting the plastic just enough to flow through the nozzle. The **heated bed** warms up too, so the first layer sticks and does not warp.
The nozzle must sit the perfect distance from the bed - about the thickness of a sheet of paper. Too far and plastic will not stick; too close and it scrapes or clogs. On the Ender 3 you level the bed by hand using the **paper test** and four corner knobs.
The printer moves along the **X, Y, and Z axes**, laying down the first layer of melted plastic. This first layer is the most important part of the whole print - if it sticks well, the rest usually succeeds.
After each layer, the Z axis raises the nozzle a fraction of a millimeter and the next layer is drawn on top. A **cooling fan** solidifies each layer as it is laid down. This repeats hundreds of times.
When the last layer finishes, the printer stops and cools down. Once cool, you flex or pop the print off the bed. Your object is done!
## The three axes of motion
An FDM printer positions the nozzle in 3D space using three axes:
Left and right movement of the print head along the gantry.
Forward and back. On the Ender 3, the **build plate itself moves** to create the Y motion - this is why it is called a "bed-slinger."
Up and down. After each layer, the Z-axis lead screw raises the print head so the next layer can be laid on top.
## Why the first layer matters most
If you remember one thing from today, remember this: **the first layer makes or breaks a print.**
* If the first layer sticks evenly to the bed, the print has a stable foundation.
* If it does not stick, the print can peel up, shift, or turn into a tangled mess of plastic (a "spaghetti" failure).
That is why bed leveling, bed temperature, and a clean surface matter so much - and why we spend real time on leveling in this camp.
Keep this journey in mind all week. When a print fails later, you will be able to ask "which step went wrong?" - design, slicing, loading, heating, leveling, or adhesion - and fix it fast.